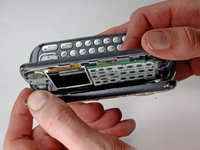
メインコンテンツにスキップ

LG VX9800 LCD Screens Replacement

必要な工具と部品

  1. LG VX9800 LCD Screens Replacement, Front Keypad: 手順 1、 1の画像 1
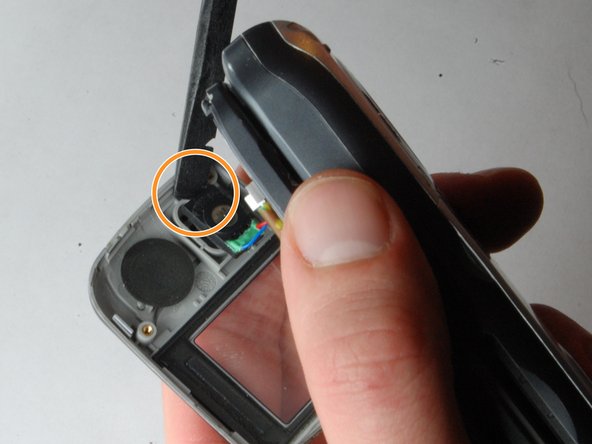
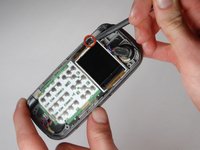
    • Remove the two triangular pads at the top of the two speakers.

    • These pads have adhesive to keep them situated, so you may want to use a fine-tipped object, such as a screwdriver or a pen, to remove them. It is easiest to place the fine-tipped object in the small indent in the corner of these pads.

  2. LG VX9800 LCD Screens Replacement: 手順 2、 1の画像 1
    • Remove the two rubber cylinders from their shafts. These cover more screws.

    • This requires a little more effort, so you may need to "dig" them out.

  3. LG VX9800 LCD Screens Replacement: 手順 3、 1の画像 1
    • Now remove the four screws.

    • The screws are small, so put them somewhere that you can easily keep track of them.

  4. LG VX9800 LCD Screens Replacement: 手順 4、 1の画像 1
    • Starting on the side with blue square, pry the faceplate upwards with the flat end of a spudger.

    • Continue to slide the flat edge along the seam of the faceplate.

    • You should hear popping or snapping noises as the faceplate is being removed.

  5. LG VX9800 LCD Screens Replacement: 手順 5、 2の画像 1 LG VX9800 LCD Screens Replacement: 手順 5、 2の画像 2
    • The faceplate is attached by wires, so do not pull the faceplate very far away from the phone.

  6. LG VX9800 LCD Screens Replacement: 手順 6、 3の画像 1 LG VX9800 LCD Screens Replacement: 手順 6、 3の画像 2 LG VX9800 LCD Screens Replacement: 手順 6、 3の画像 3
    • The faceplate is still attached through speakers that travel from the ear-piece to the motherboard.

    • Carefully wedge the flat or pointed end of the spudger beneath the ear-piece and the faceplate.

    • This may require a bit of force, as the ear-piece is stuck to the faceplate with adhesive.

  7. LG VX9800 LCD Screens Replacement: 手順 7、 1の画像 1
    • The faceplate and keypad can now be completely removed from the phone.

  8. LG VX9800 LCD Screens Replacement, LCD Screens: 手順 8、 3の画像 1 LG VX9800 LCD Screens Replacement, LCD Screens: 手順 8、 3の画像 2 LG VX9800 LCD Screens Replacement, LCD Screens: 手順 8、 3の画像 3
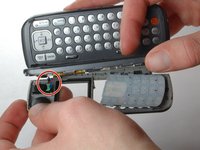
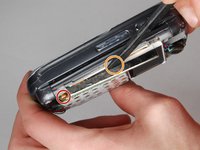
    • Wedge the spudger into the small gap between the phone and the metal casing of the motherboard.

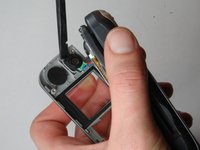
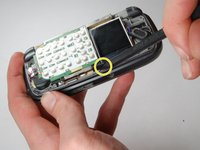
    • Slide the spudger underneath the metal and along the edge. The motherboard should begin to rise.

    • There is a ribbon at the end of this groove, do not slide the spudger into the ribbon.

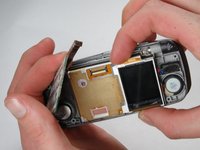
    • Now use the spudger to lift the other side of the motherboard.

  9. LG VX9800 LCD Screens Replacement: 手順 9、 1の画像 1
    • Lift the motherboard at an angle.

    • Do not completely remove the motherboard. Doing so will tear the ribbon!

  10. LG VX9800 LCD Screens Replacement: 手順 10、 2の画像 1 LG VX9800 LCD Screens Replacement: 手順 10、 2の画像 2
    • Gently pull the LCD screen upwards.

    • It can be tricky do this, you may want to use a spudger to pry it up if it doesn't pull up easily.

    • This step requires soldering. Only do this step if you are OK with soldering small wires.

ゴール

ある他の人がこのガイドを完成しました。

作成者

5人の作成者と共同で作成されました。

Aaron Rowley

メンバー登録日: 01/21/10

33 ポイント

2のガイドは作成済み

チーム

Cal Poly, Team 16-32, Maness Winter 2010 Cal Poly, Team 16-32, Maness Winter 2010人のメンバー

CPSU-MANESS-W10S16G32

4 メンバー

4のガイドは作成済み

0 件のコメント

コメントを追加

統計データ:

過去 24時間: 0

過去 7 日: 1

過去 30 日: 2

今までの合計 2,246