メインコンテンツにスキップ

このバージョンは誤った内容を含んでいる可能性があります。最新の承認済みスナップショットに切り替えてください。

必要な工具と部品

  1. この手順は未翻訳です。 翻訳を手伝う。

    : 手順 1、 3の画像 1 : 手順 1、 3の画像 2 : 手順 1、 3の画像 3
    • Drain the battery's charge below 25%.

    • Power off the phone by pressing and holding the Power/Lock key on the backside of the phone for three seconds. Tap the Power Off option and Power Off to confirm.

  2. この手順は未翻訳です。 翻訳を手伝う。

    : 手順 2、 3の画像 1 : 手順 2、 3の画像 2 : 手順 2、 3の画像 3
    • Insert and gently push the SIM card ejector tool (or an unfolded paperclip) into the small hole on the left side of the phone.

    • Press gently to eject the SIM tray.

    • Remove the SIM card tray from the device.

    • To reinsert the SIM card tray, orient the SIM card with the gold contacts facing up and the notch to the bottom right. Reinsert the SIM card by pressing the card gently into the SIM tray slot.

  3. この手順は未翻訳です。 翻訳を手伝う。

    : 手順 3、 1の画像 1
    • Use a heat gun to lightly heat the edges of the back to soften the adhesive that connects the back cover to the rest of the frame.

    • An iFixit iOpener, hair dryer, or hot plate can also be used to heat the edges. See the iOpener instructions guide to learn how to use an iOpener.

    • Using a heat gun, hair dryer, or hot plate will make the metal frame rather hot to the touch, so handle it with care.

    • Be careful not to overheat the device –the OLED display, battery and other internal parts can be damaged by excessive heat. Approximately one minute should be enough to soften the adhesive.

  4. この手順は未翻訳です。 翻訳を手伝う。

    : 手順 4、 3の画像 1 : 手順 4、 3の画像 2 : 手順 4、 3の画像 3
    この手順で使用する道具:
    Plastic Cards
    $2.99
    購入する
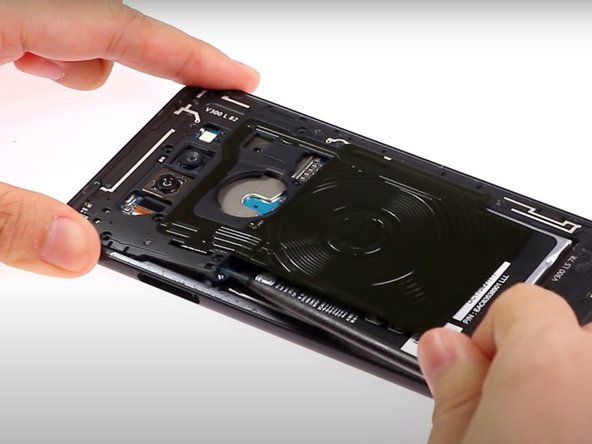
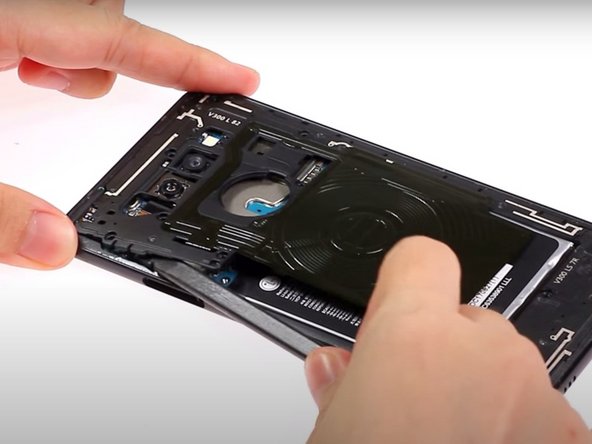
    • Use a suction cup to lift up the back cover up.

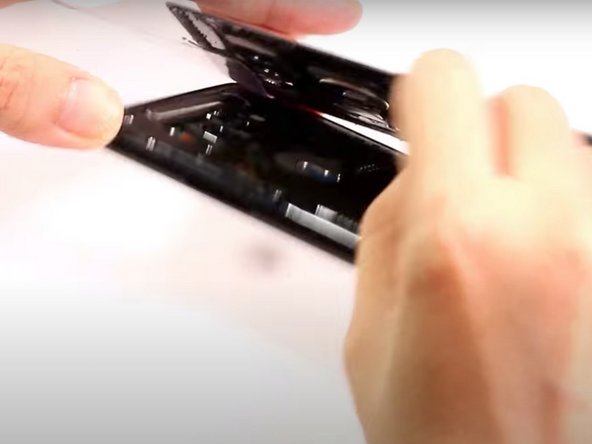
    • Insert the edge of a plastic card into the space created between the cover and frame.

  5. この手順は未翻訳です。 翻訳を手伝う。

    : 手順 5、 3の画像 1 : 手順 5、 3の画像 2 : 手順 5、 3の画像 3
    • Insert a second card where you have created an opening with the first card and slide it along the bottom edge of the phone.

  6. この手順は未翻訳です。 翻訳を手伝う。

    : 手順 6、 3の画像 1 : 手順 6、 3の画像 2 : 手順 6、 3の画像 3
    • Continue to slide the cards around the remaining three edges to release the adhesive.

  7. この手順は未翻訳です。 翻訳を手伝う。

    : 手順 7、 3の画像 1 : 手順 7、 3の画像 2 : 手順 7、 3の画像 3
    • Carefully remove the back cover, making sure that the adhesive is sliced through on all sides.

    • Because this phone's backing is attached using adhesive, you will need to replace the adhesive when re-assembling the phone.

  8. この手順は未翻訳です。 翻訳を手伝う。

    : 手順 8、 1の画像 1
    • Remove the ten Phillips #000 screws from the midframe.

  9. この手順は未翻訳です。 翻訳を手伝う。

    : 手順 9、 3の画像 1 : 手順 9、 3の画像 2 : 手順 9、 3の画像 3
    • Using a plastic spudger, pry up the midframe of the phone.

  10. この手順は未翻訳です。 翻訳を手伝う。

    : 手順 10、 2の画像 1 : 手順 10、 2の画像 2
    • Carefully pull the midframe from the rest of the phone's body.

    • The midframe is connected to the main body with a small slot on the right side of the midframe. Carefully free the frame from this slot by gently wiggling and pulling outwards at the same time.

  11. この手順は未翻訳です。 翻訳を手伝う。

    : 手順 11、 3の画像 1 : 手順 11、 3の画像 2 : 手順 11、 3の画像 3
    • Use the plastic spudger to pry up the four press-fit connectors on the top portion of the motherboard.

  12. この手順は未翻訳です。 翻訳を手伝う。

    : 手順 12、 3の画像 1 : 手順 12、 3の画像 2 : 手順 12、 3の画像 3
    • Pry up the speaker panel with a plastic spudger and remove it from the phone.

  13. この手順は未翻訳です。 翻訳を手伝う。

    : 手順 13、 1の画像 1
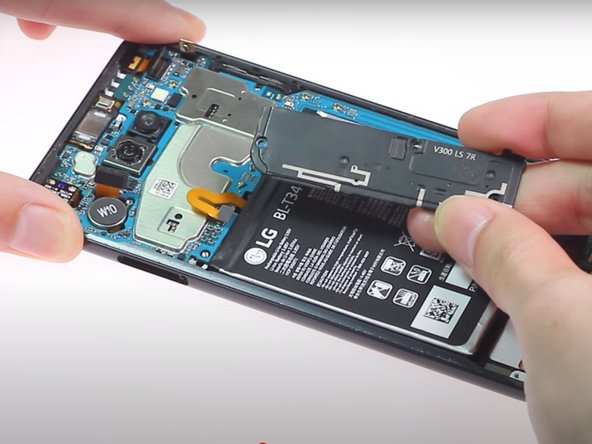
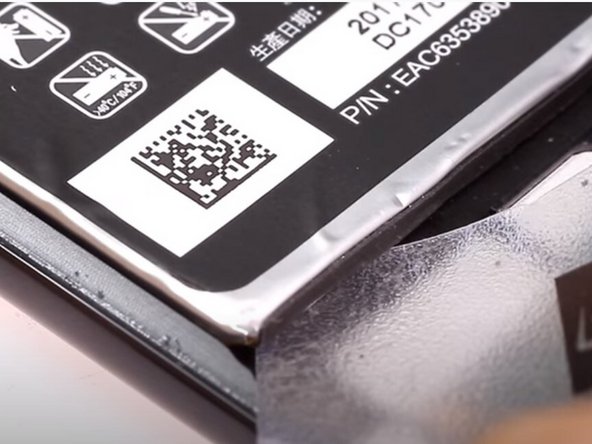
    • Use a heat gun to apply heat to the front face of the phone. This will soften the adhesive used to secure the phone's battery.

    • When using a heat gun or hair dryer to soften the adhesive, be careful not to overheat the battery. The hair dryer/heat gun will make the phone hot to the touch, so handle the phone with care.

    • Alternatively, you can place a heated iOpener across the top of the battery for approximately three minutes to soften the adhesive holding the battery to the device.

    • If you have multiple iOpeners, it is recommended to also put one on the screen side of the battery.

  14. この手順は未翻訳です。 翻訳を手伝う。

    : 手順 14、 3の画像 1 : 手順 14、 3の画像 2 : 手順 14、 3の画像 3
    • Insert a plastic card at the bottom edge of the battery

    • Gently work the plastic card around the left side of the battery, separating the battery from its adhesive.

  15. この手順は未翻訳です。 翻訳を手伝う。

    : 手順 15、 3の画像 1 : 手順 15、 3の画像 2 : 手順 15、 3の画像 3
    • Use the plastic card to pry the battery upwards from its slot.

    • Use your fingers to lift the battery away from the phone.

    • Because this battery is attached using adhesive, you will need to replace the adhesive when installing a new battery.

ゴール

12 の人々がこのガイドを完成させました。

作成者

5人の作成者と共同で作成されました。

Witrigs

メンバー登録日: 11/24/15

69,496 ポイント

378のガイドは作成済み

12 件のコメント

Do you have to put the adhesive for the battery?

RT RT - 返信

Suction cups on both sides, heatgun on the back pannel, then lift. Much easier. And you don't have to worry about breaking the back panel.

DJ Somebody - 返信

Why can’t the idiots at LG, or indeed any other company, make a phone with an MQA capable DAC, and a replaceable battery?

tonywinter - 返信

it is not about idiocy. When you do not conform to a set battery shape you can configure the insides of a phone for more performance and features. That being said the LG V30 does have a standard battery shape. So in this case it is a desire to create built in obsolescence. After all it is believed in the western world cell phone sales are flat.

Malinourn Malinourn -

And..as long as the battery is in the phone it can be used to track you…

Loud Harley - 返信

コメントを追加

統計データ:

過去 24時間: 8

過去 7 日: 29

過去 30 日: 171

今までの合計 27,652