メインコンテンツにスキップ

HP Pavilion 15-cc561st RAM Replacement

必要な工具と部品

  1. HP Pavilion 15-cc561st RAM Replacement, Bottom Cover: 手順 1、 3の画像 1 HP Pavilion 15-cc561st RAM Replacement, Bottom Cover: 手順 1、 3の画像 2 HP Pavilion 15-cc561st RAM Replacement, Bottom Cover: 手順 1、 3の画像 3
    この手順で使用する道具:
    Magnetic Project Mat
    $19.95
    購入する
    • Before you begin to remove the bottom cover, shut down the computer. Disconnect all external devices and unplug the AC adapter. Flip the laptop upside down.

    • Use a Phillips #0 screwdriver to remove five screws from the bottom cover:

    • Two 5.6 mm screws

    • Each of these screws are beneath the two rubber feet on the rear side of the laptop (near the display hinges). You do not have to completely remove the rubber feet to remove the screws; simply peel the top of the feet to reveal the screws.

    • Three 5.8 mm screws

    • Throughout this repair, keep track of each screw size and location to avoid damaging your device.

  2. HP Pavilion 15-cc561st RAM Replacement: 手順 2、 2の画像 1 HP Pavilion 15-cc561st RAM Replacement: 手順 2、 2の画像 2
    • Insert an opening tool into the space between the display hinges and the bottom cover.

    • Firmly push the opening tool upwards to separate the bottom cover from these areas.

  3. HP Pavilion 15-cc561st RAM Replacement: 手順 3、 3の画像 1 HP Pavilion 15-cc561st RAM Replacement: 手順 3、 3の画像 2 HP Pavilion 15-cc561st RAM Replacement: 手順 3、 3の画像 3
    • Insert your opening tool and firmly push the tool upwards along the rear edge.

  4. HP Pavilion 15-cc561st RAM Replacement: 手順 4、 3の画像 1 HP Pavilion 15-cc561st RAM Replacement: 手順 4、 3の画像 2 HP Pavilion 15-cc561st RAM Replacement: 手順 4、 3の画像 3
    • Use the opening tool again on the left and right sides.

    • Start prying at the areas closer to the rear of the laptop (near the display hinges) before moving towards areas that are closer to the front of the laptop (away from the display hinges).

    • Pry a little bit on the left side, then pry a little bit on the right side before prying more on the left side again. Working on both sides in this incremental fashion is easier than completely prying one side before starting the other side.

  5. HP Pavilion 15-cc561st RAM Replacement: 手順 5、 1の画像 1
    • Lift the bottom cover upwards to remove it.

  6. HP Pavilion 15-cc561st RAM Replacement, Battery: 手順 6、 1の画像 1
    • Use a Phillips #0 screwdriver to remove the five 5.7 mm screws that secure the battery.

  7. HP Pavilion 15-cc561st RAM Replacement: 手順 7、 3の画像 1 HP Pavilion 15-cc561st RAM Replacement: 手順 7、 3の画像 2 HP Pavilion 15-cc561st RAM Replacement: 手順 7、 3の画像 3
    • Pull the battery towards the front edge of the laptop to disconnect it from the 8-pin battery connector.

    • Lift the disconnected battery upwards to remove it.

    • Calibrate a newly-installed battery to help your laptop get an accurate battery percentage reading.

  8. HP Pavilion 15-cc561st RAM Replacement, RAM: 手順 8、 3の画像 1 HP Pavilion 15-cc561st RAM Replacement, RAM: 手順 8、 3の画像 2 HP Pavilion 15-cc561st RAM Replacement, RAM: 手順 8、 3の画像 3
    • Simultaneously spread the retaining tabs on each side of the memory module slot.

    • Releasing the tabs will cause the memory module to "pop" up (the edge of the module opposite the slot rises up).

    • Pull the memory module away from the slot at the angle it rises from.

    • Line up the notch on a new memory module with the slot. This notch is designed to prevent incorrect insertion.

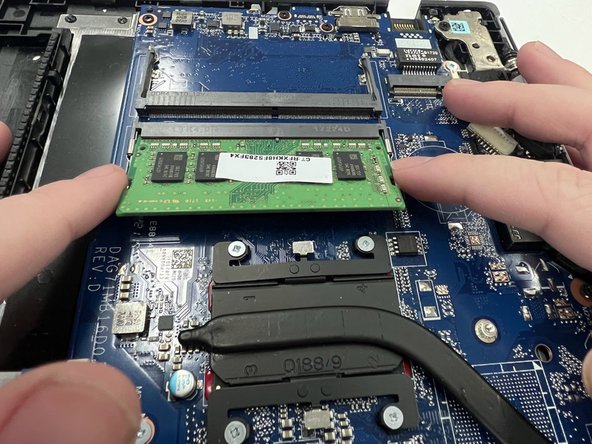
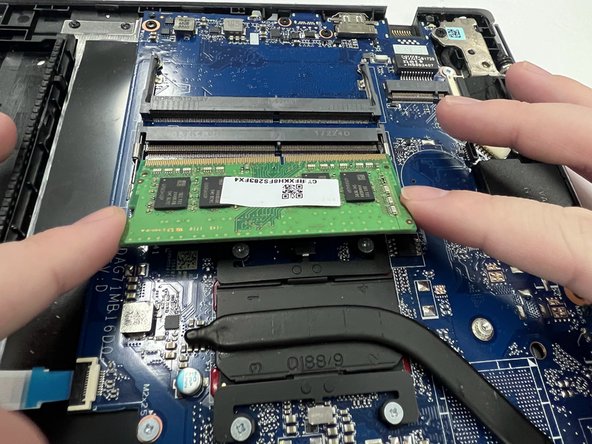
    • If only one memory module is installed, it must be installed in the socket that is closer to the center of the computer.

終わりに

To reassemble your device, follow these instructions in reverse order.

作成者

1人の作成者と共同作成されました。

Nathan Luu

メンバー登録日: 09/26/22

569 ポイント

5のガイドは作成済み

チーム

CSU Los Angeles, Team 6-4, Adachi Fall 2022 CSU Los Angeles, Team 6-4, Adachi Fall 2022人のメンバー

CSULA-ADACHI-F22S6G4

4 メンバー

7のガイドは作成済み

0 件のコメント

コメントを追加

統計データ:

過去 24時間: 1

過去 7 日: 11

過去 30 日: 16

今までの合計 315