メインコンテンツにスキップ

HP EliteBook x360 830 G7 Motherboard Replacement

必要な工具と部品

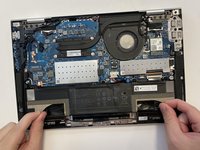
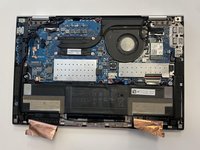
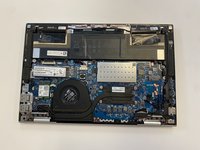
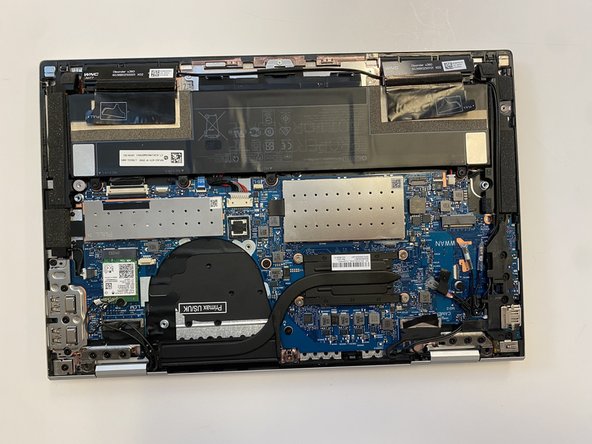
  1. HP EliteBook x360 830 G7 Motherboard Replacement, Remove the backplate: 手順 1、 3の画像 1 HP EliteBook x360 830 G7 Motherboard Replacement, Remove the backplate: 手順 1、 3の画像 2 HP EliteBook x360 830 G7 Motherboard Replacement, Remove the backplate: 手順 1、 3の画像 3
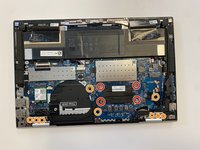
    • Turn the computer over so that the back is facing up.

    • Use a Torx T5 screwdriver to remove the three 9 mm screws from the hinge of the device.

    • Use a Torx T5 screwdriver to remove the two 7 mm screws from the left and right mid-section of the case.

    • Lift the backplate from the computer.

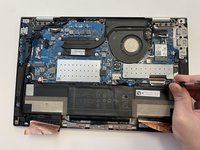
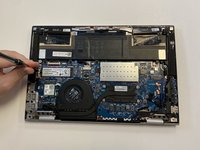
  2. HP EliteBook x360 830 G7 Motherboard Replacement, Disconnect the bundled cable connector: 手順 2、 1の画像 1
    • Use a nylon spudger to gently disconnect the battery's bundled cable connector from the motherboard.

    • This bundled cable connector has a tab on each side. Insert the spudger between these tabs and the motherboard's battery connector port and gently push the battery connector out and away from the connector.

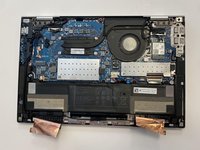
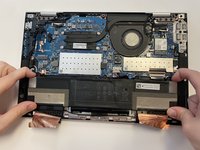
  3. HP EliteBook x360 830 G7 Motherboard Replacement, Peel the copper foil tape: 手順 3、 2の画像 1 HP EliteBook x360 830 G7 Motherboard Replacement, Peel the copper foil tape: 手順 3、 2の画像 2
    • Peel back both sides of the copper foil tape connected to the battery.

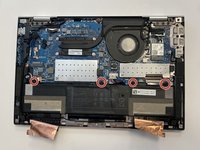
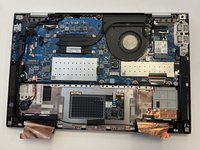
  4. HP EliteBook x360 830 G7 Motherboard Replacement, Remove the screws: 手順 4、 2の画像 1 HP EliteBook x360 830 G7 Motherboard Replacement, Remove the screws: 手順 4、 2の画像 2
    • Use a JIS #1 screwdriver to remove the four 4 mm screws that secure the battery.

  5. HP EliteBook x360 830 G7 Motherboard Replacement, Remove the battery: 手順 5、 3の画像 1 HP EliteBook x360 830 G7 Motherboard Replacement, Remove the battery: 手順 5、 3の画像 2 HP EliteBook x360 830 G7 Motherboard Replacement, Remove the battery: 手順 5、 3の画像 3
    • Remove the battery from the laptop.

  6. HP EliteBook x360 830 G7 Motherboard Replacement, Remove the backplate: 手順 6、 2の画像 1 HP EliteBook x360 830 G7 Motherboard Replacement, Remove the backplate: 手順 6、 2の画像 2
    • Turn the computer over so the back is facing up.

    • Use a Torx T5 screwdriver to remove the three 9 mm screws from the hinge of the device.

    • Use a Torx T5 screwdriver to remove the two 7 mm screws from the left and right mid-section of the case.

    • Lift the backplate from the computer.

  7. HP EliteBook x360 830 G7 Motherboard Replacement, Remove the shield: 手順 7、 3の画像 1 HP EliteBook x360 830 G7 Motherboard Replacement, Remove the shield: 手順 7、 3の画像 2 HP EliteBook x360 830 G7 Motherboard Replacement, Remove the shield: 手順 7、 3の画像 3
    • Gently lift the larger, rectangular metal shielding off. This shielding covers the RAM.

  8. HP EliteBook x360 830 G7 Motherboard Replacement, Remove the RAM: 手順 8、 1の画像 1
    • Push down on the two latches on both sides of the RAM to release it.

    • This will allow you to remove the RAM and replace it with no issues.

  9. HP EliteBook x360 830 G7 Motherboard Replacement, Remove the backplate: 手順 9、 2の画像 1 HP EliteBook x360 830 G7 Motherboard Replacement, Remove the backplate: 手順 9、 2の画像 2
    • Turn the computer over so the back is facing up.

    • Use a Torx T5 screwdriver to remove the three 9 mm screws from the hinge of the device.

    • Use a Torx T5 screwdriver to remove the two 7 mm screws from the left and right mid-section of the case.

    • Lift the backplate from the computer.

  10. HP EliteBook x360 830 G7 Motherboard Replacement, Remove the metal shield covering the SSD: 手順 10、 1の画像 1
    • Lift the metal shielding off of the solid state drive.

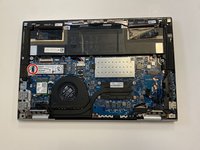
  11. HP EliteBook x360 830 G7 Motherboard Replacement, Remove the screw: 手順 11、 3の画像 1 HP EliteBook x360 830 G7 Motherboard Replacement, Remove the screw: 手順 11、 3の画像 2 HP EliteBook x360 830 G7 Motherboard Replacement, Remove the screw: 手順 11、 3の画像 3
    • Use a Phillips #0 screwdriver to remove the 4 mm screw that secures the SSD.

  12. HP EliteBook x360 830 G7 Motherboard Replacement, Remove the SSD: 手順 12、 1の画像 1
    • Gently pull the SSD free from the M.2 socket.

  13. HP EliteBook x360 830 G7 Motherboard Replacement, Display panel cable: 手順 13、 1の画像 1
    • Disconnect the display panel cable from it's connector on the motherboard.

  14. HP EliteBook x360 830 G7 Motherboard Replacement, Necessities that help keep the fan in place: 手順 14、 1の画像 1
    • Remove the display panel and the wireless antenna cables from the routing channels. Then, remove the retention tape from the system fan.

  15. HP EliteBook x360 830 G7 Motherboard Replacement, Loosen the screws: 手順 15、 1の画像 1
    • Loosen the JIS #1 screws that secure the system fan to the motherboard.

    • These screws are captive.

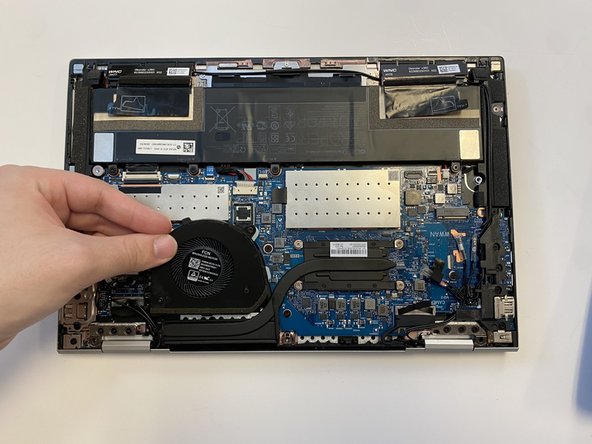
  16. HP EliteBook x360 830 G7 Motherboard Replacement, Remove the fan: 手順 16、 2の画像 1 HP EliteBook x360 830 G7 Motherboard Replacement, Remove the fan: 手順 16、 2の画像 2
    • Once all of the connectors and screws that secure the fan in place have been removed sucessfully, you can safely remove the system fan from the motherboard.

  17. HP EliteBook x360 830 G7 Motherboard Replacement, Motherboard: 手順 17、 3の画像 1 HP EliteBook x360 830 G7 Motherboard Replacement, Motherboard: 手順 17、 3の画像 2 HP EliteBook x360 830 G7 Motherboard Replacement, Motherboard: 手順 17、 3の画像 3
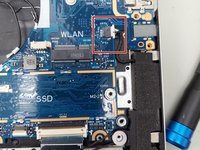
    • Use a JIS #1 screwdriver to remove the single screw securing the Wi-Fi card.

    • Use a spudger or or angled tweezers under the metal neck of the connector two connectors (as close to the head as possible) and lift straight up from the board to disconnect the coaxial cables.

    • When working with these connectors, it's key to always lift the head straight up. If pried on at an odd angle, you risk breaking the socket off of the board underneath.

    • Slide the Wi-Fi card out of the socket.

  18. HP EliteBook x360 830 G7 Motherboard Replacement: 手順 18、 1の画像 1
    • A WWAN module is optional in this device. The laptop used in this guide did not contain a WWAN module. Proper photos cannot be provided for this step; the steps will be near identical to the removal of the Wi-Fi card, please refer to the previous step for visuals.

    • If your device contains a WWAN module it will be placed on the far left side of the motherboard. The location of the WWAN module is pictured to the left.

    • Disconnect four cables.

    • Use a JIS #1 screwdriver to remove the single screw.

    • Remove the WWAN module.

  19. HP EliteBook x360 830 G7 Motherboard Replacement: 手順 19、 3の画像 1 HP EliteBook x360 830 G7 Motherboard Replacement: 手順 19、 3の画像 2 HP EliteBook x360 830 G7 Motherboard Replacement: 手順 19、 3の画像 3
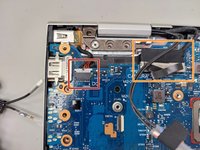
    • Use a JIS #1 screwdrivers to remove five screws securing the plastic bracket.

    • Remove plastic bracket.

  20. HP EliteBook x360 830 G7 Motherboard Replacement: 手順 20、 2の画像 1 HP EliteBook x360 830 G7 Motherboard Replacement: 手順 20、 2の画像 2
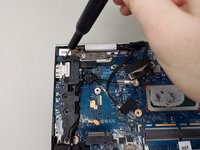
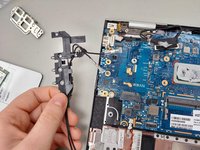
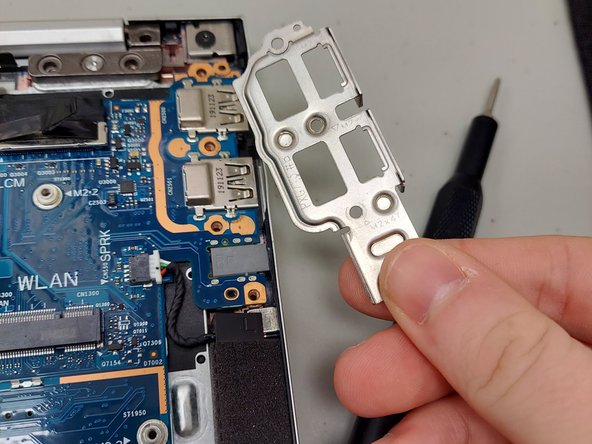
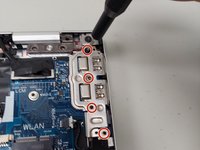
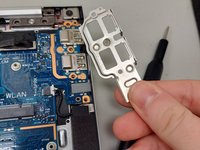
    • Use the JIS #1 screwdriver to remove four screws securing the metal bracket.

    • Remove metal bracket.

  21. HP EliteBook x360 830 G7 Motherboard Replacement: 手順 21、 2の画像 1 HP EliteBook x360 830 G7 Motherboard Replacement: 手順 21、 2の画像 2
    • Use a prying tool to push on alternating sides of the power connector to "walk" it out of its socket and disconnect.

    • Pull straight up on the connector to disconnect camera cable.

  22. HP EliteBook x360 830 G7 Motherboard Replacement: 手順 22、 2の画像 1 HP EliteBook x360 830 G7 Motherboard Replacement: 手順 22、 2の画像 2
    • Use the point of a spudger to push on alternating sides of the speaker connector to "walk" it out of its socket.

    • Don't pull on the cables.

    • Disconnecting these cables is a two-step process.

    • Gently push the tip of a spudger under the metal buckle to unclip it, then swing it over the socket.

    • Hold the buckle and cable together and gently pull the connector straight out of its socket.

    • To reconnect, grip the cable and buckle together and insert the connector fully into its socket.

    • Aligning the connector can be tricky. Reposition it as necessary and don't try to force it into the socket, or you may damage both the connector and its socket.

    • Flip the buckle over the socket and use a spudger to press the buckle down until it clicks into place.

  23. HP EliteBook x360 830 G7 Motherboard Replacement: 手順 23、 2の画像 1 HP EliteBook x360 830 G7 Motherboard Replacement: 手順 23、 2の画像 2
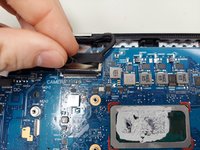
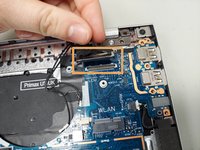
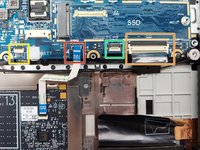
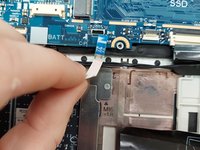
    • Disconnect touchpad cable. Lift up the small black lock and pull out the ribbon cable.

    • Lift up the small black lock and and pull out the ribbon cable to disconnect keyboard cable.

    • Disconnect keyboard ZIF connector backlight cable (if applicable).

    • Disconnect the ZIF card reader cable (if applicable).

  24. HP EliteBook x360 830 G7 Motherboard Replacement: 手順 24、 2の画像 1 HP EliteBook x360 830 G7 Motherboard Replacement: 手順 24、 2の画像 2
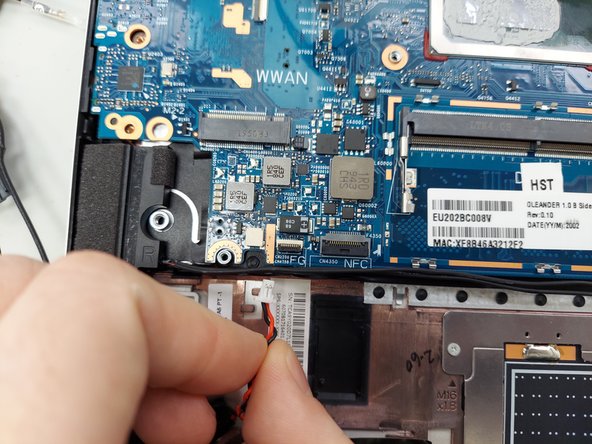
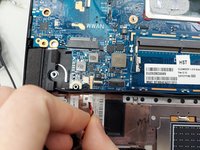
    • Use the point of a spudger to push on alternating sides of the RTC battery connector to "walk" it out of its socket and disconnect the RTC battery cable.

    • It may take a lot of alternating before the connector comes out. Be patient, and don't pull on the cables.

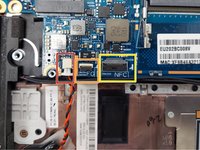
    • Disconnect NFC module ZIF connector to remove the cable (if applicable).

    • Disconnect Fingerprint reader ZIF connector to remove cable (if applicable).

  25. HP EliteBook x360 830 G7 Motherboard Replacement: 手順 25、 2の画像 1 HP EliteBook x360 830 G7 Motherboard Replacement: 手順 25、 2の画像 2
    • Use a Phillips #0 screwdriver to loosen the screws securing the heat sink.

    • These screws are captive and don't need to be removed from the heat sink.

    • Use a JIS #1 screwdriver to remove the remaining screws holding motherboard in place.

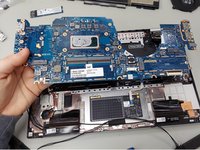
    • Lift the left side of the motherboard upwards and pull it out of the laptop.

  26. HP EliteBook x360 830 G7 Motherboard Replacement: 手順 26、 1の画像 1
    • Before placing the heatsink, it is extremely important that you place thermal paste on the new cpu. Thermal paste allows for heat to be conducted from your cpu to the heatsink and out of the computer, without this your cpu may become damaged or broken.

    • Follow this guide to replace your thermal paste, the heatsink is pictured to the left. You will need to remove the grey paste from the right end of the heatsink.

    • 放熱グリスの塗布方法

終わりに

To reassemble your device, follow these instructions in reverse order. Take your e-waste to an R2 or e-Stewards certified recycler.

作成者

2人の作成者と共同で作成されました。

Erikc24

メンバー登録日: 02/08/24

181 ポイント

1ガイドが承認済み

チーム

University of North Texas, Team 1-2, Coppersmith Spring 2024 University of North Texas, Team 1-2, Coppersmith Spring 2024人のメンバー

UNT-COPPERSMITH-S24S1G2

4 メンバー

3のガイドは作成済み

0 件のコメント

コメントを追加

統計データ:

過去 24時間: 1

過去 7 日: 7

過去 30 日: 17

今までの合計 51