メインコンテンツにスキップ

GravityLight Motor Replacement

必要な工具と部品

  1. GravityLight Motor Replacement, Removing the Front Panel: 手順 1、 2の画像 1 GravityLight Motor Replacement, Removing the Front Panel: 手順 1、 2の画像 2
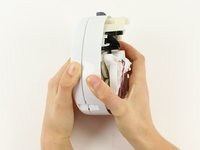
    • Flip the GravityLight on its back and place it on a sturdy surface.

    • Unscrew the three 2cm Phillips #00 screws on the back of the GravityLight’s body.

  2. GravityLight Motor Replacement, Opening the Device Housing: 手順 2、 1の画像 1
    • Some of the internal pieces may loosen or fall out during disassembly.

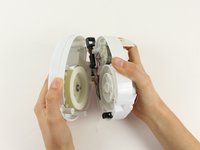
    • Firmly grasp both parts of the GravityLight body and pull them apart.

  3. GravityLight Motor Replacement, Isolating the Back Panel: 手順 3、 1の画像 1
    • Take the thicker of the two parts, the back piece, and place it face down on a sturdy surface.

  4. GravityLight Motor Replacement, Removing the Back Panel Screws: 手順 4、 1の画像 1
    • Place the back panel, the larger of the two pieces, on a sturdy surface with its back down.

    • Unscrew the two 2cm Phillips 00 screws on the inside of the back panel.

  5. GravityLight Motor Replacement, Removing the LED Housing: 手順 5、 1の画像 1
    • Watch out for the wires! Keep them attached for this entire guide, or the GravityLight will not work!

    • Gently lift off the LED housing (the white disk).

    • Set the LED housing on the table next to the body of the device.

  6. GravityLight Motor Replacement, Removing White Frame and Gear: 手順 6、 1の画像 1
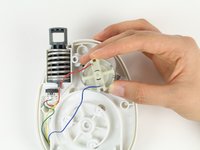
    • Lift off the white piece with four arms.

    • Lift off the black-rimmed gear.

    • Set both pieces aside in a safe place.

  7. GravityLight Motor Replacement, Removing the Motor Screws: 手順 7、 1の画像 1
    • Remove the two 2cm Phillips 00 screws from the motor housing.

    • The spring pushing the motor housing may pop out once the motor has been removed.

  8. GravityLight Motor Replacement, Separating the Back Panel Housing: 手順 8、 3の画像 1 GravityLight Motor Replacement, Separating the Back Panel Housing: 手順 8、 3の画像 2 GravityLight Motor Replacement, Separating the Back Panel Housing: 手順 8、 3の画像 3
    • Some of the internal pieces may loosen or fall out during disassembly.

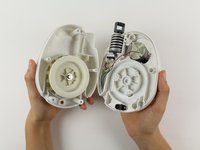
    • Firmly grasp both parts of the back panel and pull them apart.

  9. GravityLight Motor Replacement, Removing the Motor: 手順 9、 3の画像 1 GravityLight Motor Replacement, Removing the Motor: 手順 9、 3の画像 2 GravityLight Motor Replacement, Removing the Motor: 手順 9、 3の画像 3
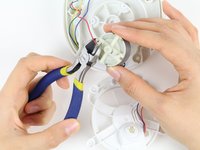
    • Place the middle section flat with the side that holds the gear system down and locate the back of the motor.

    • Clip the wires close to the soldered joints.

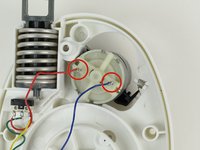
    • Lift the motor out of the middle section. Using the flush wire cutters, clip the red and the blue wires located on the motor's back.

  10. GravityLight Motor Replacement, Soldering the New Motor: 手順 10、 1の画像 1
終わりに

To reassemble your device, follow these instructions in reverse order.

ある他の人がこのガイドを完成しました。

作成者

3人の作成者と共同で作成されました。

Anthony Jungquist

メンバー登録日: 09/26/14

125 ポイント

1ガイドが承認済み

チーム

Cal Poly, Team 12-2, Forte Fall 2014 Cal Poly, Team 12-2, Forte Fall 2014人のメンバー

CPSU-FORTE-F14S12G2

5 メンバー

7のガイドは作成済み

0 件のコメント

コメントを追加

統計データ:

過去 24時間: 0

過去 7 日: 5

過去 30 日: 13

今までの合計 2,068