はじめに
Use this guide to replace a cracked or broken display on your Fitbit Ionic.
If the frame is deformed, we strongly suggest replacing it to make sure the new display will mount correctly and won’t suffer damage from uneven pressure.
You’ll need replacement adhesive to reattach components when reassembling the device.
必要な工具と部品
-
-
Before starting, take your Fitbit Ionic off the charger and power it down.
-
-
-
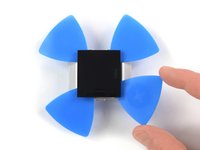
Heat an iOpener and apply it on the display for at least two minutes to soften the adhesive underneath.
Hair dryer on low took about 25 minutes directly blasting on the device, then used the ifixit metal spudger blade with rubber handle in the velcro kit pack
Thanks for sharing your experience!
-
-
-
-
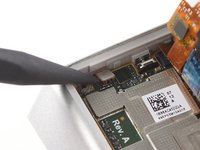
Use the flat end of a spudger to loosen and pry up the mildly glued NFC antenna.
-
Carefully fold the NFC antenna in the direction of the upper edge of the watch.
Il semble qu'il y ait confusion : <vers bord “superieur" > et non "inférieur” .
Plusieurs cas relevés
Bonjour Bernard ! Merci pour vos différentes remarques ! Vous êtes un lecteur attentif et éclairé. Nous avons adapté le texte d’origine et/ou les traductions en français. iFixit étant un wiki modifiable par tous, n’hésitez pas à modifier vous-même la prochaine fois que vous remarquez quelque chose.
-
-
-
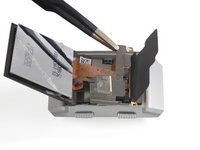
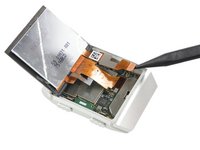
Carefully fold the display assembly onto the upper side of the watch.
Plutôt que “replier" il vaudrait mieux dire “basculer vers le haut" puis ajouter <en soulevant délicatement la nappe de connection de l'écran qui reste connectée (qui est maintenant libérée) >
-
-
この手順で使用する道具:Tweezers$4.99
-
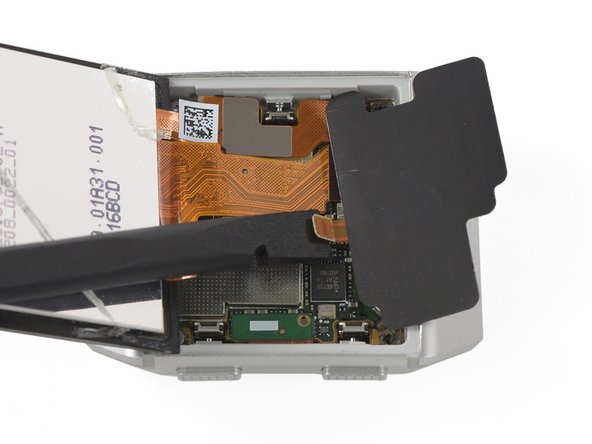
Use a pair of tweezers to remove the metal shield covering the battery flex cable.
The pointy tweezers in the ifixit kit are easier to work with the shield than the ones pictured here.
-
-
-
Fold the display assembly back to its original position.
-
-
-
Use a pair of tweezers to remove the metal cover.
Theres a lip on the right side that goes under the frame, and another lip that goes under the nfc antenna where you need to slightly turn the nfc antenna a bit to get the left side of the shield away.
-
-
-
Remove the display assembly.
The comment “turn on your Fitbit…” is out of sequence at best - battery is out, etc. However the “Remove the display assembly” is correct.
When reassembling and prior to gluing the screen, turn the device on with all components attached. Verify screen function, button function, nfc function, and HR monitor function.
-


To reassemble your device, follow these instructions in reverse order. Apply new adhesive where necessary after cleaning the relevant areas with isopropyl alcohol (>90%).
Compare your new replacement part to the original part—you may need to transfer remaining components or remove adhesive backings from the new part before installing.
Take your e-waste to an R2 or e-Stewards certified recycler.
Repair didn’t go as planned? Check out our Answers community for troubleshooting help.
2 の人々がこのガイドを完成させました。


2 件のコメント
It says in the description that you need replacement adhesive when reassembling, but what adhesive do you mean? Adhesive strips, adhesive glue? In all my searching nobody seems to have a good answer. The best thing I could find was b-7000 glue on amazon, but some people say it is water proof some say it Isn’t waterproof, so I’m not sure what to do. Any advice/feedback would be much appreciated!
Hi JJB, it’s very difficult to seal your watch waterproof after a repair but I can recommend this glue. I hope your repair works! Feel free to share your experience with us when you have finished it.