はじめに
This guide is intended to help you replace the RAM(s) in your device in a way that’s easy to follow and not confusing. You don’t need a ton of experience with computers, just some patience and attention to detail. Make sure your device is completely powered off and unplugged before you start so you don’t risk damaging anything. If you take it step by step, the process is pretty straightforward.
必要な工具と部品
-
-
Remove the bottom panel The first step for RAM replacement is to locate the base cover which is the bottom panel of the device.
-
You will find a total of eight small screws, three on each side, and two in the middle of the panel. They will be embedded in indentations which require a small phillips head #1 or similar screwdriver to reach and unscrew. Once all screws are removed, it may be helpful to use a flat, pointy tool, to pop the panel off of the device.
 FixBotに聞いてみる
-
-
-
-
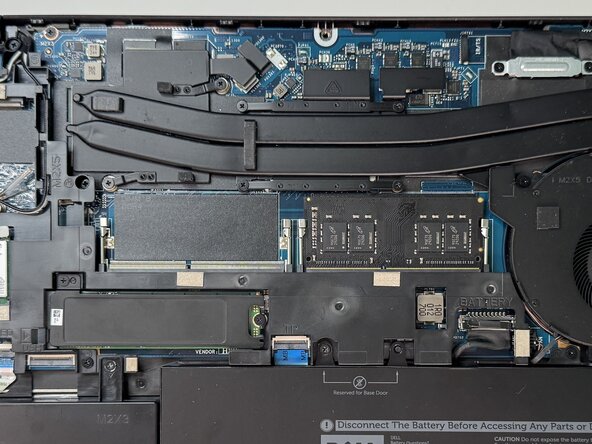
Locate RAM for removal Once looking at the interior of the underbody, you can locate the RAM(s) which will be in the high center of the device.
-
There should be two, which will be rectangular components, each about 2.7 inches in length. They will be located next to each other, with silver bars on each side of both, holding them in place.
-
-
-
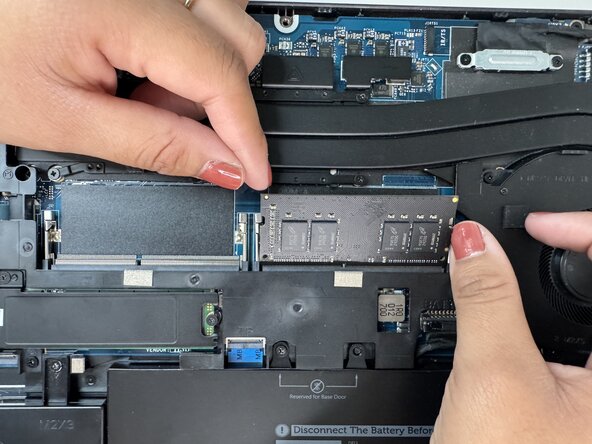
Use the silver claps to remove the RAM (Use the silver claps to remove the RAM(s)) To remove one, or both, of the RAMs, you will use the silver bar-like clasps which are holding them in place.
-
To remove the RAM, simultaneously press both bars on each side outward and down, which allows the component to pop out of its holding.
-
Repeat to second RAM if desired.
-






To reassemble your device, follow these instructions in reverse order. Take your e-waste to an R2 or e-Stewards certified recycler.

チーム

Austin Community College, Team 49-4, Cox Spring 2026 Austin Community College, Team 49-4, Cox Spring 2026人のメンバー
AUSTINCC-COX-S26S49G4
3 メンバー
5のガイドは作成済み
