はじめに
This guide will show and tell you how to replace the keyboard. Your keyboard maybe broken if the keys do not work when you are typing. Please refer to our Troubleshooting page for more information.
必要な工具と部品
-
-
Remove the battery by flipping the two switches under the battery and pulling it out
 FixBotに聞いてみる
-
-
-
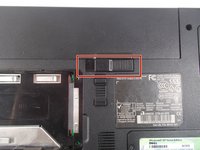
Push the tab from the battery, downwards to unlock the battery.
-
The tab should be in the position next to the unlocked indicator.
-
-
-
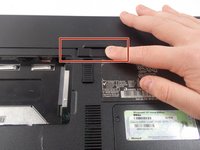
Now, push the other tab (the one right under the battery) from right to left.
-
Now the battery will be loose; lift the battery up and out of the computer.
-
-
-
-
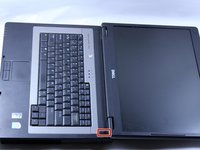
Put down the computer and open up the screen.
-
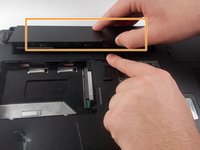
There is a long piece of plastic underneath the screen that you will have to remove.
-
-
-
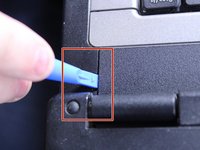
Insert the plastic opening tool into the little slot.
-
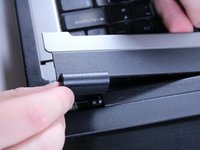
Lift up gently and remove the plastic cover.
-
-
-
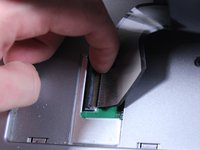
Lift keyboard up slightly and you will see the keyboard connection.
-
This black tab has to be lifted up to remove the keyboard.
-
Put your finger underneath the tab and pull back gently as indicated.
-
You can now remove the keyboard.
-


To reassemble your device, follow these instructions in reverse order.
ある他の人がこのガイドを完成しました。
チーム

UMass Dartmouth, Team 1-8, Catania Fall 2016 UMass Dartmouth, Team 1-8, Catania Fall 2016人のメンバー
UMASSD-CATANIA-F16S1G8
3 メンバー
9のガイドは作成済み