メインコンテンツにスキップ

Brightsign 4k LED Display Replacement

必要な工具と部品

  1. Brightsign 4k LED Display Replacement, Outer Shell: 手順 1、 3の画像 1 Brightsign 4k LED Display Replacement, Outer Shell: 手順 1、 3の画像 2 Brightsign 4k LED Display Replacement, Outer Shell: 手順 1、 3の画像 3
    • Remove three 8mm screws from the left side of the device.

    • Remove four 8mm screws from the right side of the device.

  2. Brightsign 4k LED Display Replacement: 手順 2、 3の画像 1 Brightsign 4k LED Display Replacement: 手順 2、 3の画像 2 Brightsign 4k LED Display Replacement: 手順 2、 3の画像 3
    • Apply pressure on the SD card to pop it out of the port.

    • Remove the card by pulling it out.

  3. Brightsign 4k LED Display Replacement: 手順 3、 3の画像 1 Brightsign 4k LED Display Replacement: 手順 3、 3の画像 2 Brightsign 4k LED Display Replacement: 手順 3、 3の画像 3
    • Press down on the top cover of the device and slid it towards you until you see a slight gap created.

    • Lift the top cover off.

  4. Brightsign 4k LED Display Replacement: 手順 4、 3の画像 1 Brightsign 4k LED Display Replacement: 手順 4、 3の画像 2 Brightsign 4k LED Display Replacement: 手順 4、 3の画像 3
    • Slide the body case back away from the bottom.

    • Pull up the body case to remove it from the bottom.

  5. Brightsign 4k LED Display Replacement, Motherboard Removal: 手順 5、 2の画像 1 Brightsign 4k LED Display Replacement, Motherboard Removal: 手順 5、 2の画像 2
    • Remove the four 8mm screws at each corner of the motherboard with a JIS #0 screwdriver.

  6. Brightsign 4k LED Display Replacement: 手順 6、 2の画像 1 Brightsign 4k LED Display Replacement: 手順 6、 2の画像 2
    • Lift the motherboard out of the casing.

  7. Brightsign 4k LED Display Replacement, LED Display: 手順 7、 2の画像 1 Brightsign 4k LED Display Replacement, LED Display: 手順 7、 2の画像 2
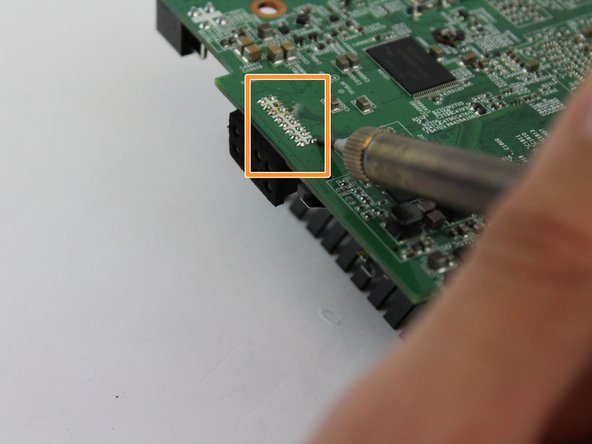
    • Turn the motherboard over and locate the solders holding the LED Display in place.

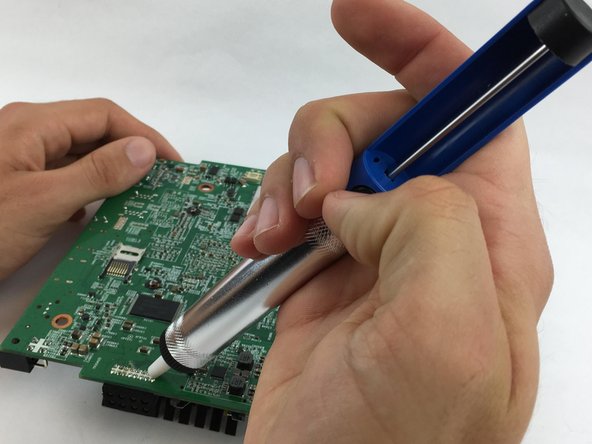
    • Use the soldering iron to desolder the sixteen solder joints and remove the melted solder with the pump shown in Step 8.

    • The soldering iron can become extremely hot, handle with caution.

  8. Brightsign 4k LED Display Replacement: 手順 8、 3の画像 1 Brightsign 4k LED Display Replacement: 手順 8、 3の画像 2 Brightsign 4k LED Display Replacement: 手順 8、 3の画像 3
    この手順で使用する道具:
    Desoldering Pump
    $3.99
    購入する
    • Apply the desoldering pump to remove the melted part from the motherboard (press the button to release it).

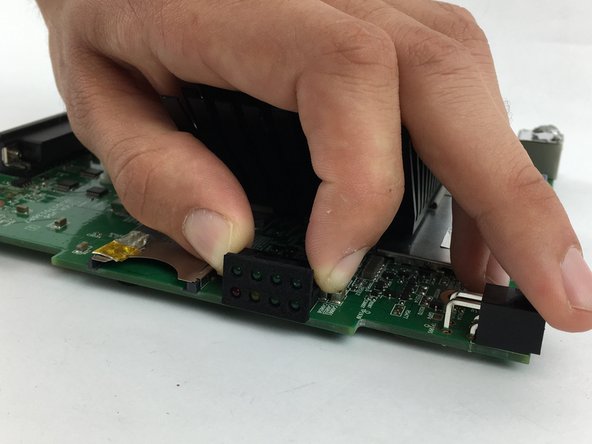
    • After the solders have been removed, gently pull the LED Display from the motherboard.

終わりに

To reassemble your device, follow these instructions in reverse order.

作成者

5人の作成者と共同で作成されました。

Nhi Pham

メンバー登録日: 02/15/18

169 ポイント

2のガイドは作成済み

チーム

USF Tampa, Team S17-G6, Boczar Spring 2018 USF Tampa, Team S17-G6, Boczar Spring 2018人のメンバー

USFT-BOCZAR-S18S17G6

4 メンバー

6のガイドは作成済み

0 件のコメント

コメントを追加

統計データ:

過去 24時間: 0

過去 7 日: 0

過去 30 日: 1

今までの合計 247