メインコンテンツにスキップ
リペアコミュニティに参加 - アカウントの作成

Altec Lansing inMotion iM9 Tweeter Replacement

必要な工具と部品

  1. Altec Lansing inMotion iM9 Tweeter Replacement, Battery: 手順 1、 1の画像 1
    • Gently push down on the two tabs at the top of the battery door.

    • While holding them down, slowly pull the door towards you.

    FixBotに聞いてみる

    コメントを追加

  2. Altec Lansing inMotion iM9 Tweeter Replacement: 手順 2、 1の画像 1
    • Once the door is open, use your hand to pull out the four batteries.

    FixBotに聞いてみる

    コメントを追加

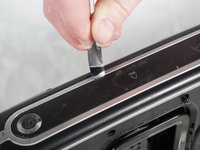
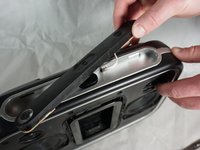
  3. Altec Lansing inMotion iM9 Tweeter Replacement, Volume and Power Buttons: 手順 3、 2の画像 1 Altec Lansing inMotion iM9 Tweeter Replacement, Volume and Power Buttons: 手順 3、 2の画像 2
    • Pry off the control panel on top of the speaker using the metal spudger. You may need to use a lot of force.

    • Start in the middle and work your way around the perimeter.

    FixBotに聞いてみる

    コメントを追加

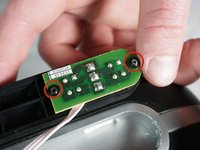
  4. Altec Lansing inMotion iM9 Tweeter Replacement: 手順 4、 2の画像 1 Altec Lansing inMotion iM9 Tweeter Replacement: 手順 4、 2の画像 2
    • Using a Phillips #1 screwdriver, remove the two 7mm screws that hold the volume button circuit board to the control panel.

    • Also remove the single 7mm screw from the power button circuit board on the opposite side.

    • There will be a little plastic piece under the eject button that you can just remove and set aside.

    FixBotに聞いてみる

    コメントを追加

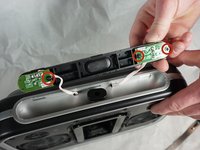
  5. Altec Lansing inMotion iM9 Tweeter Replacement: 手順 5、 2の画像 1 Altec Lansing inMotion iM9 Tweeter Replacement: 手順 5、 2の画像 2
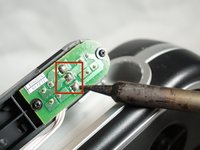
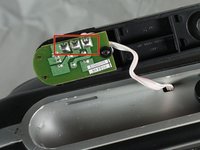
    • Desolder the three solders joints connecting the wires to the volume button circuit board.

    • Do the same to the power button circuit board on the other side (the board with only one screw).

    • Pull out the wires using a lot of force.

    • If you are not familiar or comfortable with soldering, use this guide

    FixBotに聞いてみる

    コメントを追加

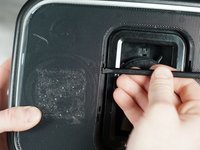
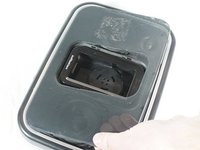
  6. Altec Lansing inMotion iM9 Tweeter Replacement, Case Opening: 手順 6、 2の画像 1 Altec Lansing inMotion iM9 Tweeter Replacement, Case Opening: 手順 6、 2の画像 2
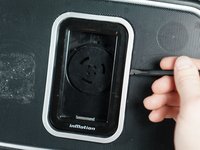
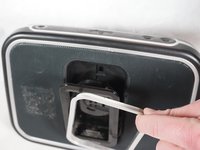
    • Gently pry open the silver plastic lining of the iPod dock using the plastic spudger.

    • It is best to start from the top or bottom, then work your way around if it has not popped out yet.

    • Remove the silver lining.

    FixBotに聞いてみる

    コメントを追加

  7. Altec Lansing inMotion iM9 Tweeter Replacement: 手順 7、 2の画像 1 Altec Lansing inMotion iM9 Tweeter Replacement: 手順 7、 2の画像 2
    • Pry open the metal mesh by working the plastic spudger around the inside of the mesh.

    • Once loose, lift up the metal mesh.

    FixBotに聞いてみる

    コメントを追加

  8. Altec Lansing inMotion iM9 Tweeter Replacement: 手順 8、 1の画像 1
    • Remove the fourteen 30mm screws with Phillips #1 Screwdriver.

    • Remove the 7mm screw with the Phillips #1 Screwdriver.

    FixBotに聞いてみる

    コメントを追加

  9. Altec Lansing inMotion iM9 Tweeter Replacement: 手順 9、 1の画像 1
    • Carefully separate the front and back case plates at a corner of the speaker.

    • Lots of cables are still connected, so be very gentle when separating case plates.

    FixBotに聞いてみる

    コメントを追加

  10. Altec Lansing inMotion iM9 Tweeter Replacement: 手順 10、 1の画像 1
    • Guide the white button cables through the hole on the top of speaker case.

    FixBotに聞いてみる

    コメントを追加

  11. Altec Lansing inMotion iM9 Tweeter Replacement: 手順 11、 1の画像 1
    • Use your fingers to peel the glue off of the red and black cables.

    FixBotに聞いてみる

    コメントを追加

  12. Altec Lansing inMotion iM9 Tweeter Replacement: 手順 12、 1の画像 1
    • Careful not to touch the green capacitors or you might shock yourself.

    FixBotに聞いてみる

    コメントを追加

  13. Altec Lansing inMotion iM9 Tweeter Replacement, Tweeter: 手順 13、 1の画像 1
    • Remove the speaker cables by desoldering the two solder joints on opposite sides of the tweeter.

    FixBotに聞いてみる

    コメントを追加

  14. Altec Lansing inMotion iM9 Tweeter Replacement: 手順 14、 1の画像 1
    • To fully remove the tweeter from the device, unscrew the two 7mm screws and the tweeter will be free.

    FixBotに聞いてみる

    コメントを追加

  15. Altec Lansing inMotion iM9 Tweeter Replacement: 手順 15、 1の画像 1
    • Follow the previous instructions to remove the second tweeter on the opposite side of the speaker.

    FixBotに聞いてみる

    コメントを追加

終わりに

To reassemble your device, follow these instructions in reverse order.

キャンセル: このガイドを終了できませんでした。

作成者

3人の作成者と共同で作成されました。

Shaun Steele

メンバー登録日: 02/02/15

279 ポイント

2のガイドは作成済み

チーム

Cal Poly, Team 17-33, Amido Winter 2015 Cal Poly, Team 17-33, Amido Winter 2015人のメンバー

CPSU-AMIDO-W15S17G33

4 メンバー

7のガイドは作成済み

1件のガイドコメント

Where do you buy the replacement tweeters?

Fred Schneider - 返信 共有

コメントを追加

統計データ:

過去 24時間: 1

過去 7 日: 10

過去 30 日: 34

今までの合計 1,315