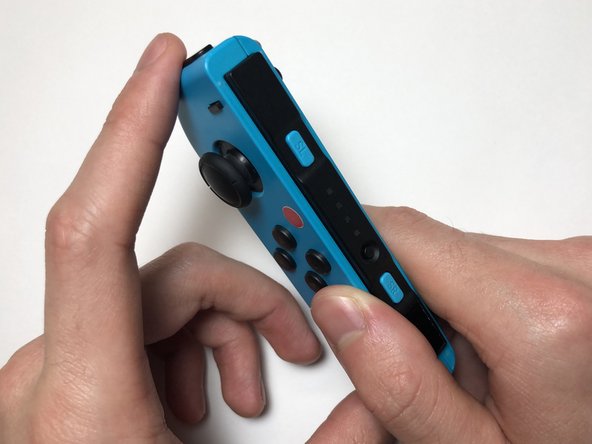
はじめに
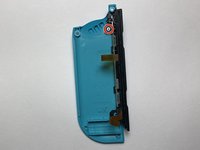
充電レールが破損すると、Nintendo Switch本体に直接接続できなくなったり、Joy-Conの充電ができなくなったりします。このガイドでは、左側Joy-Conコントローラーの充電レールを交換する方法を説明します。
このガイドを使用する前に、充電レールのピンが曲がっていないか確認してください。可能であればJoy-Conが外部ソースから充電できるテストするか、問題が実際にNintendo Switch本体のセンサーレールにあるかどうかを確認してください。
Nintendo Switchのセンサーレールに問題がある場合は、 Nintendo Switch 左側ジョイコン センサーレールの交換を参照してください。
必要な工具と部品
-
-
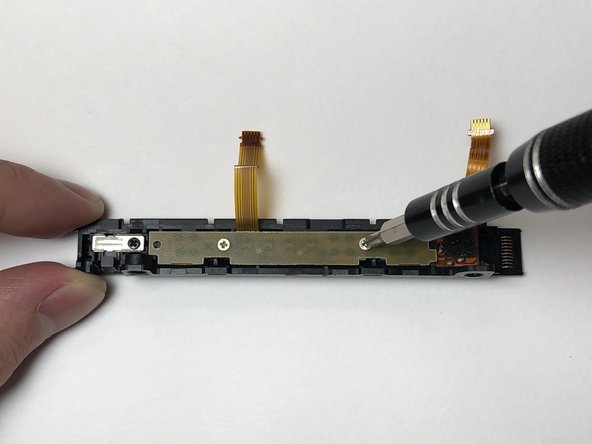
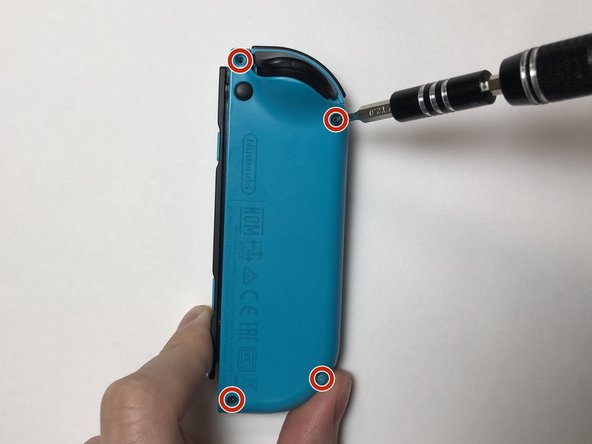
ミッドフレームを固定しているゴールドの3mmのプラスネジ(#000)3本を外します。
-
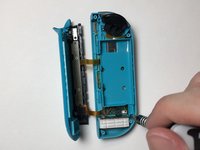
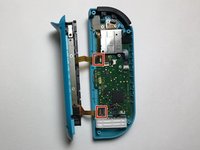
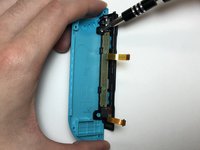
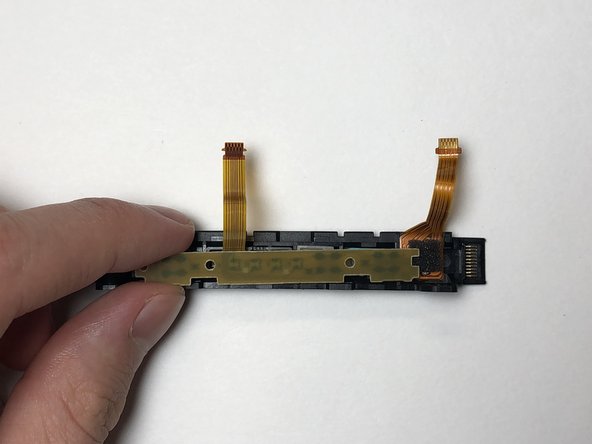
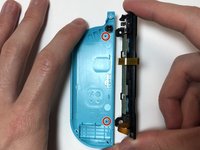
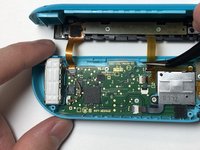
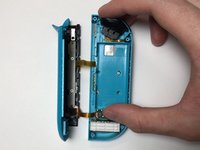
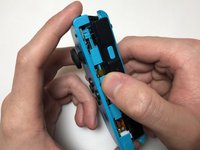
ミッドフレームをマザーボードから持ち上げ、横に置きます。
Be mindful of your L button on top, as it's not secured in placed once this plate is removed. If it comes off without intention, make sure you find and keep the spring with it
-
-
この手順で使用する道具:Tweezers$4.99
-
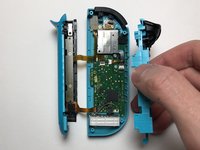
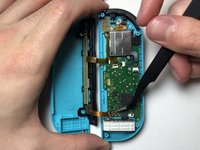
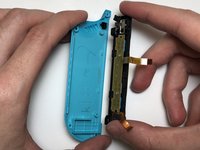
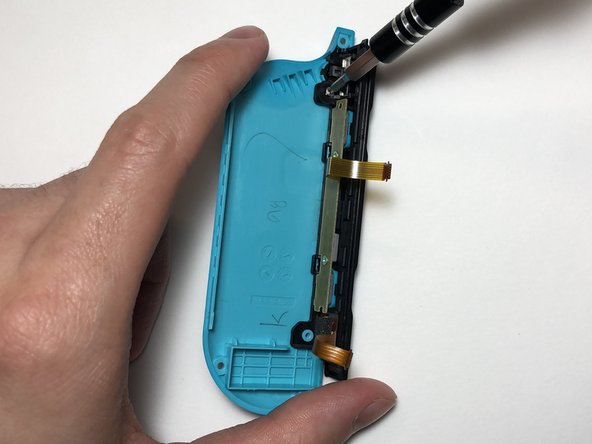
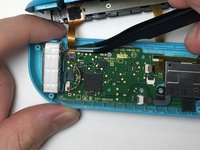
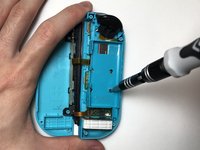
ミッドフレームのリボンケーブルをマザーボードに固定しているZIFコネクタのラッチを外します。
-
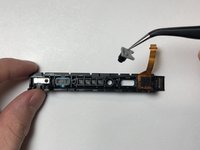
ピンセットを使って、ZIFコネクタからリボンケーブルをゆっくりと引っ張ります。
This step (disconnecting the midframe cable) is not strictly necessary, but if you don’t do it the frame can get in the way during reassembly.
-
-
-
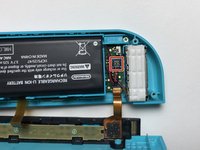
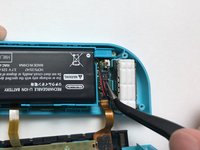
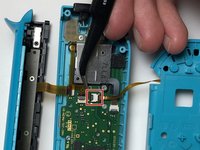
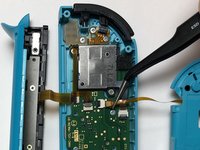
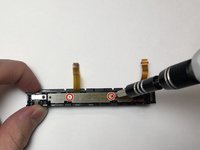
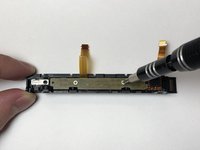
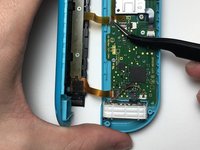
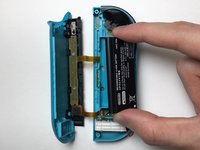
充電レールのリボンケーブルをマザーボードに固定している2つのZIFコネクタのロックを解除します。
-
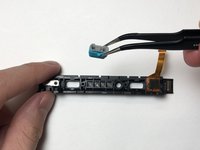
ピンセットを使って、リボンケーブルをZIFコネクタからゆっくりと引き抜きます。
How do you unlatch the connections.
The top connector has a latch; raising the cable slightly or prising in the slot on the side will release it. There is no latch on the bottom connector; just gently ease the cable out.
The bottom connector absolutely DOES have a ZIF connector, but it's on the opposite side. The tweezers in the second picture are pointing directly at the connector, and it slides up to the left (from the perspective of the picture).
Rob Hulson - 返信
That little grey piece on the bottom connector flew off the connector when I put a spudger under it. I can't get it back on regardless of what I've tried, so I'm likely to leave it off rather than risk bending pins. Looks like this little grey piece is wedged between two tuning fork shapes for each pin. If anyone knows the connector name I'd love to take a look at the datasheet as the disconnect/reconnect is making no sense to me.
Bo Buckley - 返信
Took me ages to figure out how to put it back on. Just make sure you lift it up to rotate it rather than push it back parallel with the board (like some other connectors). See here for how to replace it if it flies off (and you can find it) :D
Repositionnement du clapet de connecteur de nappe flexibleBo Buckley - 返信
-
-
-
-
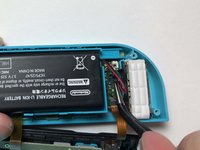
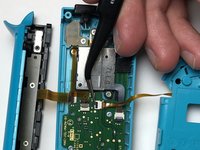
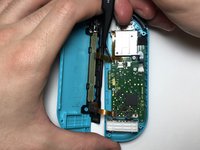
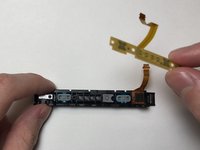
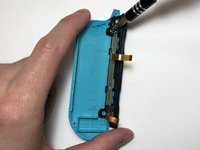
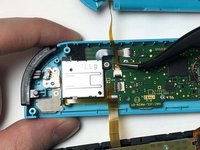
SL,SRと同期ボタンを充電レールから外します。
If the new charging rail does not have the syncing led extenders, you can take them out and transfer them as well.
-
-
-
バックシェルの2つのスタンドオフネジと充電レールの位置合わせをします。
-
2 mm #000 プラスネジを留めて、バックシェルと充電レールを固定します。
-
-
-
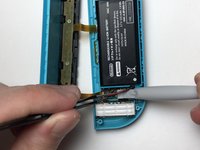
ピンセットを使って、充電用レールのリボンケーブルをマザーボードのZIFコネクタに挿入します。
-
各ZIFコネクターのラッチを下ろして、リボンケーブルを固定します。
Note also that there is no latch on the lower cable.
On a Switch OLED Joy Con, both ZIF connectors have latches, one is black and one is the same color as the port
-


32 の人々がこのガイドを完成させました。
以下の翻訳者の皆さんにお礼を申し上げます:
100%

Midori Doiさんは世界中で修理する私たちを助けてくれています! あなたも貢献してみませんか?
翻訳を始める ›
チーム

York University, Team S1-G14, O'Regan Summer 2021 York University, Team S1-G14, O'Regan Summer 2021人のメンバー
YORK-O'REGAN-SU21S1G14
1 メンバー
8のガイドは作成済み
16 件のコメント
I did this and still doesn’t work. I also changed the rail on the console side too. Very carefully of course. Any ideas?
Hey Luis,
Can you give me more detail on the problem? Like is the Joy-Con not being detected when it’s plugged in or is it not charging. If possible, can you test the console rail with a working Joy-Con?
If the Joy-Con is not charging, it could also be a battery problem. If you are comfortable with it, I would suggest swapping out the battery with a working one from the other Joy-Con to see if it solves the problem. You should probably attempt this after double-checking the connections for potential tears or if the connectors are too loose in the sockets.
Hi, I need help. My left Joy-Con is not charging because of the ZIF connector for the charging rail ribbon has been detached and I have lost it. Is there a way to fix this problem?
Honestly, I would recommend replacing the entire Motherboard, unless you can find a trusted repair shop to solder it on.
I damaged the ZIF connector for the battery on my Switch. It works with some pressure and perfect alignment, but I've had issues ever since I damaged it during repairs :/
I'm going to swap it with a functional motherboard, I would advise you do the same.
Hello need a little help. the ribbon cable will not stay connected. and it will not charger. Any thing will help.
I damaged my joy con and the lower ribbon wire that connects to the battery has burned out. Is there anyway I can get another set of wires or what not?
Hi There, i trust a bad guide not from here, and seemed to have broke the charging ribbon attachment area. Any way to fix it?
in this guide, it would be step 6, second image. the black part that wraps around the ribbon when it is attached is ripped in half. Some other youtuber said to detach the latch from the front, which i tried. but it was actually in the rear. because he didn't show the step clearly, figured it was that. As i've seen other laptop ribbon latches are similar, pull the thing out, and it pops out. in this case, that was a ribbon connector, and the latch is a flip latch from the rear...
hope you can help. thanks.
What if the charging rail is totally broken off? Like, it was pushed off the counter by a small child and the charging rain is totally torn off from the controller
If both ribbon cables are completely severed on the rail then you would probably have to also buy a SL/SR PCB replacement. The process would still be the same just use the new SL/SR PCB and make sure that the PCB is for the correct joycon. If you want to find it, you can search for SL SR flex cable or sometimes they are also sold with a new charging rail.
I forgot to mention if you broke the peg on the back shell then you may need to replace the back shell. Alternatively, you can try to glue it back together, but if you do, you should check if it can withstand a bit of pressure.
Hi I need someones help with my right joy con stick's charging rail. It is charging alright but it's not connecting to my switch in hand-held mode. Is it possible that somebody could post a tutorial like this but for the right joy con? It will really help me a bunch. Thanks.
I would also like this tutorial but for the Right Joy Con. I would've assumed they are similar, but since the guides are labelled very specifically per side, I'd rather not risk it.
My Right Joy Con is not recognised by the Switch, wirelessly or when attached. As a result it doesn't charge, and so It's now off permanently :(
PuyoBop -
Is there a video of this guide?
When removing the battery using the tweezers as shown the socket also detached with the battery connector. I didn’t know I could just gently remove them with my fingers…. is there any way to reattach the socket to the motherboard properly? I used nail glue, and now the joycon wont charge and my switch isn’t reading the it. Sometimes it shows but it will only work when connected to the switch.
Tia LaShay - 返信
This guide also works for the Joy con right?