メインコンテンツにスキップ

必要な工具と部品

この分解は修理ガイドでは ありません。 お持ちのSeagate Expansionを修理する際は、iFixitの修理ガイドをご利用ください。

  1. Expansion Teardown, Open the cover: 手順 1、 1の画像 1
    • Using a flat head screwdriver or plastic tool

  2. Expansion Teardown: 手順 2、 1の画像 1
    • Remove the cover

  3. Expansion Teardown: 手順 3、 1の画像 1
    • Remove the drive from the case

  4. Expansion Teardown: 手順 4、 1の画像 1
    • Peel back the shielding

  5. Expansion Teardown: 手順 5、 1の画像 1
    • Remove the Screw with the #02 screw driver

  6. Expansion Teardown: 手順 6、 2の画像 1 Expansion Teardown: 手順 6、 2の画像 2
    • Separate the adapter form the sata port

作成者

3人の作成者と共同で作成されました。

Dan

メンバー登録日: 02/18/19

4,261 ポイント

9のガイドは作成済み

2 件のコメント

Hello,

I’d like to know if it’s possible to swap in another bigger NAS drive, as I keep my hard drive connected and it might be more durable.

Thank you !

Léana Jiang - 返信

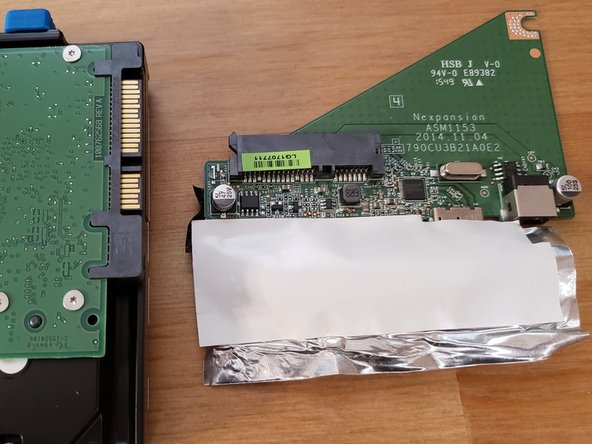
This does appear to be a semi-destructive method. In the picture under step 2, you can see the series of plastic brackets on the cover are snapped. See my pictures here

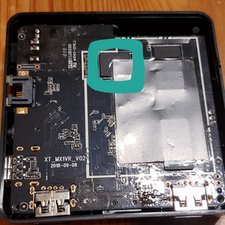
I had difficulty finding a spot to pry up from. There are 4 lips around the cover that should make it easier. See pics.

Derick Roy - 返信

コメントを追加

統計データ:

過去 24時間: 2

過去 7 日: 18

過去 30 日: 79

今までの合計 3,888