メインコンテンツにスキップ

why! N650DU Processor

必要な工具と部品

  1. why! N650DU Processor, The Batteries: 手順 1、 3の画像 1 why! N650DU Processor, The Batteries: 手順 1、 3の画像 2 why! N650DU Processor, The Batteries: 手順 1、 3の画像 3
    • Unlock the button without spring

    • Slide the battery up while unlocking the button with spring

  2. why! N650DU Processor, Access to major components: 手順 2、 3の画像 1 why! N650DU Processor, Access to major components: 手順 2、 3の画像 2 why! N650DU Processor, Access to major components: 手順 2、 3の画像 3
    • Unscrew the two large screws circled in red

    • Unscrew the two small screws circled in green

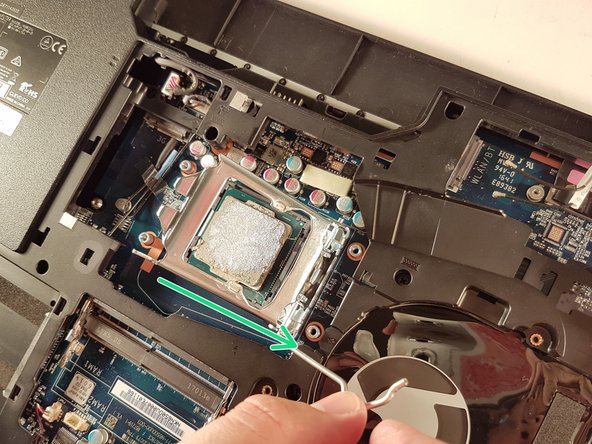
    • Slide the plate down and lift the

  3. why! N650DU Processor, Processor: 手順 3、 3の画像 1 why! N650DU Processor, Processor: 手順 3、 3の画像 2 why! N650DU Processor, Processor: 手順 3、 3の画像 3
    • Unscrew the four screws circled in red

    • Lift the radiator with the black label

  4. why! N650DU Processor: 手順 4、 3の画像 1 why! N650DU Processor: 手順 4、 3の画像 2 why! N650DU Processor: 手順 4、 3の画像 3
    • Push the lever in the direction of the red arrow while pushing it in

    • Lift the lever in the direction of the green arrow

    • Do not touch the bottom of the processor and take it by the sides

終わりに

To reassemble your device, Follow these instructions in reverse order.

以下の翻訳者の皆さんにお礼を申し上げます:

fr en

100%

irlandaさんは世界中で修理する私たちを助けてくれています! あなたも貢献してみませんか?
翻訳を始める ›

作成者

1人の作成者と共同作成されました。

Felice Suglia

メンバー登録日: 06/15/13

30,908 ポイント

264のガイドは作成済み

0 件のコメント

コメントを追加

統計データ:

過去 24時間: 0

過去 7 日: 1

過去 30 日: 3

今までの合計 219