メインコンテンツにスキップ

Nintendo Wii U Hauptplatin tauschen

ご注意:あなたは前提となるガイドを編集しています。あなたが行なう変更は、この手順を含むガイド全体に反映されます。

手順 2を翻訳中

英語
ドイツ語
手順2
Nintendo Wii U Motherboard Replacement: 手順 0、 3の画像 1 Nintendo Wii U Motherboard Replacement: 手順 0、 3の画像 2 Nintendo Wii U Motherboard Replacement: 手順 0、 3の画像 3
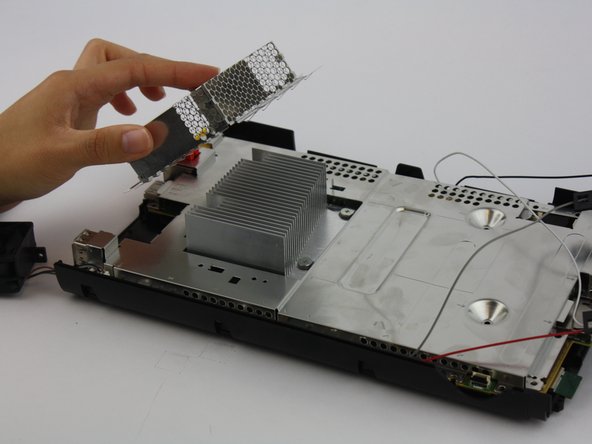
  • The metal cap does not require unscrewing and should lift up with ease.

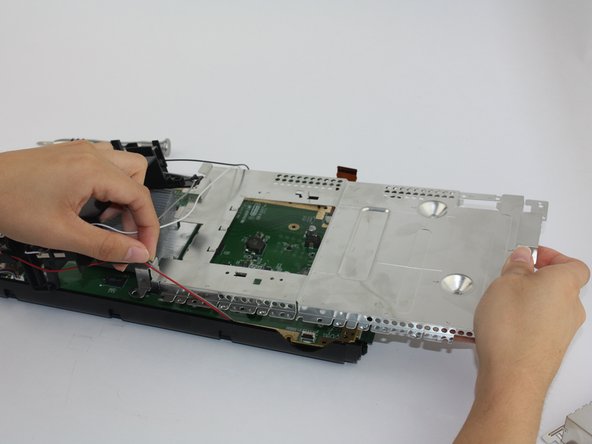
  • Unscrew all the screws that outline the perimeter of the board using a Phillips Head (PH1) screwdriver.

  • Remove the silver shielding plate once all screws are removed. Be careful when pulling it under the affixed antenna cables.

Um die Metallkappe zu entfernen, musst du keine Schrauben lösen, sie sollte einfach anzuheben sein.

Entferne alle Schrauben, die den Bereich der Platine umranden mit einem PH1 Schraubendreher.

Entferne die silberne Abdeckung, wenn alle Schrauben entfernt wurden. Sei vorsichtig, wenn du sie unter den Antennenkabel herausziehst.

クリエイティブコモンズのオープンソース著作権のもと、あなたの投稿は著作権の対象となります