メインコンテンツにスキップ

Retina MacBook 2016 の分解

英語
日本語

手順 5を翻訳中

手順5
Retina MacBook 2016 Teardown: 手順 0、 3の画像 1 Retina MacBook 2016 Teardown: 手順 0、 3の画像 2 Retina MacBook 2016 Teardown: 手順 0、 3の画像 3
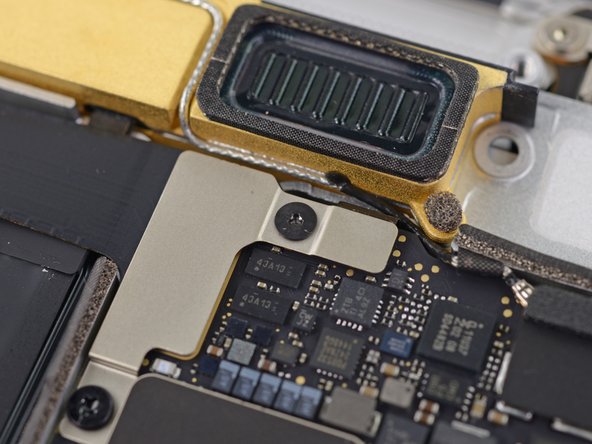
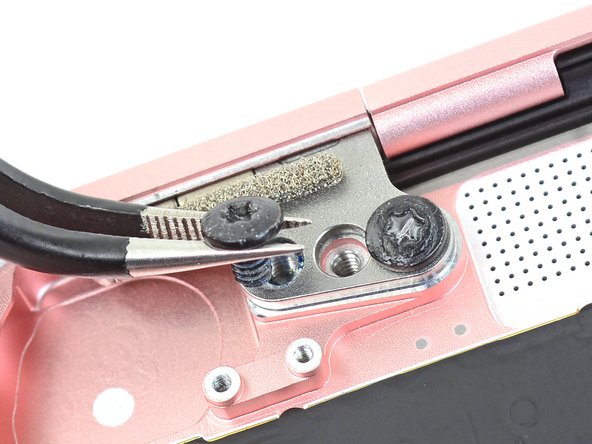
  • What's that? The pesky tri-wing screw we saw last year grew another, um, wing—now it's a regular ol' repair-friendly Phillips.

  • If you weren't put off by the Pentalobes on the lower case, then a tri-wing probably won't slow you down much—but hey, we'll take what we can get!

  • Thankfully, all the other internal screws remain standard Phillips and Torx screws.

  • However, another surprise awaits at the hinge screws, whose Torx heads are filled with some sort of substance that disintegrates when you insert a screwdriver. Are you sealing our MacBook with tamper-evident screws, Apple?

これは一体何でしょうか?昨年モデルで目にした、厄介な三分ネジが修理しやすいプラスネジに変わっています。

もし、底ケースのペンタロープネジでやる気を失わなかったあなたなら、次の三分ネジでも同じ調子で取り外せるはずです!

ありがたいことに、その他全てのネジは標準型のプラスネジとトルクスネジが使用されています。

しかしながら、別のサプライズが蝶番ネジで待ち受けています。スクリュードライバーを差し込んだ際に、形を変えて崩れてしまう何か物質がトルクスネジ頭に付けられています。Apple、私たちのMacBookをタンパーエビデント性ネジで封じ込めるつもりですか?

クリエイティブコモンズのオープンソース著作権のもと、あなたの投稿は著作権の対象となります