メインコンテンツにスキップ

4芯ヘッドホンジャックの交換

英語
日本語

手順 4を翻訳中

手順4
4-Pole Headphone Jack Replacement: 手順 0、 1の画像 1
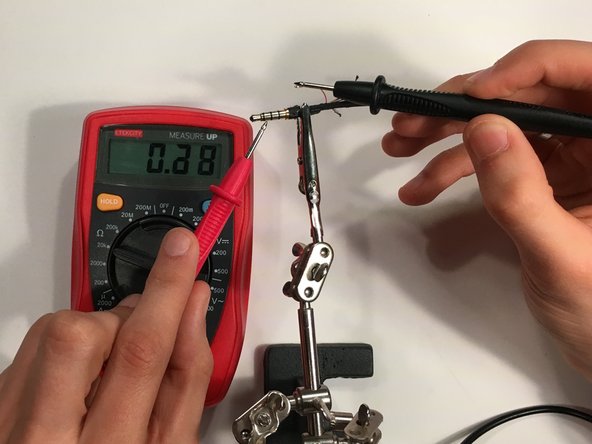
  • Turn on the multimeter and set it to measure resistance.

  • Select a wire and touch one of the multimeter leads to the soldered tip.

  • Touch the other multimeter lead to each of the segments on the headphone jack until the multimeter indicates that the wire is connected.

  • Make sure to record what wire is connected to what pole of the jack.

  • Repeat the process for each wire.

マルチメーターの電源を入れて、抵抗値測定モードに合わせます。

ワイヤを1本選択して、はんだ付けした先端にマルチメーターの片方のリードを当てます。

マルチメーターによりワイヤの接続が確認できるまで、もう片方のマルチメーターのリードを、ヘッドホンジャックの各セグメントに当てます。

必ずどのワイヤが、ジャックのどの芯に接続されているかをメモしておいてください。

各ワイヤに対して、この作業を繰り返します。

クリエイティブコモンズのオープンソース著作権のもと、あなたの投稿は著作権の対象となります