メインコンテンツにスキップ

MacBook Pro 15'' Retina Display Mid 2015のヒートシンクの交換

英語
日本語

手順 5を翻訳中

手順5
MacBook Pro 15" Retina Display Mid 2015 Heat Sink Replacement: 手順 0、 2の画像 1 MacBook Pro 15" Retina Display Mid 2015 Heat Sink Replacement: 手順 0、 2の画像 2
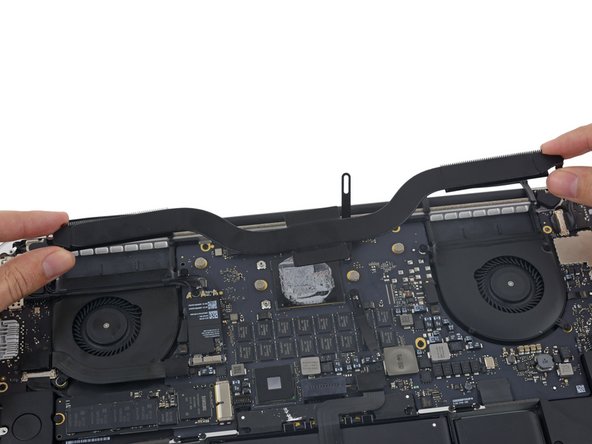
  • Flip the two spring clamps out of the way of the heat sink.

  • Remove the heat sink from the MacBook Pro.

  • On reassembly, be sure to clean the CPU and heat sink and reapply thermal compound to the CPU. Follow this guide to learn how.

  • If you are using a model with dual graphics, be sure to remove the four screws where the GPU die is before attempting to remove the heatsink.

ヒートシンクを取り出す際に、邪魔にならないよう、この2つのバネ付き留め金を反対側に裏返します。

MacBook Proからヒートシンクを取り出します。

再組立ての際は、CPUとヒートシンクの放熱グリスを綺麗に拭き取り、必ずCPUに放熱グリスを再塗布してください。このガイドを参照してください。

デュアルグラフィックス搭載モデルを使用している場合、ヒートシンクを取り外す前に、GPUダイがある4本のネジを必ず外してください。

クリエイティブコモンズのオープンソース著作権のもと、あなたの投稿は著作権の対象となります