メインコンテンツにスキップ

Remplacement du dissipateur de chaleur du MacBook Pro 15" Retina mi-2015

英語
フランス語

手順 5を翻訳中

手順5
MacBook Pro 15" Retina Display Mid 2015 Heat Sink Replacement: 手順 0、 2の画像 1 MacBook Pro 15" Retina Display Mid 2015 Heat Sink Replacement: 手順 0、 2の画像 2
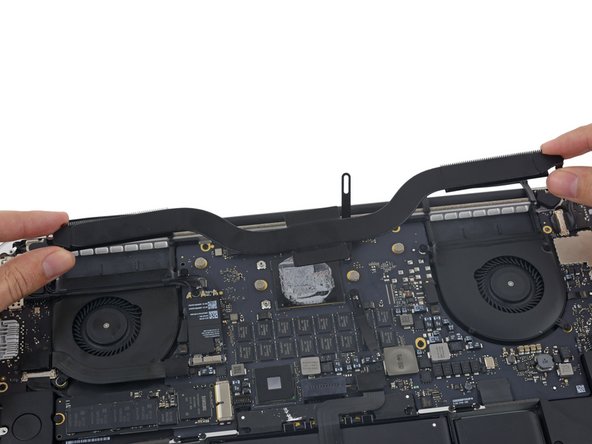
  • Flip the two spring clamps out of the way of the heat sink.

  • Remove the heat sink from the MacBook Pro.

  • On reassembly, be sure to clean the CPU and heat sink and reapply thermal compound to the CPU. Follow this guide to learn how.

  • If you are using a model with dual graphics, be sure to remove the four screws where the GPU die is before attempting to remove the heatsink.

Retournez les deux pinces à ressort hors du champs du dissipateur de chaleur.

Retirez le dissipateur de chaleur du MacBook Pro.

Lors du remontage, assurez-vous de nettoyer le processeur et le dissipateur de chaleur et réappliquez le composé thermique au CPU. Suivez ce guide pour apprendre comment.

[* black] Flip the two spring clamps out of the way of the heat sink.
[* black] Remove the heat sink from the MacBook Pro.
[* icon_reminder] On reassembly, be sure to clean the CPU and heat sink and reapply thermal compound to the CPU. Follow [guide|744|this guide] to learn how.
+[* icon_note] If you are using a model with dual graphics, be sure to remove the four screws where the GPU die is before attempting to remove the heatsink.

クリエイティブコモンズのオープンソース著作権のもと、あなたの投稿は著作権の対象となります