メインコンテンツにスキップ

Olympus E-Pl1 Sensor Assembly Removal

注意:あなたはさきほど閲覧しているガイドの前提となるページを編集しています。あなたが行った変更は、この手順を含むガイド全体に影響を与えます。

英語
日本語

手順 1を翻訳中

手順1
Olympus E-Pl1 Sensor Assembly Removal: 手順 0、 3の画像 1 Olympus E-Pl1 Sensor Assembly Removal: 手順 0、 3の画像 2 Olympus E-Pl1 Sensor Assembly Removal: 手順 0、 3の画像 3
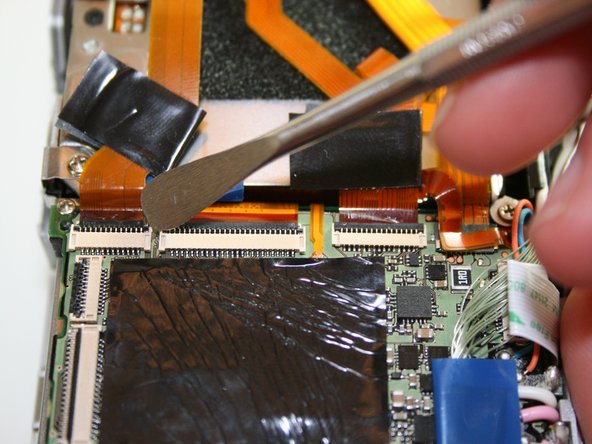
  • Using a spudger, remove the ribbon cables by pushing the black tab back and gently pulling the cable out.

  • Avoid using metal pry tools, as shown in the photo, on internal electronic components, as it can cause a short and damage the device. Use an ESD-safe tool such as a standard nylon spudger.

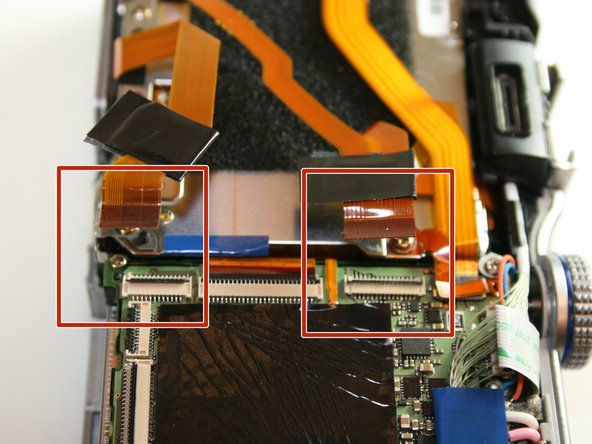
  • Do this process for the two ribbon cables shown in the third photo.

ここに翻訳を挿入する

ここに翻訳を挿入する

ここに翻訳を挿入する

クリエイティブコモンズのオープンソース著作権のもと、あなたの投稿は著作権の対象となります