手順 6を翻訳中
手順6


-
After removing the rest of the hard-to-access screws, you can lift off the lower case from the Virtual Boy.
-
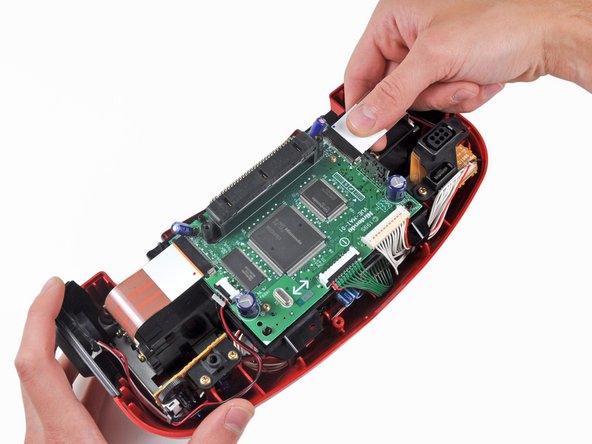
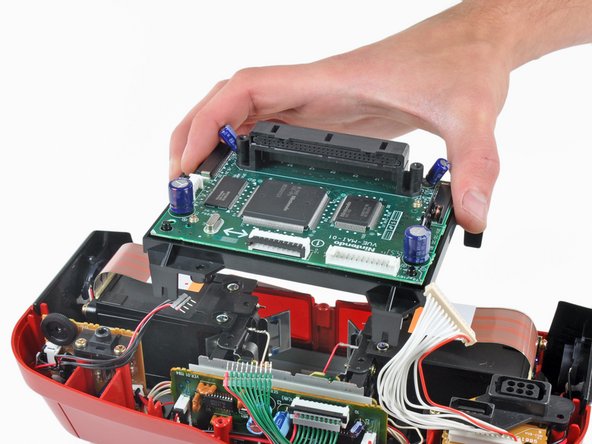
Several ribbon cables attach the main board to the main components across the Virtual Boy. After disconnecting them, the board easily comes out.
クリエイティブコモンズのオープンソース著作権のもと、あなたの投稿は著作権の対象となります。