手順 12を翻訳中
手順12

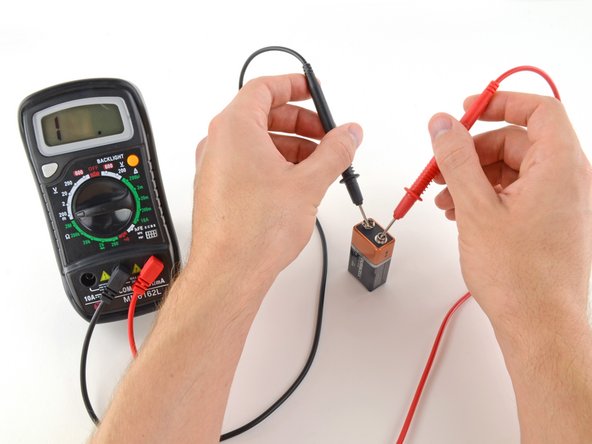


Manual ranging voltage measurement
-
Place the red probe on the positive terminal, and the black probe on the negative terminal.
-
If your range was set too high, you may not get a very precise reading. Here the multimeter reads 9 volts. That's fine, but we can turn the dial to a lower range to get a more precise.
-
If you set the range too low, the multimeter simply reads 1 or OL, indicating that it is overloaded or out of range. This won't hurt the multimeter, but we need to set the dial to a higher range.
クリエイティブコモンズのオープンソース著作権のもと、あなたの投稿は著作権の対象となります。