メインコンテンツにスキップ

Nintendo 3DS XL Upper LCD Display Replacement

英語
日本語

手順 7を翻訳中

手順7
Nintendo 3DS XL Upper LCD Display Replacement: 手順 0、 3の画像 1 Nintendo 3DS XL Upper LCD Display Replacement: 手順 0、 3の画像 2 Nintendo 3DS XL Upper LCD Display Replacement: 手順 0、 3の画像 3
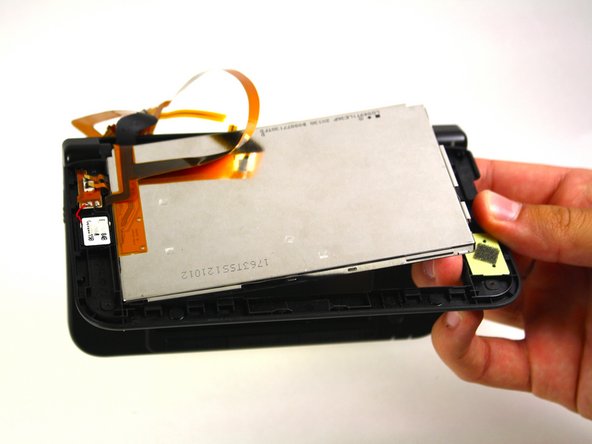
  • Open the hinge and carefully pop off the Upper LCD using your fingers.

  • Gently remove the ribbon from the hinge.

  • Though not required, the task of removing the ribbon cables becomes much easier once you remove the hinge barrel on the right side of the device.

  • Do not lose the tiny fabric and rubber water-resistant rectangles that cover the two speakers; they often fall out once the speakers are removed.

  • The screen's cover glass can be replaced or transferred to your new screen. The cover is easily scratched by metal tools; use plastic or your fingernail to separate it.

  • Adhere the cover to the new screen by using thin adhesive around the edges, or by reusing the old adhesive.

  • To reinsert the hinge piece, open the console to the last click before it's completely flat.

ここに翻訳を挿入する

ここに翻訳を挿入する

ここに翻訳を挿入する

ここに翻訳を挿入する

ここに翻訳を挿入する

ここに翻訳を挿入する

ここに翻訳を挿入する

クリエイティブコモンズのオープンソース著作権のもと、あなたの投稿は著作権の対象となります