メインコンテンツにスキップ

Wireless Charging Coil and Loudspeaker Removal

注意:あなたはさきほど閲覧しているガイドの前提となるページを編集しています。あなたが行った変更は、この手順を含むガイド全体に影響を与えます。

英語
日本語

手順 1を翻訳中

手順1
Wireless Charging Coil and Loudspeaker Removal, Disconnect the wireless charging coil: 手順 0、 2の画像 1 Wireless Charging Coil and Loudspeaker Removal, Disconnect the wireless charging coil: 手順 0、 2の画像 2
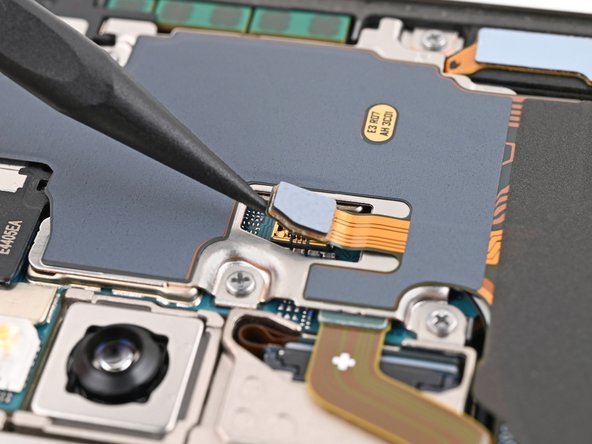
Disconnect the wireless charging coil
  • Use a spudger to pry up and disconnect the wireless charging coil press connector from the motherboard.

  • There's an arrow printed on the board near each press connector that indicates the recommended prying location. Only pry in this location for each press connector to avoid dislodging surface-mounted components.

  • To reconnect press connectors, align the connector carefully over its socket and press down with your fingertip—first on one side, then the other—until it clicks into place. Don't try to force the connector into place. If you're having trouble, reposition it and try again.

ここに翻訳を挿入する

ここに翻訳を挿入する

ここに翻訳を挿入する

クリエイティブコモンズのオープンソース著作権のもと、あなたの投稿は著作権の対象となります