メインコンテンツにスキップ

Google Pixel 4の解体(バッテリーを取り出した後の作業)

注意:あなたはさきほど閲覧しているガイドの前提となるページを編集しています。あなたが行った変更は、この手順を含むガイド全体に影響を与えます。

英語
日本語

手順 9を翻訳中

手順9
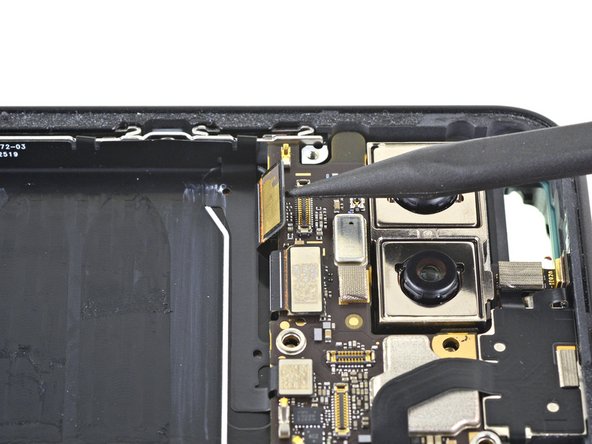
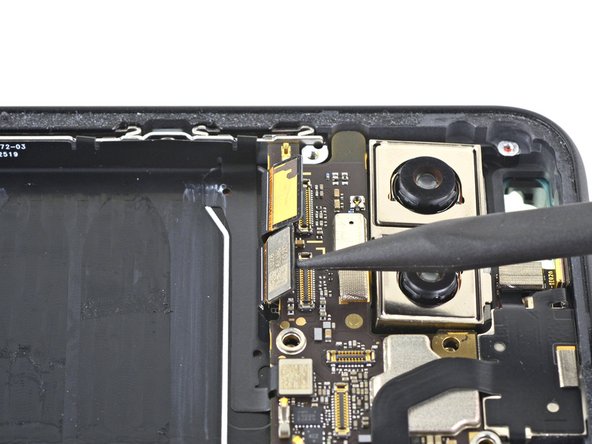
Google Pixel 4 Disassembly (Post-Battery Removal), Disconnect the motherboard press connectors: 手順 0、 3の画像 1 Google Pixel 4 Disassembly (Post-Battery Removal), Disconnect the motherboard press connectors: 手順 0、 3の画像 2 Google Pixel 4 Disassembly (Post-Battery Removal), Disconnect the motherboard press connectors: 手順 0、 3の画像 3
Disconnect the motherboard press connectors
  • Use the pointed end of a spudger to disconnect the two rear-facing camera connectors from the motherboard.

  • Disconnect the side buttons connector from the motherboard.

スパッジャーの先端を使って、マザーボードから、2つの背面向きカメラコネクタの接続を外します。

マザーボードからサイドボタン用コネクタの接続を外します。

クリエイティブコモンズのオープンソース著作権のもと、あなたの投稿は著作権の対象となります