注意:あなたは必要条件ガイドを編集しています。あなたが行なう変更は、この手順を含む全ての14個のガイドに反映されます。
手順 15を翻訳中
手順15


Remove the screen
-
Remove the screen.
-
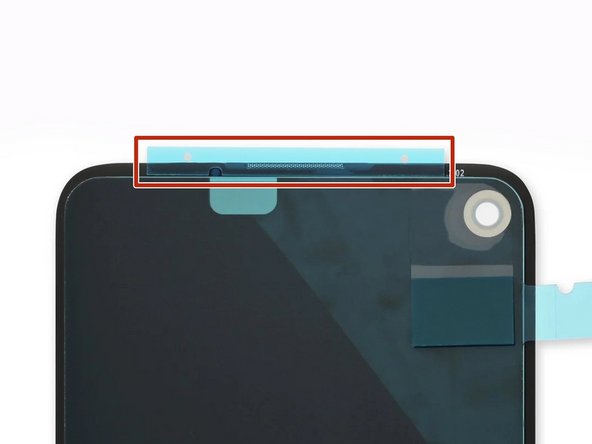
Check if your replacement screen has speaker mesh and top edge adhesive pre-installed.
-
If it does, you won't need the top edge adhesive.
-
If it doesn't, remove the larger clear liner from the top edge adhesive and apply it to the screen (not the frame). Make sure the larger cutout lines up with the speaker mesh.
-
Follow this guide to apply the custom-cut adhesive.
| [title] Remove the screen | |
| [* black] Remove the screen. | |
| - | [* black] Compare your replacement screen with the original. You may need to transfer additional components (such as the speaker mesh to the new part). |
| - | [* icon_reminder] To install the new screen: |
| - | [* black] [guide|126585|Follow this guide|new_window=true] if you are using custom-cut adhesives. |
| - | [* black] If you are using double-sided tape such as Tesa tape, [guide|113604|follow this guide|new_window=true]. |
| - | [* icon_reminder] During the boot-up process after reassembly, the screen will go through a calibration sequence. Do not touch the screen during this process, as it could result in improper touch calibration and create touch issues. |
| + | [* icon_reminder] To install a new screen: |
| + | [* red] Check if your replacement screen has speaker mesh and top edge adhesive pre-installed. |
| + | [* black] If it does, you won't need the [link|https://guide-images.cdn.ifixit.com/igi/vBiBoDTsRNJZNvrP.full|top edge adhesive|new_window=true]. |
| + | [* black] If it doesn't, remove the larger clear liner from the [link|https://guide-images.cdn.ifixit.com/igi/vBiBoDTsRNJZNvrP.full|top edge adhesive|new_window=true] and apply it to the ***''screen''*** (not the frame). Make sure the larger cutout lines up with the speaker mesh. |
| + | [* black] Follow [guide|126585|this guide|new_window=true] to apply the custom-cut adhesive. |
| + | [* icon_note] Use the third photo as a reference to position your adhesives. |
| + | [* icon_caution] During the boot-up process after reassembly, the screen will go through a calibration sequence. Don't touch the screen during this process, as it could result in improper touch calibration and create touch issues. |
クリエイティブコモンズのオープンソース著作権のもと、あなたの投稿は著作権の対象となります。