メインコンテンツにスキップ

MacBook Pro 13インチ Two Thunderbolt Ports 2019 バッテリーの交換

注意:あなたは必要条件ガイドを編集しています。あなたが行なう変更は、この手順を含む全ての2個のガイドに反映されます。

英語
日本語

手順 17を翻訳中

手順17
MacBook Pro 13" Two Thunderbolt Ports 2019 Battery Replacement: 手順 0、 2の画像 1 MacBook Pro 13" Two Thunderbolt Ports 2019 Battery Replacement: 手順 0、 2の画像 2
  • Lift and remove the battery.

  • Before installing your new battery, remove all the old adhesive from the MacBook Pro's case.

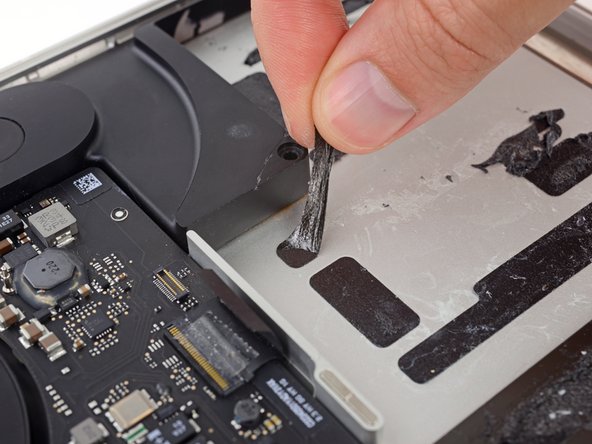
  • With a little luck, you can slowly pull out each strip of adhesive with your fingers.

  • Otherwise, soak each strip of adhesive with a bit of adhesive remover for 2-3 minutes, and then scrape it out with a plastic tool. This can take quite a bit of work, so be patient.

  • Mop up any remaining adhesive remover and give your MacBook Pro a few minutes to air dry.

  • The replacement battery included in your iFixit kit comes with adhesive pre-installed. Test the battery's fit and alignment carefully before peeling off the film covering the adhesive, and then press each cell firmly into place. If any additional films/liners are present that weren't on your original battery, remove them now.

  • Calibrate your newly installed battery: charge it to 100%, and keep charging it for at least 2 more hours. Unplug and use it normally to drain the battery. When you see the low battery warning, save your work, and keep your laptop on until it goes to sleep due to low battery. Wait at least 5 hours, then charge your laptop uninterrupted to 100%.

  • If you notice any unusual behavior or problems after installing your new battery, you may need to reset your MacBook Pro's SMC.

バッテリーを取り出します。

新しいバッテリーをインストールする前に、MacBook Proのケースから残りの接着剤を綺麗に剥がします。 

運が良ければ、指で接着剤の糸を引き抜くことができます。

そうでない場合は、接着剤の各ストリップに接着剤リムーバーを少量塗り、2-3分間待機してください。それからプラスチックツールで削ぎ落とします。作業には力が要ります。忍耐持って行いましょう。

残りの接着剤リムーバーを拭き取り、MacBook Proの本体を乾かします。

iFixitキットに含まれている交換用バッテリーには、接着シールがプレインストールされています。 接着剤を覆っているフィルムを剥がす前に、バッテリーの位置合わせを点検して、きちんと装着できるか確認してから、各バッテリーセルを所定の位置にしっかりと押し込みます。 元のバッテリーに付いていなかったフィルム/ライナーがある場合は、取り外します。

新しく取り付けたバッテリーをキャリブレーション(調整)します。100%まで充電し、さらに2時間以上充電し続けます。 プラグを抜いて、通常どおりに使用してバッテリーを完全に消耗させます。 バッテリ低下の警告が表示されたら、作業を保存して、スリープ状態になるまでラップトップをオンの状態で保ちます。電源が切れてから 少なくとも5時間待機して、ラップトップを中断せずに100%まで充電します。

新しいバッテリーを取り付けた後に異常な動作や問題に気付いた場合は、MacBookProのSMCをリセットする必要があるかもしれません。

クリエイティブコモンズのオープンソース著作権のもと、あなたの投稿は著作権の対象となります