メインコンテンツにスキップ

MacBook Pro 16" 2019 拆解

英語
中国語

手順 13を翻訳中

手順13
MacBook Pro 16" 2019 Teardown: 手順 0、 3の画像 1 MacBook Pro 16" 2019 Teardown: 手順 0、 3の画像 2 MacBook Pro 16" 2019 Teardown: 手順 0、 3の画像 3
  • Teardown Update: Hey, what's this little flex cable doing here? We don't remember seeing this before, and MacRumors was kind enough to ask us about it.

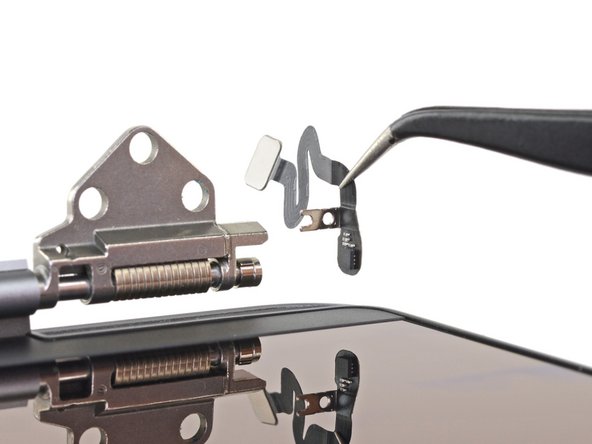
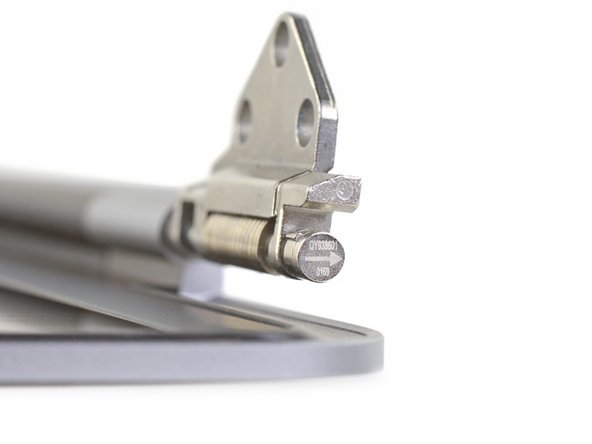
  • We have to fully remove the display to investigate, but it turns out there's a new sensor facing the left-side hinge, and a magnet embedded in the hinge itself. The arrow on the magnet indicates alignment/polarity, which rotates in sync with the display.

  • Looks like Apple added a lid angle sensor. Why would they need that? Will this enable some cool new macOS feature?

  • Maybe. It could also be a clever way for Apple to trace the history of how the device was used if repairs are needed. For instance, if the display cables fray, Apple might want to know how much the display was adjusted, and how often.

  • MacRumors did some additional gumshoeing, and found out that Apple wants this little sensor calibrated after repairs. Check out our post to speculate with us!

拆解更新:嘿,这条小的柔性电缆在做什么?我们不记得以前见过这种情况,MacRumors 很友善地向我们询问。

我们必须完全卸下显示屏进行调查,但事实证明,有一个面向左侧铰链的新传感器,并且在铰链本身中嵌入了一块磁铁。磁铁上的箭头指示对准/极性,其与显示屏同步旋转。

看起来苹果增加了一个盖角传感器。他们为什么需要这玩意?这会开启一些很棒的新macOS功能吗?

也许。如果需要维修,这可能也是 Apple追溯设备使用历史的明智方法。例如,如果显示屏电缆磨损了,Apple可能想知道显示屏的调整量和调整频率。

MacRumors进行了一些额外的设置,发现苹果希望在维修后会对这个小的传感器进行校准。查看我们的帖子,与我们一起猜测!

クリエイティブコモンズのオープンソース著作権のもと、あなたの投稿は著作権の対象となります