メインコンテンツにスキップ

Teardown der AirPods Pro

英語
ドイツ語

手順 10を翻訳中

手順10
AirPods Pro Teardown: 手順 0、 3の画像 1 AirPods Pro Teardown: 手順 0、 3の画像 2 AirPods Pro Teardown: 手順 0、 3の画像 3
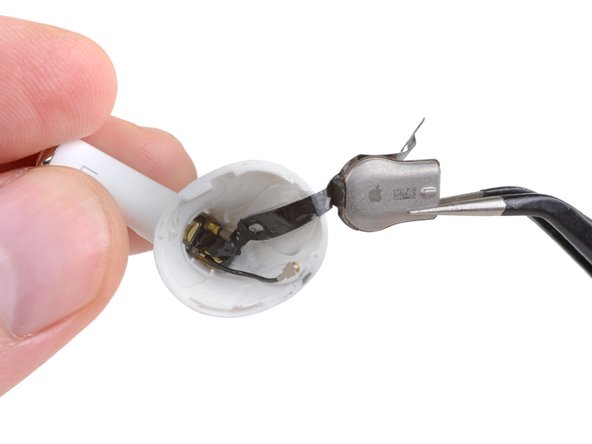
  • Back at the tail end of the AirPod, we disconnect a cute little coax connector and untangle Apple's custom SiP, where the H1 and other chips live.

  • This tiny board is even smaller than what we found last time, and probably afforded Apple a lot of extra space in the AirPods Pro compared to the standard AirPods.

  • Try as we might, we aren't able to pry apart this package—we'll have to take Apple at their word that it's just silicon in there, and not some form of magic.

  • Update—thanks to the awesome community, we now have some pretty good guesses as to what these chips are:

  • Most likely a Bosch IMU (Inertial Measuring Unit), which helps with Apple's Spatial Audio feature

  • Most likely an STMicroelectronics accelerometer, which helps with speech detection and noise cancellation

Zurück am Endstück des AirPod trennen wir einen niedlichen kleinen Koaxial-Stecker ab und entwirren den Apple eigenen SiP, der den H1 und andere Chips beherbergt.

Diese winzige Platine ist sogar noch kleiner als die, die wir letztes Mal gefunden haben, wodurch Apple im Vergleich zu den AirPods wohl sehr viel zusätzlichen Platz in den AirPods Pro gewonnen hat.

Was wir auch versuchen, wir schaffen es nicht dieses Paket zu öffnen - wir müssen auf Apples Aussage vertrauen, dass sich darin nur Silizium und nicht eine Art Magie verbirgt.

Update - Dank unserer wunderbaren Community haben wir beste Informationen, um was es sich bei diesen Chips handeln könnte:

Höchstwahrscheinlich ein IMU (Inertial Measering Unit = Trägheitsmesseeinheit) von Bosch zur Unterstützung von Apples Spatial Feature (Raumklang).

Höchstwahrscheinlich ein Beschleunigungssensor von STMicroelectronics zur Unterstützung der Spracherkennung und Geräuschunterdrückung.

クリエイティブコモンズのオープンソース著作権のもと、あなたの投稿は著作権の対象となります