手順 5を翻訳中
手順5


-
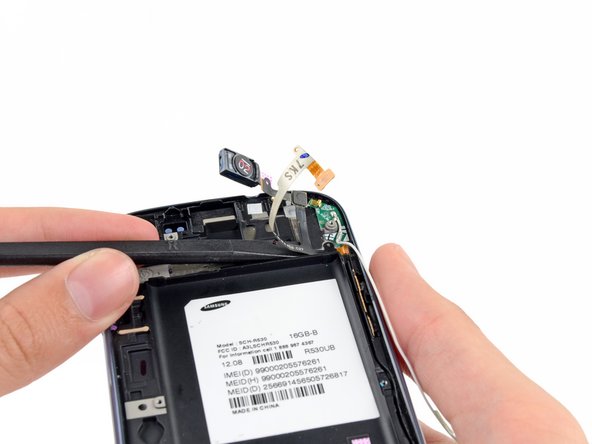
Insert the flat edge of a spudger underneath the earpiece/volume buttons/ambient light sensor ribbon cable connector.
-
Gently run the spudger across to continue peeling the the earpiece/volume buttons/ambient light sensor ribbon cable from the front panel assembly.
クリエイティブコモンズのオープンソース著作権のもと、あなたの投稿は著作権の対象となります。