メインコンテンツにスキップ

OnePlus 5 指紋スキャナーの交換

ご注意:あなたは前提となるガイドを編集しています。あなたが行なう変更は、この手順を含むガイド全体に反映されます。

英語
日本語

手順 3を翻訳中

手順3
OnePlus 5 Fingerprint Scanner Replacement: 手順 0、 3の画像 1 OnePlus 5 Fingerprint Scanner Replacement: 手順 0、 3の画像 2 OnePlus 5 Fingerprint Scanner Replacement: 手順 0、 3の画像 3
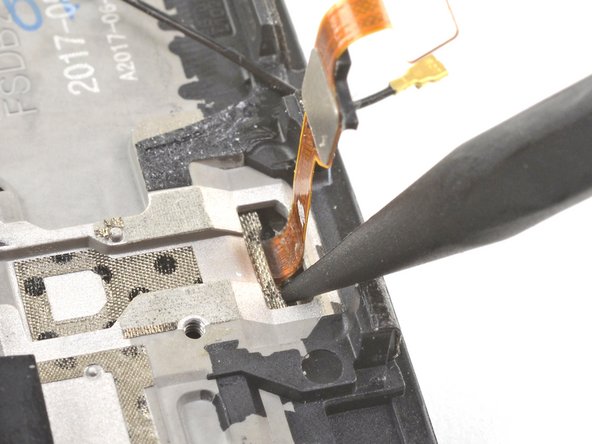
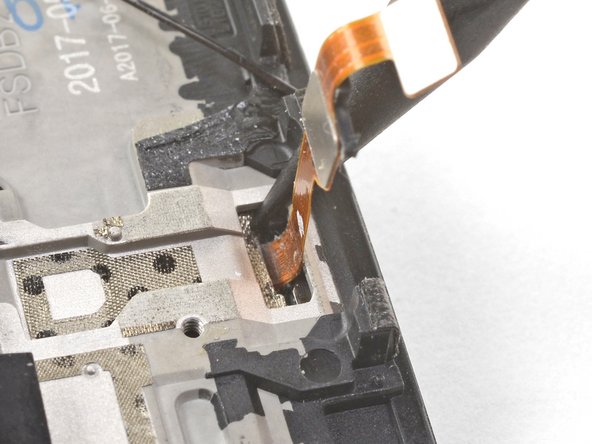
  • Insert the point of a spudger into the marked areas on either side of the flex cable, and push until the fingerprint scanner is loosened from its recess.

  • Do not apply pressure directly onto the delicate flex cable.

  • If the fingerprint scanner is not coming loose, make sure you are pressing the spudger's point against the backside of the scanner as indicated in the first image, and not the metal plate below it.

フレックスケーブルの両側のマークのある部分にスパッジャーの先を差し込み、指紋スキャナーを凹みから緩めるまで押します。⦅2番目画像⦆

デリケートなフレックスケーブルに直接圧力をかけないでください。

指紋スキャナーが抜けない場合は、最初の画像に示されているように、スパッジャーの先をスキャナーの裏側に押し当て、その下のメタルプレートには押し当てないようにしてください。

クリエイティブコモンズのオープンソース著作権のもと、あなたの投稿は著作権の対象となります