メインコンテンツにスキップ

Motorola Moto G5 Plusディスプレイアセンブリの交換

注意:あなたはさきほど閲覧しているガイドの前提となるページを編集しています。あなたが行った変更は、この手順を含むガイド全体に影響を与えます。

英語
日本語

手順 14を翻訳中

手順14
Motorola Moto G5 Plus Display Assembly Replacement: 手順 0、 3の画像 1 Motorola Moto G5 Plus Display Assembly Replacement: 手順 0、 3の画像 2 Motorola Moto G5 Plus Display Assembly Replacement: 手順 0、 3の画像 3
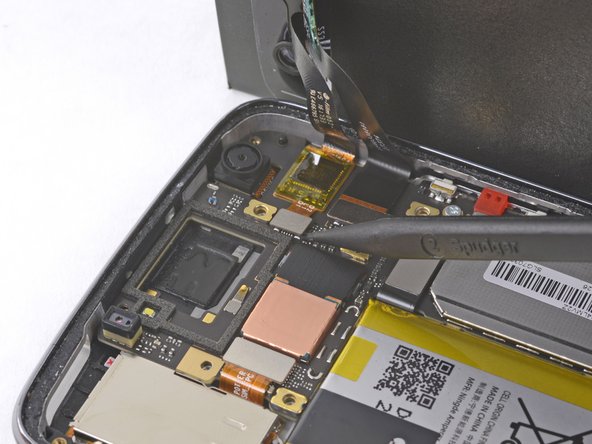
  • Disconnect the smaller display cable connector.

  • This cable houses a display controller chip encased in yellow tape. You do not need to remove the yellow tape. The chip is lightly adhered to the motherboard, but should come up with minimal effort.

  • Gently continue lifting the cable to break the adhesive seal and pull the cable away from the motherboard.

小さい方のディスプレイケーブルコネクタの接続を外します。

このケーブルには、黄色のテープで覆われたディスプレイコントローラーチップが搭載されています。 黄色のテープを取り外す必要はありません。 チップはマザーボードに軽く接着されていますが、簡単に外れるはずです。

続けて慎重にケーブルを持ち上げて、接着剤シールを剥がして、ケーブルをマザーボードから引き離します。

クリエイティブコモンズのオープンソース著作権のもと、あなたの投稿は著作権の対象となります