メインコンテンツにスキップ

iRobot Braava Jet 240 Tank Replacement

必要な工具と部品

  1. iRobot Braava Jet 240 Tank Replacement, Battery: 手順 1、 1の画像 1
    • Turn the device off.

  2. iRobot Braava Jet 240 Tank Replacement: 手順 2、 2の画像 1 iRobot Braava Jet 240 Tank Replacement: 手順 2、 2の画像 2
    • Use your fingers to gently pop out the battery.

  3. iRobot Braava Jet 240 Tank Replacement, Mop Pad: 手順 3、 2の画像 1 iRobot Braava Jet 240 Tank Replacement, Mop Pad: 手順 3、 2の画像 2
    • Lift up the handle to reveal the eject button.

  4. iRobot Braava Jet 240 Tank Replacement: 手順 4、 3の画像 1 iRobot Braava Jet 240 Tank Replacement: 手順 4、 3の画像 2 iRobot Braava Jet 240 Tank Replacement: 手順 4、 3の画像 3
    • Use your finger to push the eject button forward.

  5. iRobot Braava Jet 240 Tank Replacement: 手順 5、 1の画像 1
    • Tilt the robot on its side and let the mop pad slide out.

  6. iRobot Braava Jet 240 Tank Replacement, Front Shell: 手順 6、 2の画像 1 iRobot Braava Jet 240 Tank Replacement, Front Shell: 手順 6、 2の画像 2
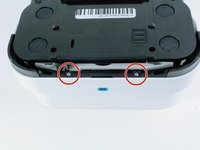
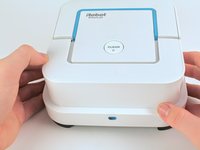
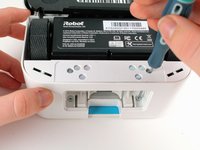
    • Remove the two 22.0 mm screws on the bottom-front of the robot using a Phillips #1 screwdriver.

  7. iRobot Braava Jet 240 Tank Replacement: 手順 7、 2の画像 1 iRobot Braava Jet 240 Tank Replacement: 手順 7、 2の画像 2
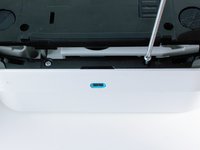
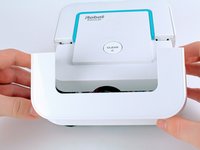
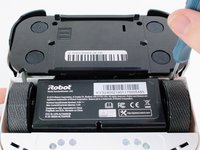
    • Use a Phillips #1 screwdriver and an iFixit opening tool to remove the two 15.0 mm screws on the front sides of the robot.

  8. iRobot Braava Jet 240 Tank Replacement: 手順 8、 3の画像 1 iRobot Braava Jet 240 Tank Replacement: 手順 8、 3の画像 2 iRobot Braava Jet 240 Tank Replacement: 手順 8、 3の画像 3
    • Carefully pull back on the front shell to remove it from the robot.

  9. iRobot Braava Jet 240 Tank Replacement, Back Shell: 手順 9、 2の画像 1 iRobot Braava Jet 240 Tank Replacement, Back Shell: 手順 9、 2の画像 2
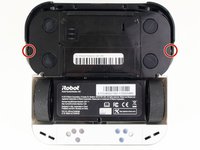
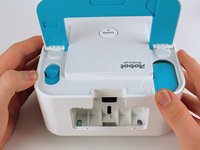
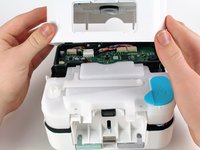
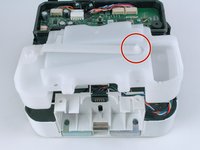
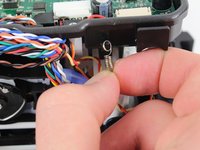
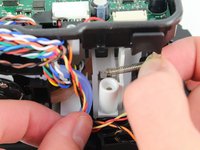
    • Insert a Phillips #1 screwdriver through the screw holes.

    • Unscrew the two 9.7 mm screws.

  10. iRobot Braava Jet 240 Tank Replacement: 手順 10、 2の画像 1 iRobot Braava Jet 240 Tank Replacement: 手順 10、 2の画像 2
    • Unscrew the four 9.7 mm screws using a long neck #1 Phillips screwdriver.

    • If the screws are unscrewed but do not come out easily, turn the robot upside down and gently shake it.

  11. iRobot Braava Jet 240 Tank Replacement: 手順 11、 3の画像 1 iRobot Braava Jet 240 Tank Replacement: 手順 11、 3の画像 2 iRobot Braava Jet 240 Tank Replacement: 手順 11、 3の画像 3
    • Pull up on the back shell to remove it from the robot.

    • For reassembly, pop the mop pad release trigger back into place if it fell out during back shell removal.

  12. iRobot Braava Jet 240 Tank Replacement, Tank: 手順 12、 2の画像 1 iRobot Braava Jet 240 Tank Replacement, Tank: 手順 12、 2の画像 2
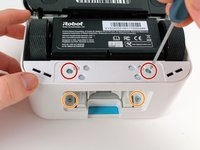
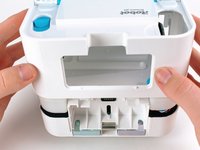
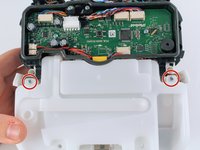
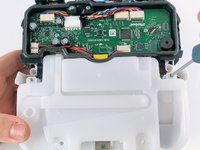
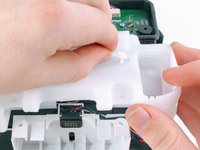
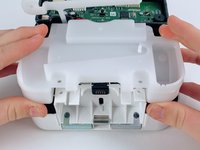
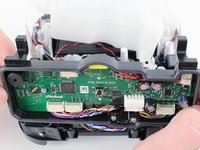
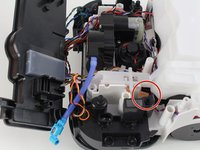
    • Use a Phillips #1 screwdriver to remove the two 9.7 mm screws on the tank.

  13. iRobot Braava Jet 240 Tank Replacement: 手順 13、 3の画像 1 iRobot Braava Jet 240 Tank Replacement: 手順 13、 3の画像 2 iRobot Braava Jet 240 Tank Replacement: 手順 13、 3の画像 3
    • Pull up on the L - shaped plastic piece and remove it from the tank assembly.

  14. iRobot Braava Jet 240 Tank Replacement: 手順 14、 2の画像 1 iRobot Braava Jet 240 Tank Replacement: 手順 14、 2の画像 2
    • Lift the tank up and away from the device.

    • Don't pull the tank too hard because it is still attached to the water tube at the back.

  15. iRobot Braava Jet 240 Tank Replacement: 手順 15、 3の画像 1 iRobot Braava Jet 240 Tank Replacement: 手順 15、 3の画像 2 iRobot Braava Jet 240 Tank Replacement: 手順 15、 3の画像 3
    • First pull up, then pull down on the spring to detach it from the hooks.

  16. iRobot Braava Jet 240 Tank Replacement, Remove the motherboard case: 手順 16、 2の画像 1 iRobot Braava Jet 240 Tank Replacement, Remove the motherboard case: 手順 16、 2の画像 2
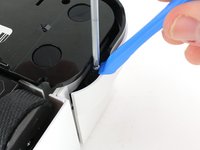
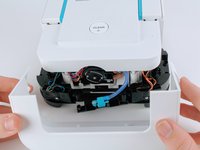
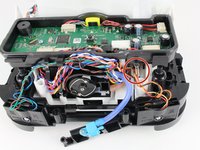
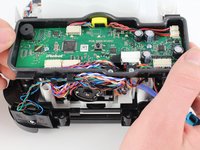
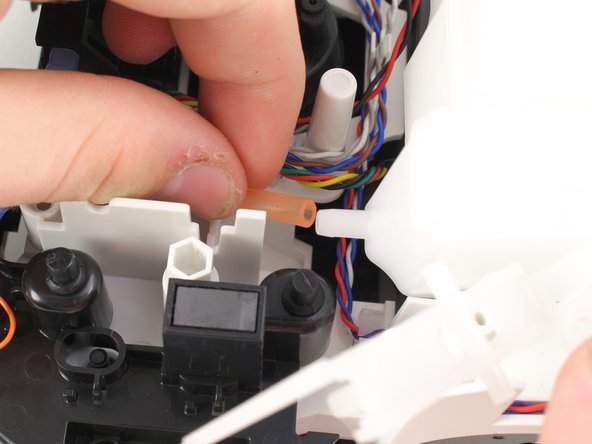
    • Lift up on the motherboard case to remove it from the device. This will expose the water tube that is attached to the tank.

  17. iRobot Braava Jet 240 Tank Replacement: 手順 17、 2の画像 1 iRobot Braava Jet 240 Tank Replacement: 手順 17、 2の画像 2
    • Pull the tubing off of the tank connector.

終わりに

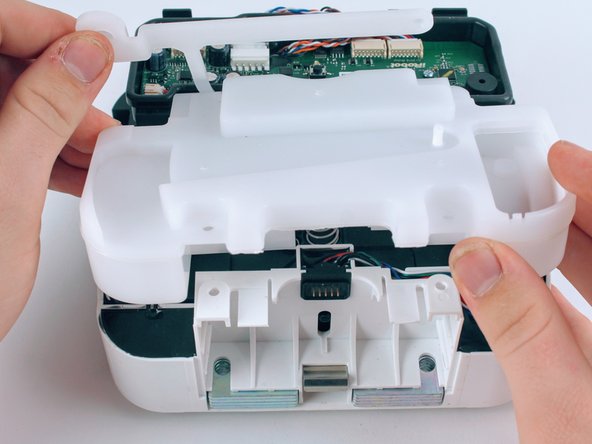
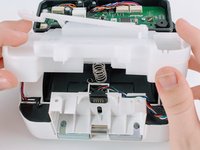
To reassemble your device, follow these instructions in reverse order.

3 の人々がこのガイドを完成させました。

作成者

5人の作成者と共同で作成されました。

Claire Franz

メンバー登録日: 02/10/20

2,772 ポイント

7のガイドは作成済み

チーム

Cal Poly, Team S22-G2, Regan Winter 2020 Cal Poly, Team S22-G2, Regan Winter 2020人のメンバー

CPSU-REGAN-W20S22G2

5 メンバー

12のガイドは作成済み

5 件のコメント

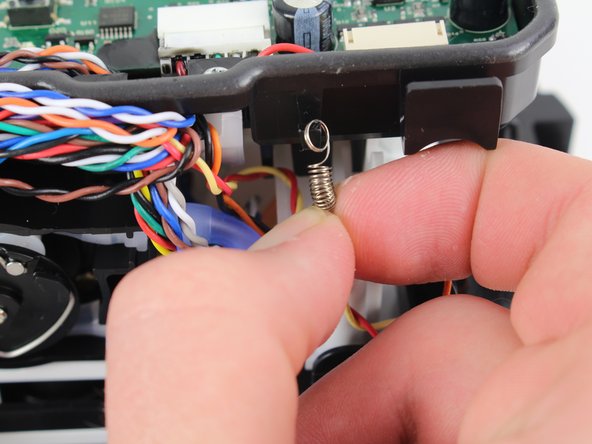
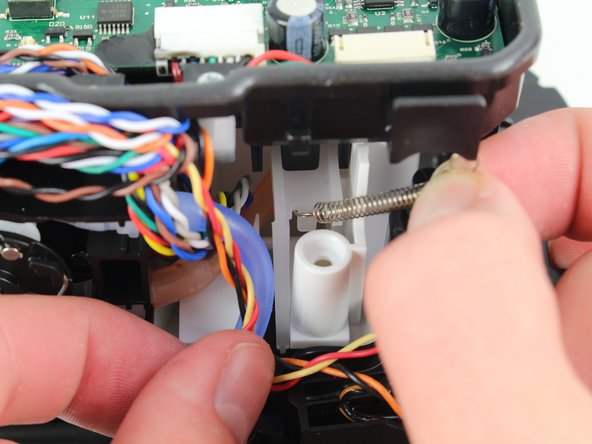
Good guide. I would suggest doing steps 13-16 before step 12 and a small hook (bent wire, staple or the like) makes reattaching the spring (step 15) a lot easier. Otherwise, perfect.

Gareth Thomas - 返信

Thanks Claire for this. I have an issue and maybe you can help with it. https://imgur.com/a/Nw3nxrM

Thanks!

Diego Cacivio - 返信

I agree with moving steps 13-16 before step 12. Two reasons. First, it may be easier to remove the water tube from the tank while the tank is fastened in place. Second, removal of the motherboard case is an important building block step that provides access to free-floating platform, motors, tubing, and magnetic pads. I am roughing out a guide for removing the motherboard case built on this guide that you might be able to use. Feel free to edit it if you'd like.

Elven Decker - 返信

it would be nice if someone has a way to add an external water bottle to give more water to the unit. Thanks

Sing LoveTo - 返信

Okay tank is out….question is how do you CLEAN it ?

Daniel Rafanowicz - 返信

コメントを追加

統計データ:

過去 24時間: 1

過去 7 日: 4

過去 30 日: 33

今までの合計 3,712