はじめに
このガイドを参照して、iPod Touch 第3世代の割れたディスプレイを交換しましょう。
必要な工具と部品
-
-
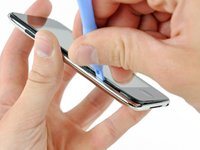
左の写真(フロントパネルは既に取り外し済み)は、プラスチックフレームに留められたメタル製クリップ(赤で表示)の位置を示しています。 次の手順では、これらのクリップ間の隙間からフロントパネルをこじ開けます。
-
-
-
-
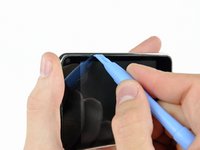
白いプラスチック製のバックライトとその下のメタルシールドの間に、開口ツールを差し込み、ディスプレイの下側に向けてこじ開けます。
-
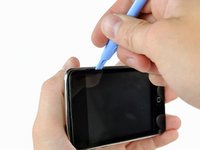
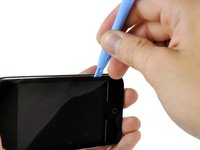
スクリーンを曲げないように注意しながら、指でディスプレイを十分に摘めるまでディスプレイの下端に沿ってこじ開けます。
-


デバイスを再度組み立てるには、この説明書の逆の順番で組み立ててください。
デバイスを再度組み立てるには、この説明書の逆の順番で組み立ててください。
74 の人々がこのガイドを完成させました。
以下の翻訳者の皆さんにお礼を申し上げます:
100%

これらの翻訳者の方々は世界を修理する私たちのサポートをしてくれています。 あなたも貢献してみませんか?
翻訳を始める ›

3 件のコメント
A few years ago, the screen of my iPod Touch was failing (at that time, I had left it to my son). I asked for a new display and the iPod came back up. Later we bought my son an iPhone, and the iPod left it to my daughter, but again the display failed again. I requested another display, but now only the "white screen of death" is displayed. It is heard that it turns on, but the display goes white and then goes out. I tried to reset it but there was no success. My MacBook recognizes, it can be seen on iTunes. Any suggestion?
Hii, when will these products be back in stock???
For iPod Touch 3rd Generation…