はじめに
iPod Nano 5th Generationのディスプレイを交換します。
必要な工具と部品
-
-
-
ヒートガンを使って、iPodの底側のプラスチック製ベゼルの下に留められた接着剤をほぐします。
-
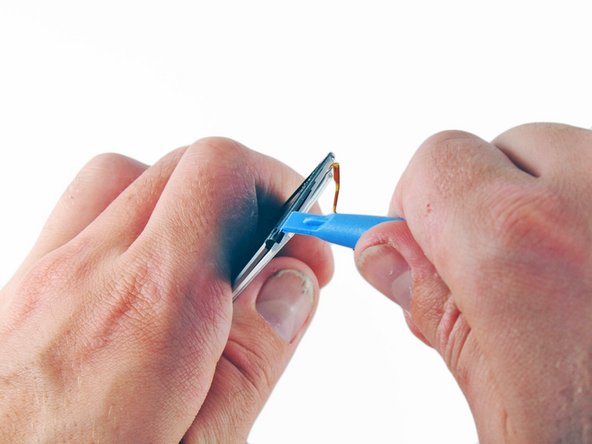
プラスチック製開口ツールを使って、iPodのケースからベゼルを持ち上げて外します。
-
-
-
ヒートガンを使って、カメラ/マイクカバーの下に留められた接着剤を柔らかくします。
-
メタル製スパッジャーを使って、ケースからカメラ/マイクカバーをこじ開けて、取り外します。
-


デバイスを再組み立てする際は、これらの手順を逆の順番に従って作業を進めてください。
デバイスを再組み立てする際は、これらの手順を逆の順番に従って作業を進めてください。
31 の人々がこのガイドを完成させました。
以下の翻訳者の皆さんにお礼を申し上げます:
100%

これらの翻訳者の方々は世界を修理する私たちのサポートをしてくれています。 あなたも貢献してみませんか?
翻訳を始める ›

9 件のコメント
Re-assembly is kind of the reverse of disassembly, but replacing some of the glue may be required, particularly for the camera/mic cover. Sliding the logic board into the housing is an exercise in considerable care - the display ribbon, the speaker ribbon, various bits of yellow tape, all can snag on the lugs around the clickwheel hole, or the camera/mic holes.
what type of glue would you recommend?
Help my ribbon for hold switch fell off!!! Will it still work without the hold switch connected?
Cristna007 - 返信
I used a cigarette lighter instead of heat gun and worked like a charm.
Sadly my ipod was full of glue and it was not possible to replace the display and broke it. :-(