はじめに
iPodケースをピカピカの背面にします。
必要な工具と部品
-
-
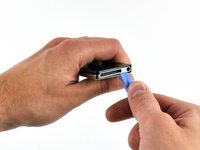
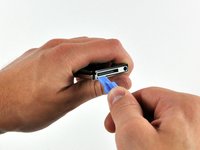
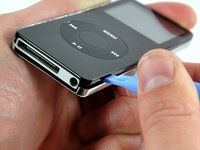
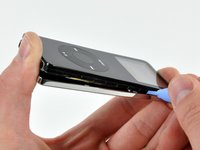
大型のiPodオープニングツールを、iPodの正面ケースとリアパネルの間の継ぎ目、ドックコネクターの下に挿入します。工具を前後に動かして開口部を作ります。工具のエッジはリアパネル側に向けるようにし、アルミニウム製正面ケースに傷がつかないようにしてください。
-
-
-
-
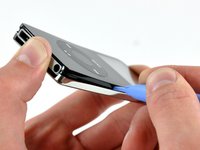
リアケースに取り付けられた2つのタブのそれぞれ近くの隙間に小型のiPodオープニングツールを押し込み、クリップをiPodの中心に向かって押し、両方が解放されるまで待ちます。
-


終わりに
デバイスを再度組み立てるには、この説明書の逆の順番で組み立ててください。
19 の人々がこのガイドを完成させました。
以下の翻訳者の皆さんにお礼を申し上げます:
en jp
100%

これらの翻訳者の方々は世界を修理する私たちのサポートをしてくれています。 あなたも貢献してみませんか?
翻訳を始める ›
