はじめに
iPhone 5のスクリーンを交換する方法です。このパーツはフロントカメラ、イヤピーススピーカーとLCDシールドプレートが既にインストールされています。そのため修理が簡単です。
必要な作業は、古いスクリーンを取り出して、ホームボタンを新しいスクリーンに移植することです。
スクリーンの交換が終わったら、スクリーンプロテクターをインストールして、傷からスクリーンを保護しましょう。
必要な工具と部品
ビデオの概要
-
-
使用するツールに関係なく、ディスプレイ全体を引き上げなければなりません。
-
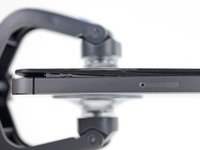
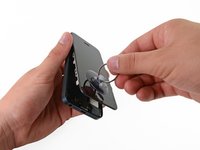
最初の画像の通り、ガラスがプラスチックから外れたら、プラスチック製の開口ツールをフレームとメタルボディの間に差し込み、ケースからメタルクリップを押し上げます。
-
-
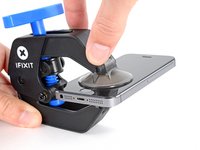
この手順で使用する道具:Clampy - Anti-Clamp$24.95
-
青いハンドルをヒンジ側に引いて、リバースクランプのアームのロックを解除します。
-
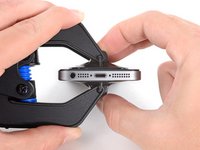
iPhoneの左/右側の端に向けてアームをスライドします。
-
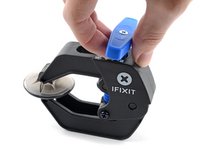
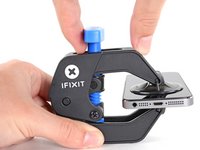
吸盤カップをiPhoneの下端付近に装着します。上部に一つ、下部に1つずつ取り付けます。
-
吸盤カップ両側をしっかりと締め合わせると、標的の場所にしっかりと装着させることができます。
-
-
-
-
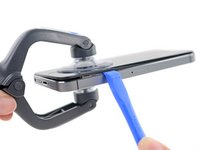
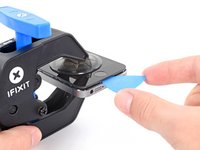
iPhone を片手でしっかりと抑えながら、吸盤カップを本体背面ケースからフロントパネルを丁寧に引き離していきます。
-
プラスチックの開口ツールを使うと吸盤カップを上に引き上げながらゆっくりとスクリーンを本体から離すことができます。
-
-
-
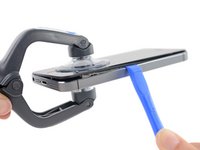
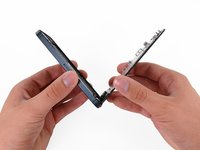
クリップがフロントパネルの下と両サイドから外れたら、アセンブリの下を引っ張り背面ケースから外します。
-
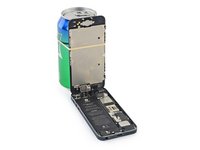
ディスプレイを90度まで開きます。開いて固定したまま作業するため、後ろに衝立を用意して立てかけてください。
-
ディスプレイが作業中閉じないように、ゴムを使って衝立に固定してください。これはディスプレイケーブルが過度な力で引っ張られないようにするためです。
-
-
-
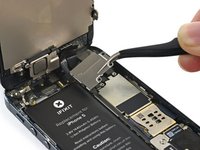
ロジックボードに留められているメタル製バッテリーコネクターブラケットから次のネジを2本外します。
-
1.8 mmプラスネジー1本
-
1.6 mmプラスネジー1本
-
-
-
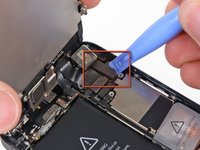
フロントパネルのケーブルブラケットが本体ボードにあることを確認してから次のネジを外します。
-
1.2mmのプラスネジー2本
-
1.6mmのプラスネジー1本
-
-
-
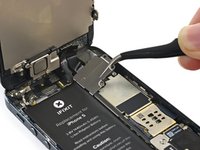
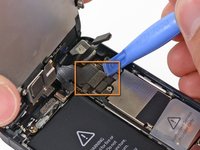
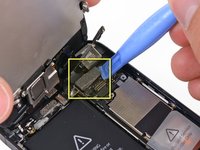
プラスチックの開口ツールもしくは爪先を使って、次の3つのフロントパネルアセンブリケーブルを外します。
-
正面カメラとセンサーケーブル
-
LCDケーブル
-
デジタイザーケーブル
-


デバイスを再組み立てする際は、このインストラクションを逆の順番に従って作業を進めてください。
デバイスを再組み立てする際は、このインストラクションを逆の順番に従って作業を進めてください。
889 の人々がこのガイドを完成させました。
以下の翻訳者の皆さんにお礼を申し上げます:
100%

これらの翻訳者の方々は世界を修理する私たちのサポートをしてくれています。 あなたも貢献してみませんか?
翻訳を始める ›

38 件のコメント
My brother in-law had water damage to his screen and the carrier was going to charge him and arm and a leg for a new phone so I ordered the complete display assembly from right here on iFixit that came with all the necessary tools. Took me a little over 5 minutes between repairing and chit chat to finish. It was a really easy repair and my brother in-law was never happier to have his phone back at a fraction of the cost the carrier was quoting.
Thanks for your guide for replace new touch screen
i had save one tiny screw from inside assembally :) :) :)
nilesh2411 - 返信
My display didn't shut down when i have a call and i put the phone near my ear! I plug my broken display and it work well but not the new one...please someone help! btw thanks for the guide and for the fast delivery
I know you posted this awhile ago, but if anyone else is wondering, how to fix the issue where the display won't turn off while on a phone call, You MUST transfer over the small plastic retaining brackets from the old display, and put them in the correct position! By correct position, I mean the two small transparent points need to line up with the receptors on your iPhone's front panel assembly (Camera, light sensor, mic).
This one is for Max:
Max, can you explain better what you mean by plastic retaining brackets? I'm about to swap my screen out and I wanna be able to do this