はじめに
このガイドにしたがって、iPad Pro 11インチ第4世代のスクリーンを交換します。第1世代から第4世代まで、ロジックボードとの接続方法についてはスクリーンの設計はほとんど変更されていません。これは、11インチのiPad Proに合う画面の交換部品であれば概ね動作することを意味します。
バッテリーが膨張している場合は、予防措置を講じてください。
スクリーンに取り付けられているLiDARセンサーアセンブリは、Face IDのハードウェアと関連付けられています。Face ID機能を維持するために、この部品を新しいスクリーンに移植する必要があります。
必要な工具と部品
-
-
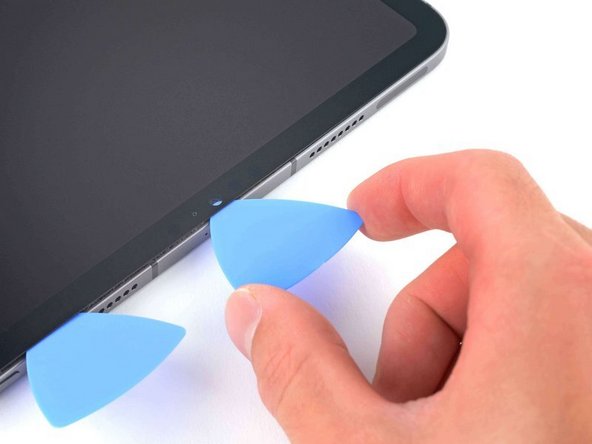
画面の下端から約5cmの右端に吸盤を張り付けます。
-
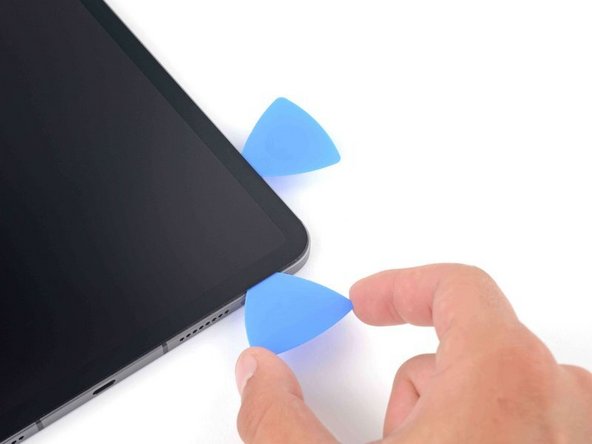
しっかりとした一定の力で吸盤を引き上げて、iPadにオープニングピックを5mmを超えないくらい挿入するのに十分な大きさの隙間を作ります。
-
役に立つと思うなら、挿入する前に、オープニングピックに深さ5mmの線をシャープペンシルなどで書いてください。
-
-
-
この色は、周囲光センサーの位置を示しています。センサーの損傷を避けるために、オープニングピックを2mm以上挿入しないでください。
-
この色は、カメラモジュール、近接センサー、マイクの位置を示します。損傷を避けるために、オープニングピックを1mm以上挿入しないでください。
-
-
-
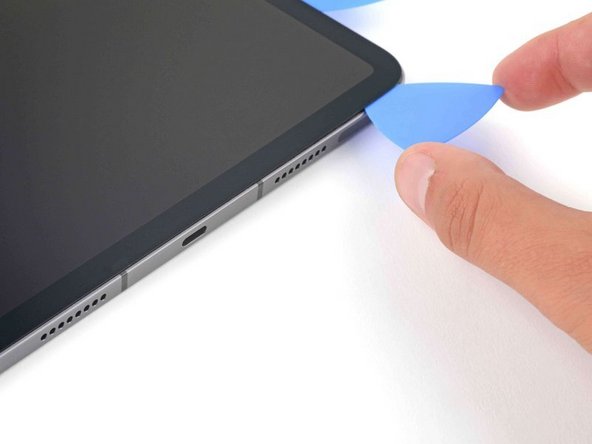
左#2から角を曲がったところにオープニングピック#3を挿入します。
-
ピック#3を取り、上端に沿ってピックをスライドさせます。前の手順でリストされたパーツの予防措置を講じます。
-
左上隅近くの環境光センサーの右側にピック#3を残します。
-
-
-
-
この色は、ディスプレイケーブルがフレームの小さなくぼみのどこにあるかを示します。ベストプラクティスは、ピックを45度の角度で挿入することです。
-
この色は、フレームの平らな部分がどこにあるかを示します。これらのセクションでは、ピックを水平にする必要があります。
-
-
-
残りの接着剤を分離します。
-
ピックを45度の下向きの角度でスライドさせ、ピックを5mm以上挿入しないでください。
-
ピックを水平にスライドさせ、5mm以上挿入しないでください
-
-
-
さらに別のオープニングピックを使用して、接着剤が残っているかどうかを確認します。
-
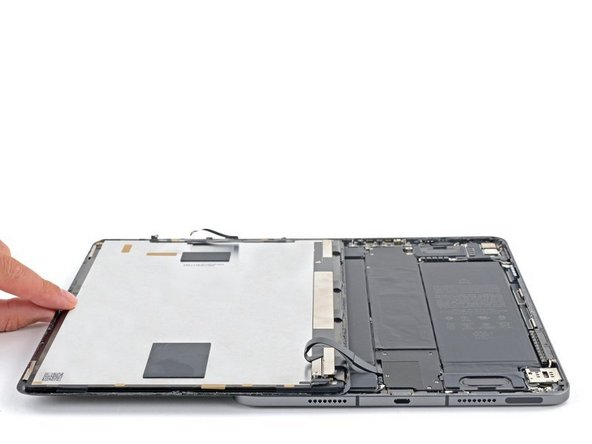
画面の右上隅と左下隅を刻み、画面を右下に向かってゆっくりと動かします。
-
上端付近の環境光センサーリボンケーブルが覆われるまで、画面を動かし続けてください。
-
-
-
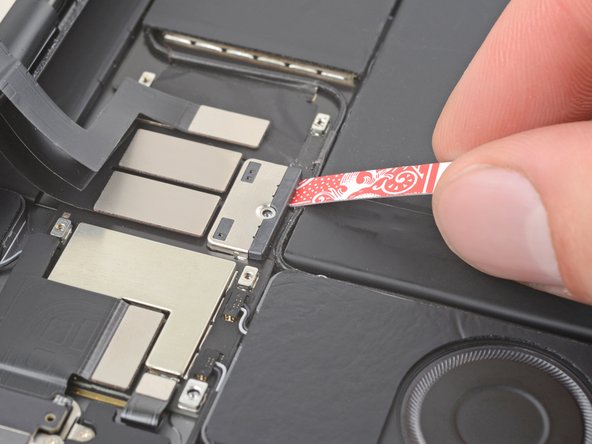
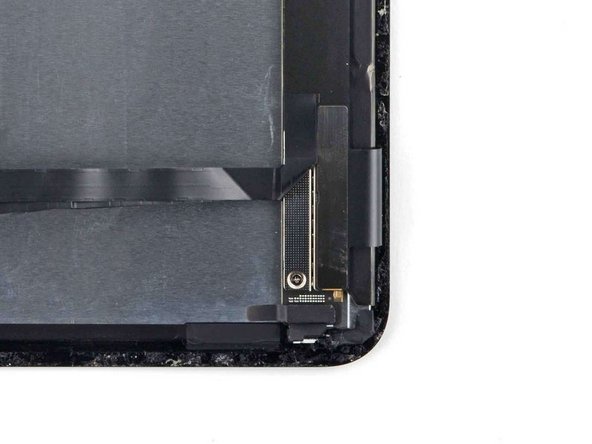
プラスドライバーを使用して、ケーブルシールドをロジックボードに固定している5本のネジを取り外します。
-
2本の2.0mmネジ
-
3本の1.3mmネジ
-
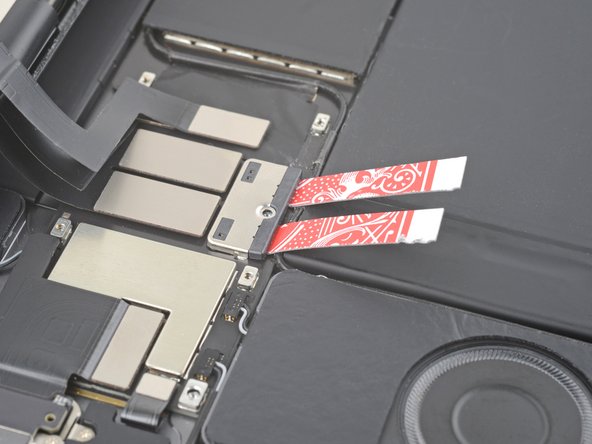
ピンセットまたは指を使って、下のケーブルシールドをつかんで取り外します。
-
-
-
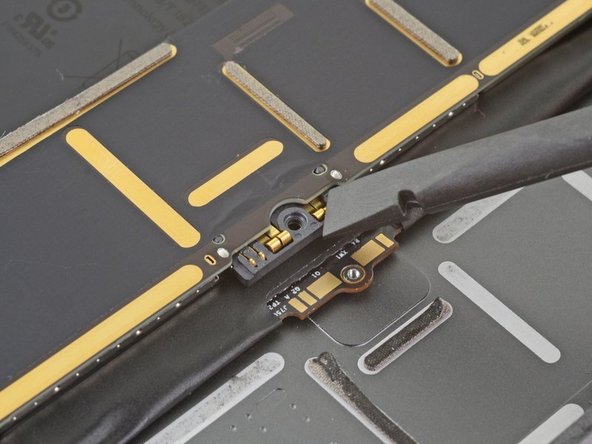
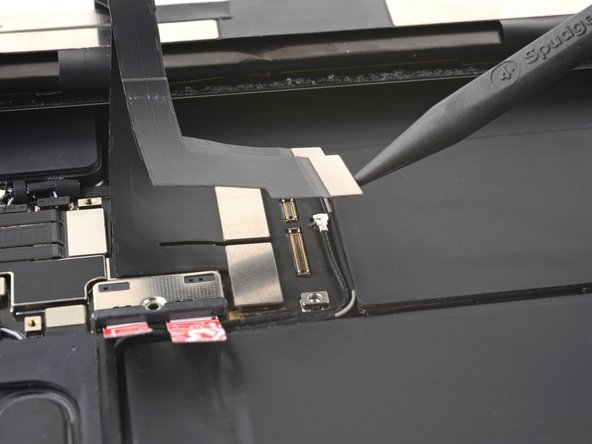
スパッジャーの尖った端を使用して、下部の2つのディスプレイケーブルを取り外します。
-
スパッジャーの尖った端を使用して、上部の2つのディスプレイケーブルを取り外します。
-
-
-
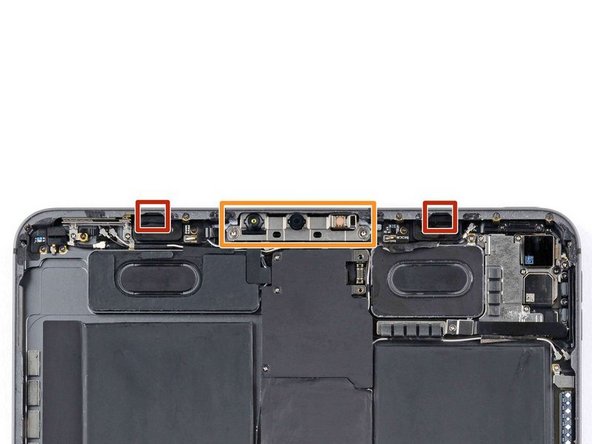
環境光センサー (2)
-
マイク
-
近接センサー
-
これらのセンサーを接続するリボンケーブルは非常に薄くて繊細です。時間をかけて取り外しに注意してください。
-
iOpenerを準備します。ディスプレイの上部に2分間置いておきます。
-
-
-
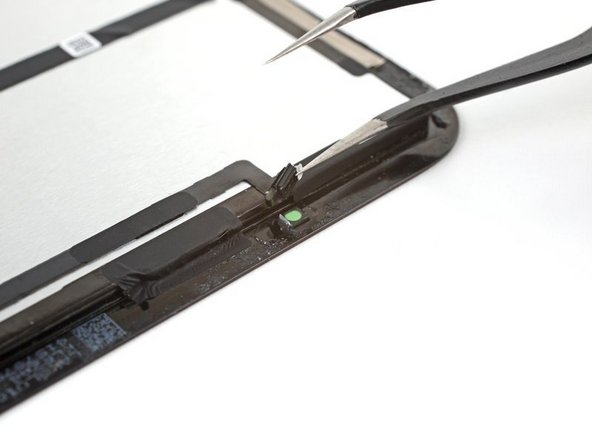
一対のピンセットを使用して、環境光センサーと画面の間に片腕を挿入します。
-
センサーを画面からそっとこすり上げます。これにはかなりの力がかかるかもしれません。
-
他の環境光センサーでこれらの手順を繰り返します。
-
-
-
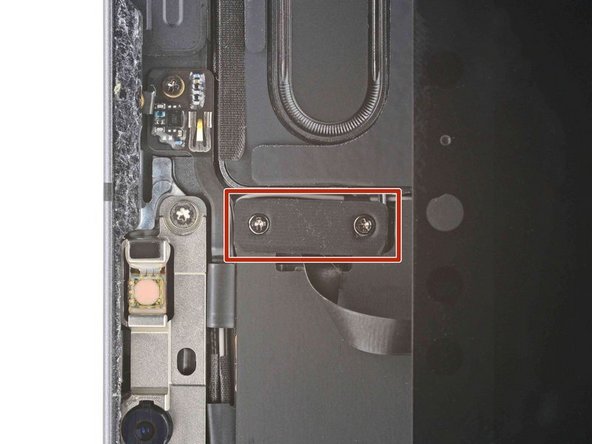
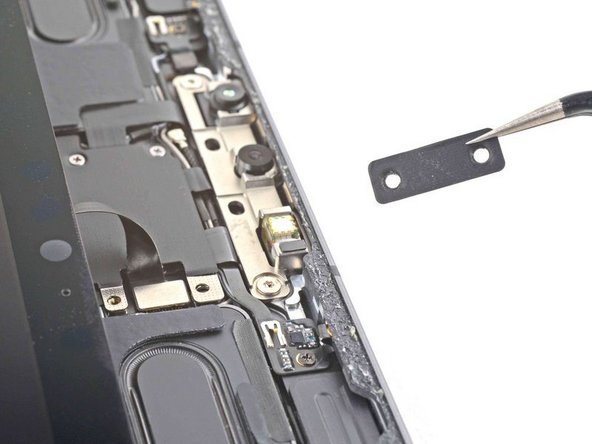
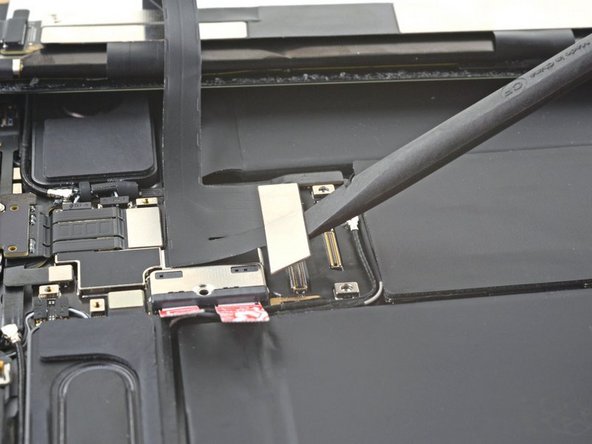
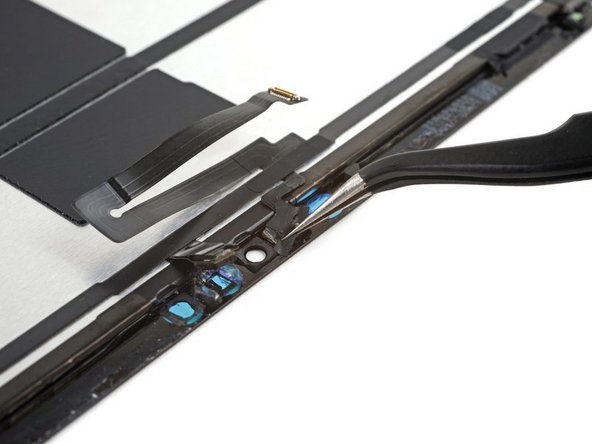
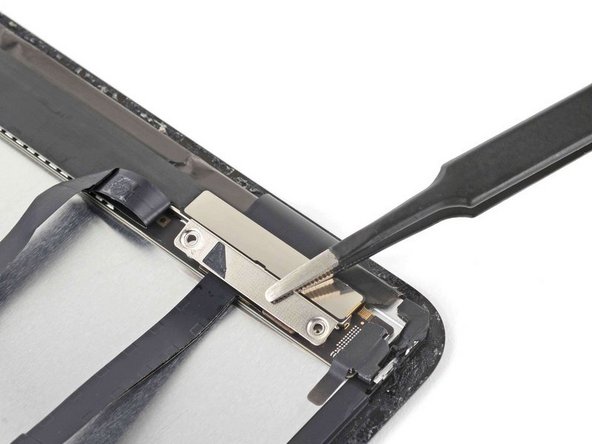
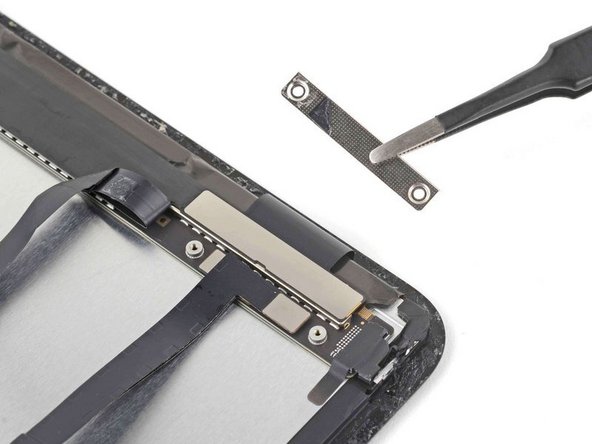
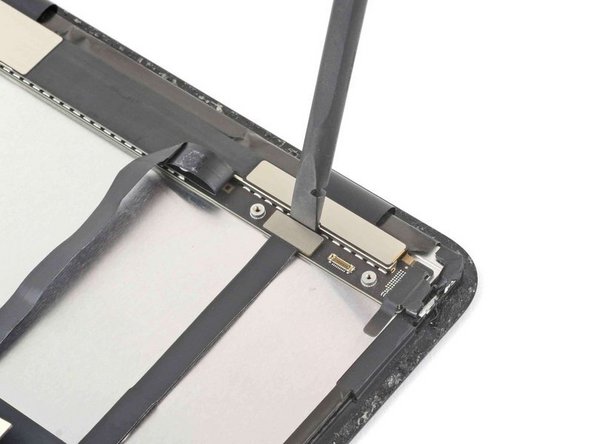
プラスドライバーを使用して、ディスプレイケーブルブラケットをスコアリングする2本の1.2mmネジを取り外します。
-
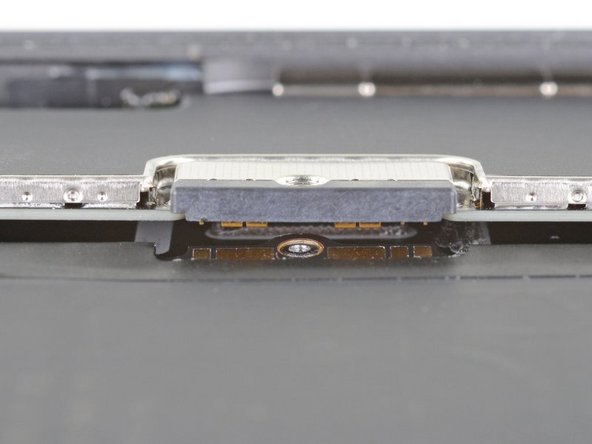
一対のピンセットを使用して、下部のディスプレイケーブルブラケットを取り外します。
-
-
-
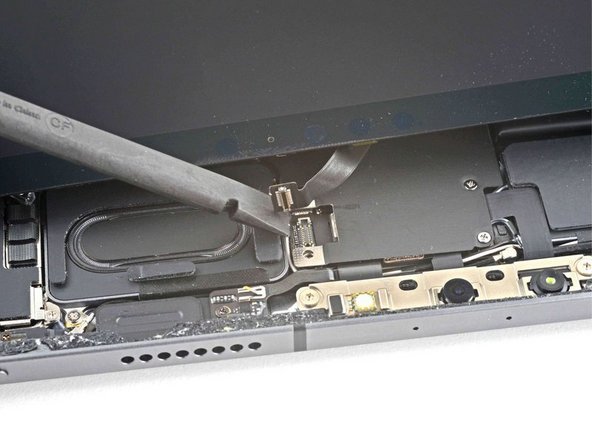
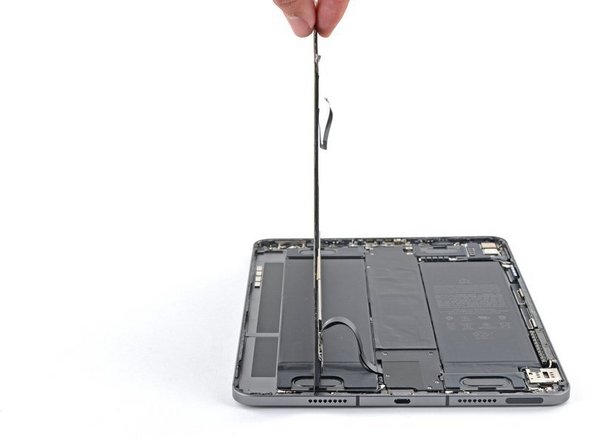
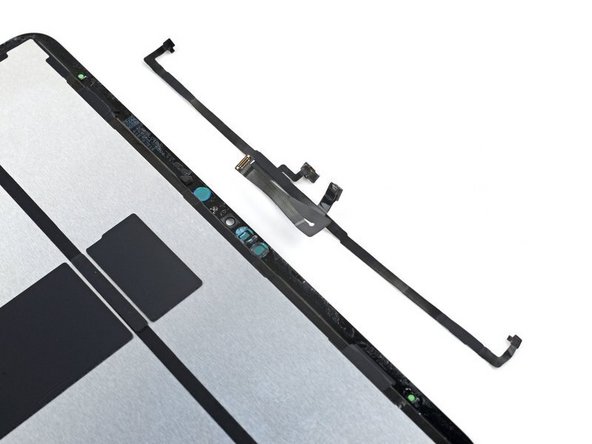
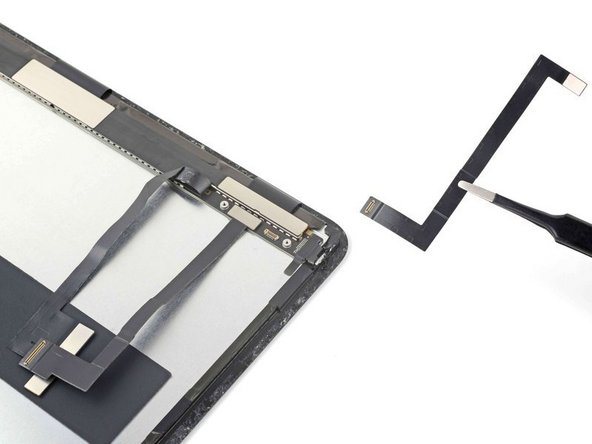
スパッジャーの平らな端を使用して、狭いディスプレイケーブルをこじて取り外します。
-
新しいディスプレイに接続するには、ケーブルを脇に置いてください。
-
より広いディスプレイケーブルでこのプロセスを繰り返します。
-


端末を組み立てるためには、この指示を逆順に実施してください。
端末を組み立てるためには、この指示を逆順に実施してください。
5 の人々がこのガイドを完成させました。
以下の翻訳者の皆さんにお礼を申し上げます:
100%


これらの翻訳者の方々は世界を修理する私たちのサポートをしてくれています。 あなたも貢献してみませんか?
翻訳を始める ›

チーム
