はじめに
このガイドを参照して、お持ちのiPad Mini 2 Wi-Fiの故障したバッテリーを取り外して交換しましょう。
バッテリーが膨張している場合、適切な予防処置をとってください。
必要な工具と部品
-
-
鍋を十分な量のお湯で満たして、iOpener を完全に沈めます。
-
お湯を沸かして熱くなったら火を止めます。
-
iOpenerを熱湯の中に約2−3分間沈めます。iOpener全体が完全に浸かっているか確認してください。
-
トングなどを浸かって、温まったiOpenerをお湯から取り出します。
-
タオルでiOpener全体を拭き取ります。
-
iOpenerの準備は整いました。iOpenerを再度温める必要がある場合は、お湯を沸騰させて、火を止めてからiOpenerを2-3分間浸してください。
-
-
-
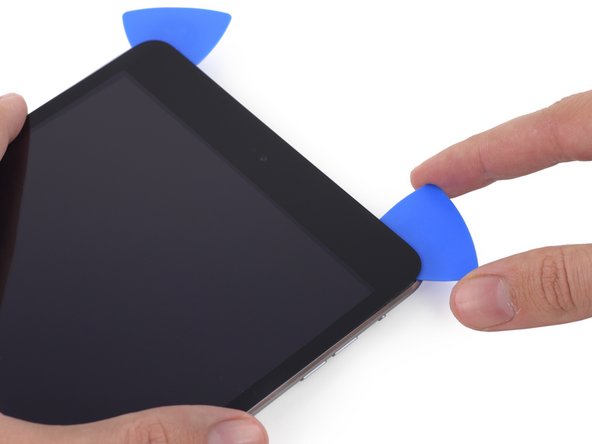
ディスプレイガラスにひびが入っている場合は、ガラス表面にテープを貼り,修復中に怪我をしないように注意してください。
-
iPadのディスプレイの表面全体が覆われように、透明テープを重ね張りします。
-
残りも手順通りに作業をしますが,ガラスが割れてしまうと,ひび割れが広がってしまいます。その場合,金属製のヘラなどを使用する必要があるかもしれません。
-
-
-
-
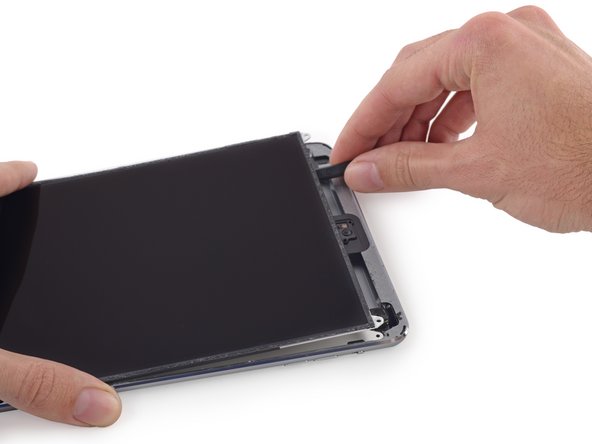
全ての接着がはがれたら、前面ガラスを本のページをめくるように開き作業台に置きます。
-
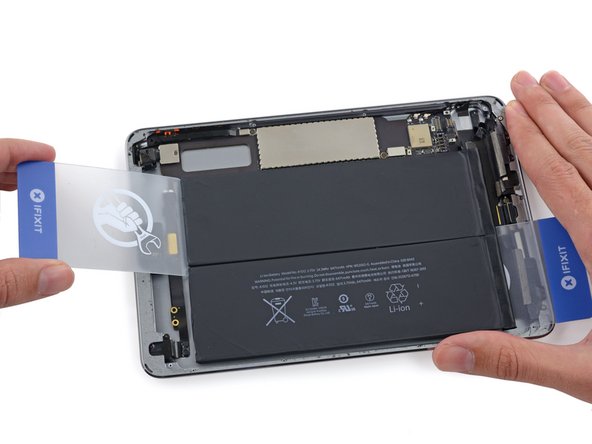
フロントパネルアセンブリを再利用して再組み立てする際は、ディスプレイ用の接着剤を交換してください。ディスプレイ用の接着剤塗布ガイドを参照して、デバイスに接着剤を再装着してから、本体を密封します。
-


デバイスを再度組み立てるには、この説明書の逆の順番で組み立ててください。
デバイスを再度組み立てるには、この説明書の逆の順番で組み立ててください。
86 の人々がこのガイドを完成させました。


15 件のコメント
I was able to change the battery but I will say the hardest part was heating the screen to get it off. The guide was great.
I have just installed replacement battery in iPad mini 2. Changing for about 2-1/2 hours only shows logo, and slightly warm.
battery shows same markings as original, I have also recently done iPhone 5 and Nexus 7 , both went well,. I'm concerned something is wrong with this installation, can anyone advise? Many thanks
Ross
Just completed my first attempt to replace the battery. All went well following the instructions here, but the photos could use some loving when it comes to some red arrows pointing to specific points. Also a little better contrast of separation points like adhesive tape areas and the lcd shield. other than that this was not to hard for me to complete especially with all of the added comments by others throughout the steps.
Next is the reverse process once I do some cleaning and prepare the replacement adhesive strips.
I would have really found it useful to have some detailed guidance on how to reapply the adhesive. The adhesive strips are packaged in such a way that it actually makes applying them much more difficult… unless there’s some trick that I couldn’t figure out. Hence, the value of some instructions.
The sheet with the adhesives has a clear cover over the side of the strips that adheres to the glass, with a blue cover strip and tab for easy removal on the side that adheres to the body. This would lead you to believe that you should adhere it to the glass first, and then press the glass onto the body. But the adhesive has many notches and curves and if you don’t get them aligned on the glass correctly, they could cover the light sensor or camera, interfere with the button, etc. Thus it seems you have to first stick it to the body, meaning you have completely exposed double-sided adhesive that you’re wrestling with, sticking to itself, etc.
If this is NOT how it’s done, some instructions would seem necessary.