はじめに
この修理ガイドの手順に従って、iMac Intel 21.5インチ EMC 3068のSATAハードドライブを交換するか、アップグレードをします。ドライブをアップグレードする場合、ファイルやOSシステムを保つため、アップグレードを行う前に、必ず 現存のハードドライブを複製してください。
このガイド中の画像は2015年iMacモデルを使用しています。そのため、若干の見た目の違いはありますが、リペア作業に影響はありません。
必要な工具と部品
-
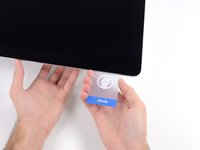
この手順で使用する道具:iMac Intel 21.5" Cardboard Service Wedge$4.99
-
iFixitの梱包用ボックスを使ってウェッジ用サポートを作ることができます。こちらから組み立てガイドを参照してください。
-
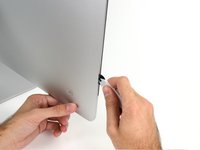
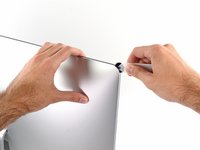
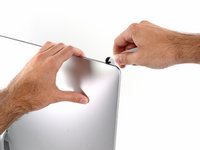
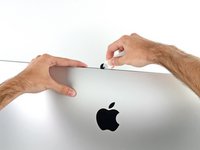
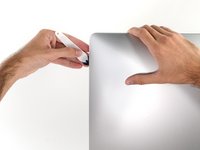
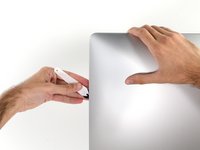
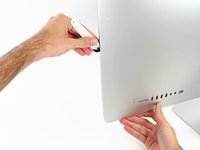
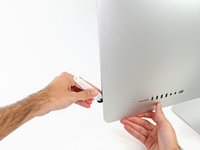
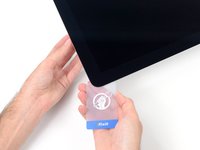
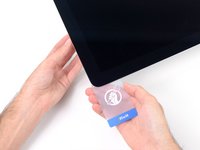
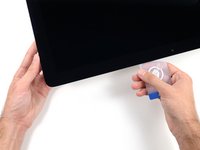
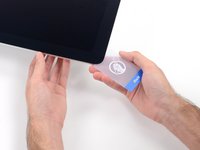
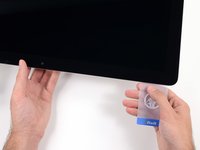
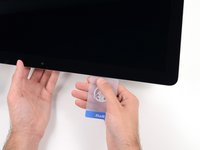
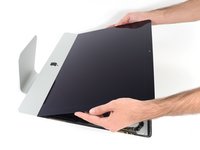
iMacの作業を始める前に、コンピューターの電源を外して電源のキャパシタを放電するため約10秒間電源を押し続けてください。
-
-


デバイスを再組み立てする際は、これらの手順を逆の順番に従って作業を進めてください。
デバイスを再組み立てする際は、これらの手順を逆の順番に従って作業を進めてください。
27 の人々がこのガイドを完成させました。
以下の翻訳者の皆さんにお礼を申し上げます:
100%

Midori Doiさんは世界中で修理する私たちを助けてくれています! あなたも貢献してみませんか?
翻訳を始める ›

3 件のコメント
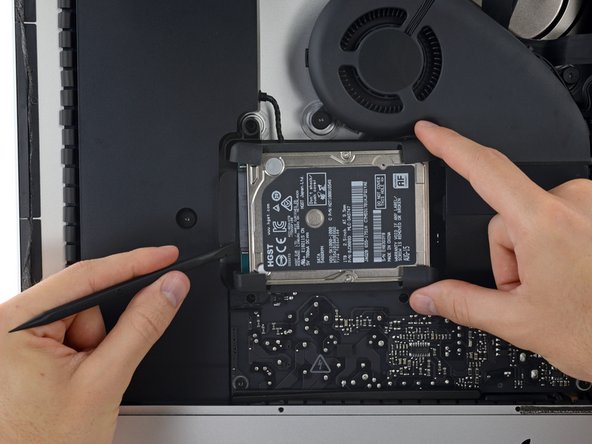
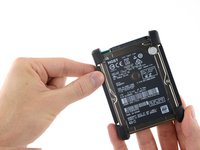
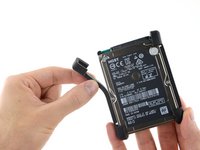
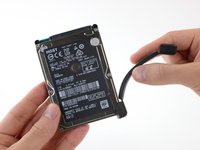
This tutorial is excellent but has the final step missing: how to replug the SATA connector given that it is stuck under the storage bay.
I had to unscrew the storage bay to be able to replug the SATA connector and follow the tutorial in reverse to finish it.
Don't try to remove the left speaker as it requires to remove the CPU fan first which adds extra steps to the process.
The most difficult part of the whole process was connecting the new HD to the connector (even if not stuck under the bay). There's not enough slack in the connector's cabling to allow use of one's fingers. It took me 20 minutes and the use of a couple of wooden popsicle sticks and a spudger to eventually nudge it in place. Otherwise, great tutorial Adam O'Camb!
2020 kaufte ich mir einen iMac 21,5 Zoll einfachste Ausführung (8GB RAM, 2,3 GhZ). Der Computer brauchte mindestens 65 Sekunden, um Applikationen hochzuladen, was die Arbeit mit dem Computer nahezu unmöglich machte. Letzte Woche habe ich die HDD-Festplatte dank des Reperatur-Kits von ifixit ausgetauscht. Seitdem funktioniert der Computer mühelos. Applikationen, Dokumente, Bilddateien lassen sich unter einer Sekunde öffnen. Man bekommt schon das Gefühl einen neuen iMac gekauft zu haben! Ich kann das Reperatur-Kit samt Anleitung nur wärmstens empfehlen. Hierbei ist allerdings zu beachten, dass die Reparatur genaustens nach Anleitung durchgeführt werden sollte. Kleiner Tipp: Wenn die Schrauben von dem Lautsprecher gelöst werden, lässt er sich leicht nach links verschieben. Damit ist das SATAkabel leichter zugänglich! Viel Erfolg!