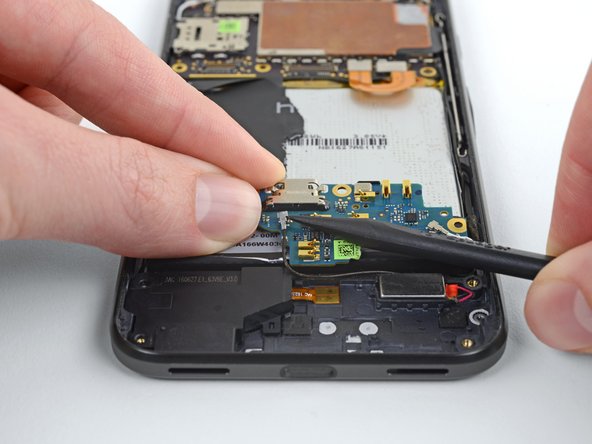
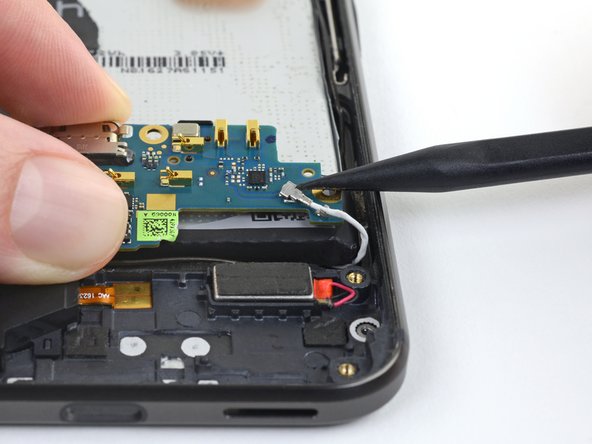
メインコンテンツにスキップ

Google Pixel Daughterboard Replacement

英語
日本語

手順 8を翻訳中

手順8
Google Pixel Daughterboard Replacement: 手順 0、 3の画像 1 Google Pixel Daughterboard Replacement: 手順 0、 3の画像 2 Google Pixel Daughterboard Replacement: 手順 0、 3の画像 3
  • Use a spudger to pry up the black and white coaxial cables attached to underside of the daughterboard.

  • Coaxial cable connectors and sockets are fragile. To avoid damaging the connectors, be sure to gently pry them straight off of the board.

  • When reconnecting these cables, lay the daughterboard upside down on the battery and use tweezers to carefully position each connector over its socket on the board, then press it straight down until it snaps into place.

ここに翻訳を挿入する

ここに翻訳を挿入する

ここに翻訳を挿入する

クリエイティブコモンズのオープンソース著作権のもと、あなたの投稿は著作権の対象となります