手順 2を翻訳中
手順2


-
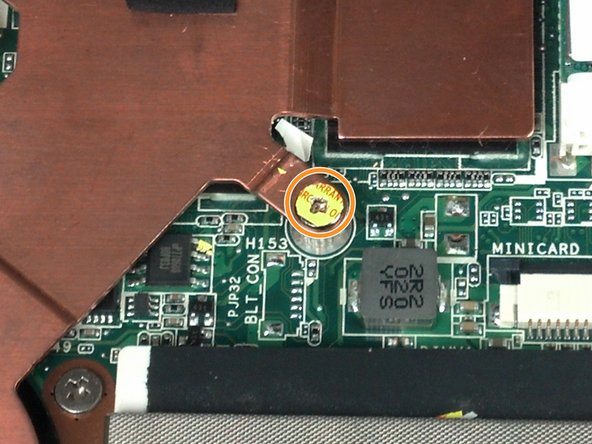
An additional 3.76 mm Phillips screw is hidden under the seal that reads, "WARRANTY VOID IF SEAL BROKEN OR REMOVED." Remove this sticker to access the screw.
-
Use a Phillips #0 screwdriver to remove the screw.
クリエイティブコモンズのオープンソース著作権のもと、あなたの投稿は著作権の対象となります。