メインコンテンツにスキップ

Logitech Harmony 1100 Screen Replacement

ご注意:あなたは前提となるガイドを編集しています。あなたが行なう変更は、この手順を含むガイド全体に反映されます。

英語
日本語

手順 2を翻訳中

手順2
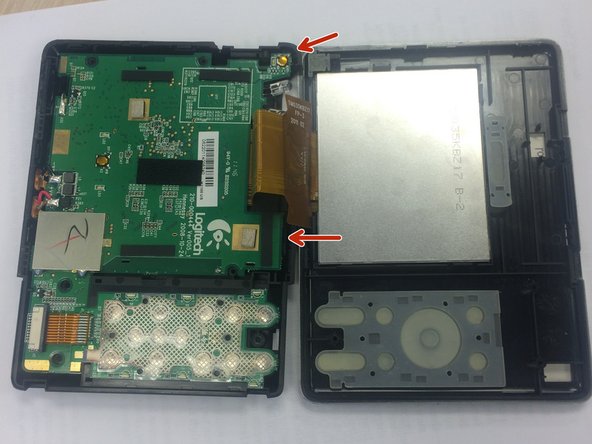
Logitech Harmony 1100 Screen Replacement: 手順 0、 2の画像 1 Logitech Harmony 1100 Screen Replacement: 手順 0、 2の画像 2
  • Use PH00 Phillips head from the iFixit Tool Kit to remove 3 screws from the circuit on the back half of the device.

  • Flip over the larger circuit board to the left.

  • Use the edge of the circuit board to flip the board over.

  • The connector port in the top right corner may make removal difficult. Lift the logic board above the screw ports, and the connector port should slide out easily.

ここに翻訳を挿入する

ここに翻訳を挿入する

ここに翻訳を挿入する

ここに翻訳を挿入する

クリエイティブコモンズのオープンソース著作権のもと、あなたの投稿は著作権の対象となります