メインコンテンツにスキップ

Sony Handycam DCR-HC30 LCD Screen Replacement

英語
日本語

手順 4を翻訳中

手順4
Sony Handycam DCR-HC30 LCD Screen Replacement: 手順 0、 3の画像 1 Sony Handycam DCR-HC30 LCD Screen Replacement: 手順 0、 3の画像 2 Sony Handycam DCR-HC30 LCD Screen Replacement: 手順 0、 3の画像 3
  • Ensure that you are gentle when handling the parts of the board within. Even small mistakes can permanently damage the board.

  • While holding the entire LCD screen unit in the palm of your hand use your thumb and forefinger to grasp the big ribbon and gently wiggle it out of its housing.

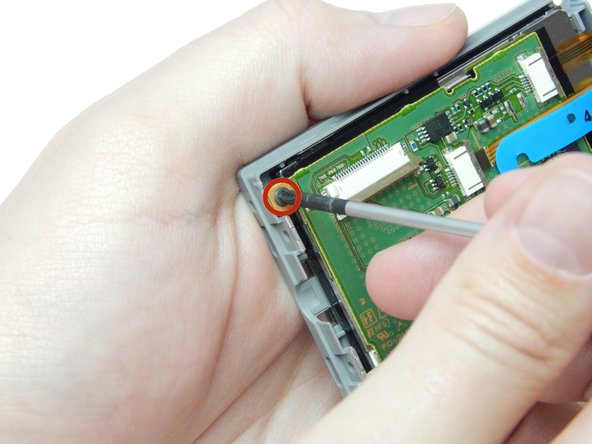
  • Remove the one screw that holds the board onto the back of the LCD screen unit.

ここに翻訳を挿入する

ここに翻訳を挿入する

ここに翻訳を挿入する

クリエイティブコモンズのオープンソース著作権のもと、あなたの投稿は著作権の対象となります