メインコンテンツにスキップ

ZTE Axon 7 Screen Replacement

英語
日本語

手順 4を翻訳中

手順4
ZTE Axon 7 Screen Replacement: 手順 0、 3の画像 1 ZTE Axon 7 Screen Replacement: 手順 0、 3の画像 2 ZTE Axon 7 Screen Replacement: 手順 0、 3の画像 3
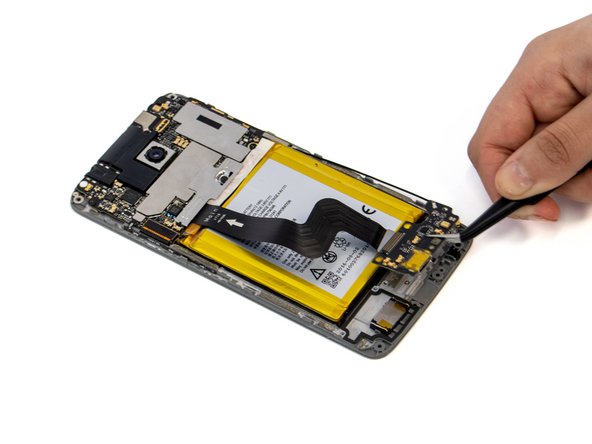
  • Use a spudger to pry under the USB-C board and lift it from the chassis.

  • There is adhesive underneath the charging port so work the spudger around the perimeter of the USB-C board to ease it out before trying to remove it fully.

ここに翻訳を挿入する

ここに翻訳を挿入する

クリエイティブコモンズのオープンソース著作権のもと、あなたの投稿は著作権の対象となります