メインコンテンツにスキップ

任天堂 Switch Joy-Con コントロールスティックの交換

英語
日本語

手順 5を翻訳中

手順5
Nintendo Switch Joy-con Control Stick Replacement, Removing the battery compartment.: 手順 0、 3の画像 1 Nintendo Switch Joy-con Control Stick Replacement, Removing the battery compartment.: 手順 0、 3の画像 2 Nintendo Switch Joy-con Control Stick Replacement, Removing the battery compartment.: 手順 0、 3の画像 3
Removing the battery compartment.
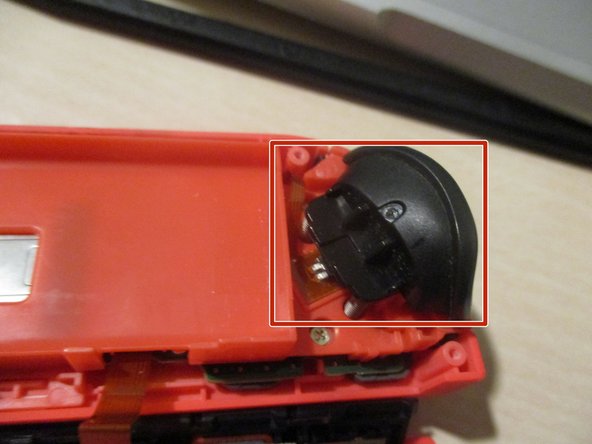
  • remove the ZR button and its springs. Be careful not to break the clips holding it in place.

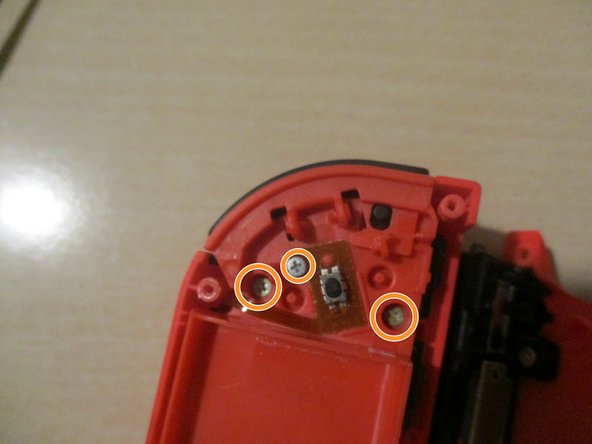
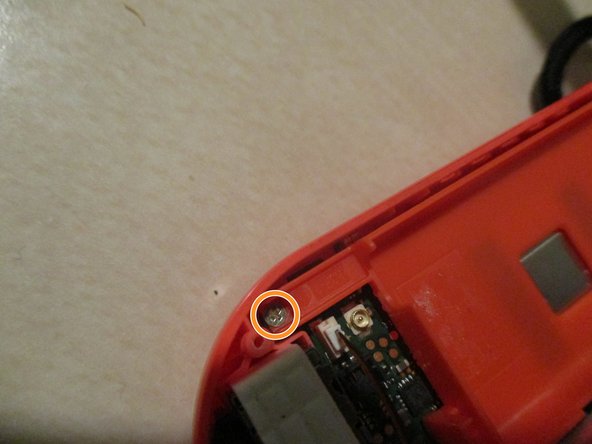
  • unscrew the four PH000 screws holding the battery compartment and the ZR button board. There is one hidden on the side of the hd rumble module.

  • The screw of the ZR button board is shorter than the others. Keep that in mind if you are sorting the screws using a magnetic project mat or the cover of a Mako driver kit

  • Pick up the battery compartment.

ZRボタンとバネを外します。固定しているクリップを壊さないようにご注意ください。

バッテリーコンパートメントとZRボタンボードを固定しているPH000ネジを4本外してください。HDランブルモジュールの横に1本のネジが隠れています。

ZRボタンボードのネジは他のネジに比べると短くなっています。マグネット製プロジェクトマットMakoドライバーキットの蓋カバーなどを使用して、ネジの管理をしてください。

バッテリーコンパートメントを外します。

クリエイティブコモンズのオープンソース著作権のもと、あなたの投稿は著作権の対象となります