メインコンテンツにスキップ

任天堂 Switch Joy-Con コントロールスティックの交換

英語
日本語

手順 6を翻訳中

手順6
Nintendo Switch Joy-con Control Stick Replacement, Removing the joystick: 手順 0、 2の画像 1 Nintendo Switch Joy-con Control Stick Replacement, Removing the joystick: 手順 0、 2の画像 2
Removing the joystick
  • Unscrew the two PH000 screws holding the joystick down.

  • Make sure to NOT disconnect the two side board cables. It may cause fatal damage to the controller.

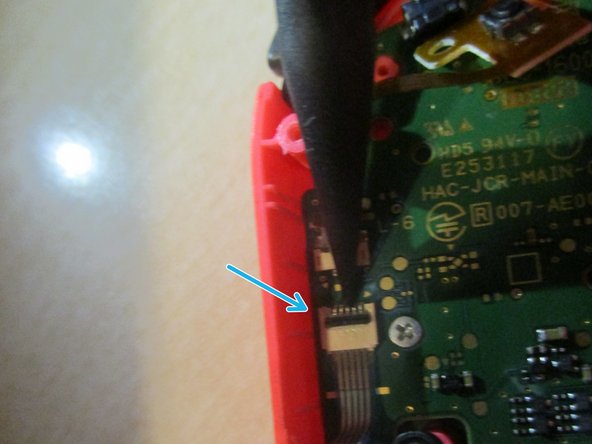
  • Before you remove the joystick, remove the secured ribbon cable by opening the clip using the tip of a spudger.

  • Note that there is a small gasket below the joystick and that it has to be re-seated in place before inserting the new joystick.

Joystickを固定しているPH000ネジを3本外します。

両側のサイドボードケーブルの接続を外さないでください。 コントローラに致命的な損傷を引き起こす可能性があります。

Joystickを外す前に、スパッジャーの先端を使ってクリップを跳ね上げ、固定されたリボンケーブルを取り出します。

Joystickの下に小さなガスケットが付いています。このガスケットは新しいJoystickを装着する前に、再装着させてください。

クリエイティブコモンズのオープンソース著作権のもと、あなたの投稿は著作権の対象となります