手順 1を翻訳中
手順1


-
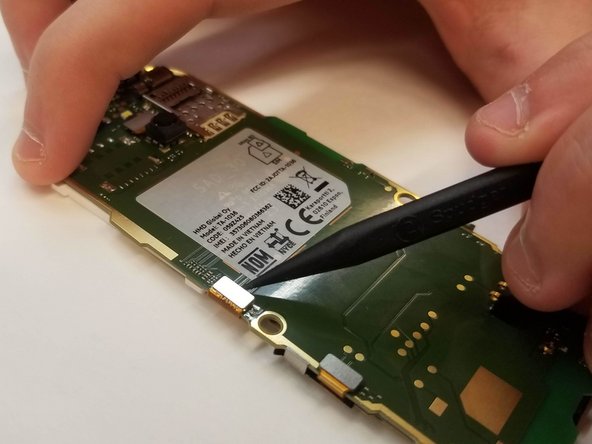
With the motherboard removed, the only thing holding the screen into place is the snap plug on the back of the motherboard.
-
Using a spudger, leverage the top snap up to disconnect it (photo shows motherboard rotated 90 degrees counterclockwise).
クリエイティブコモンズのオープンソース著作権のもと、あなたの投稿は著作権の対象となります。