メインコンテンツにスキップ

Xiaomi Mi 9 Front Camera Replacement

必要な工具と部品

  1. Xiaomi Mi 9 Front Camera Replacement, Rear Glass: 手順 1、 1の画像 1
    • Before you begin, switch off your phone.

    • Apply a heated iOpener to the rear glass to loosen the adhesive beneath the edges. Apply the iOpener for at least two minutes.

  2. Xiaomi Mi 9 Front Camera Replacement: 手順 2、 3の画像 1 Xiaomi Mi 9 Front Camera Replacement: 手順 2、 3の画像 2 Xiaomi Mi 9 Front Camera Replacement: 手順 2、 3の画像 3
    • Secure a suction handle to the lower edge of the rear glass, as close to the edge as possible.

    • If the phone's rear glass is cracked, the suction handle may not stick. Try lifting it with strong tape, or superglue the suction handle in place and allow it to cure so you can proceed.

    • Lift the rear glass with the suction handle to create a gap between the glass and the frame.

    • Insert an opening pick into the gap.

    • If you have trouble, apply more heat to further soften the adhesive. Follow the iOpener instructions to avoid overheating.

    • Slide the opening pick to the bottom right corner of the phone.

  3. Xiaomi Mi 9 Front Camera Replacement: 手順 3、 2の画像 1 Xiaomi Mi 9 Front Camera Replacement: 手順 3、 2の画像 2
    • Insert a second opening pick and slide it to the bottom left corner to cut the adhesive.

    • Leave the opening picks in place to prevent the adhesive from resealing.

  4. Xiaomi Mi 9 Front Camera Replacement: 手順 4、 3の画像 1 Xiaomi Mi 9 Front Camera Replacement: 手順 4、 3の画像 2 Xiaomi Mi 9 Front Camera Replacement: 手順 4、 3の画像 3
    • Insert a third opening pick at the bottom left corner.

    • Start to slide the opening pick from the bottom left corner along the side of the Xiaomi Mi 9 to cut the adhesive.

    • Be aware of the rear cameras and only insert the tip of the opening pick. As the adhesive cools down it gets harder to cut. If necessary use your iOpener to reheat it.

    • Leave the opening pick in the top left corner to prevent the adhesive from resealing.

  5. Xiaomi Mi 9 Front Camera Replacement: 手順 5、 2の画像 1 Xiaomi Mi 9 Front Camera Replacement: 手順 5、 2の画像 2
    • Insert a fourth opening pick under the top left corner of the rear glass.

    • Slide the opening pick along the top to cut the adhesive.

    • Leave the opening pick in the top right corner to prevent the adhesive from resealing.

  6. Xiaomi Mi 9 Front Camera Replacement: 手順 6、 2の画像 1 Xiaomi Mi 9 Front Camera Replacement: 手順 6、 2の画像 2
    • Insert a fifth opening pick at the top right corner of the phone.

    • Slide the opening pick along the right edge to cut the remaining adhesive.

  7. Xiaomi Mi 9 Front Camera Replacement: 手順 7、 2の画像 1 Xiaomi Mi 9 Front Camera Replacement: 手順 7、 2の画像 2
    • Carefully lift the rear glass and remove it.

    • Before installing new adhesive and reassembly, remove any remaining adhesive from the phone, and clean the glued areas with isopropyl alcohol and a lint-free cloth.

  8. Xiaomi Mi 9 Front Camera Replacement, Motherboard Cover with Charging Coil: 手順 8、 1の画像 1
    • Remove the ten Phillips #00 screws (3 mm length) that secure the motherboard cover.

    • There might be tamper proof sticker on some of the screws.

  9. Xiaomi Mi 9 Front Camera Replacement: 手順 9、 2の画像 1 Xiaomi Mi 9 Front Camera Replacement: 手順 9、 2の画像 2
    • Insert an opening pick at the top right corner of the motherboard cover.

    • Twist the opening pick sideways to pry up and slightly lift the motherboard cover.

  10. Xiaomi Mi 9 Front Camera Replacement: 手順 10、 2の画像 1 Xiaomi Mi 9 Front Camera Replacement: 手順 10、 2の画像 2
    • Carefully remove the motherboard cover including the charging coil / NFC antenna.

  11. Xiaomi Mi 9 Front Camera Replacement, Battery Disconnect: 手順 11、 2の画像 1 Xiaomi Mi 9 Front Camera Replacement, Battery Disconnect: 手順 11、 2の画像 2
    • Use a spudger to pry up and disconnect the battery flex cable.

  12. Xiaomi Mi 9 Front Camera Replacement, Front Facing Camera: 手順 12、 2の画像 1 Xiaomi Mi 9 Front Camera Replacement, Front Facing Camera: 手順 12、 2の画像 2
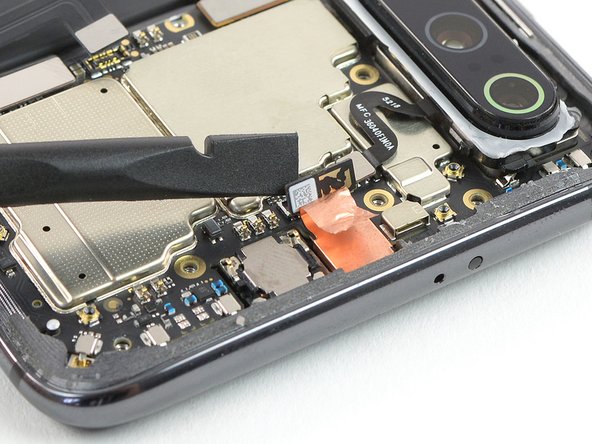
    • Use a pair of tweezers to pell the copper tape off the motherboard and fold it out of the way.

  13. Xiaomi Mi 9 Front Camera Replacement: 手順 13、 2の画像 1 Xiaomi Mi 9 Front Camera Replacement: 手順 13、 2の画像 2
    • Use the flat end of a spudger to pry up and disconnect the flex cable of the front camera.

  14. Xiaomi Mi 9 Front Camera Replacement: 手順 14、 2の画像 1 Xiaomi Mi 9 Front Camera Replacement: 手順 14、 2の画像 2
    • Use a pair of tweezers to lift the front camera out of its recess and remove it.

終わりに

If possible, turn on your phone and test your repair before installing new adhesive and resealing the phone.

To reassemble your device, follow these instructions in reverse order.

Take your e-waste to an R2 or e-Stewards certified recycler.

Repair didn’t go as planned? Check out our Answers community for troubleshooting help.

ある他の人がこのガイドを完成しました。

作成者

1人の作成者と共同作成されました。

Dominik Schnabelrauch

メンバー登録日: 11/23/16

203,299 ポイント

682のガイドは作成済み

チーム

iFixit iFixit人のメンバー

Staff

135 メンバー

16,817のガイドは作成済み

4 件のコメント

Can you suggest a replacement Front camera where I can purchase?

Manoj kumar - 返信

Muchísimas gracias por la guía. Pude Limpiar la cámara frontal sin ningún problema.

Naomi Díaz - 返信

Hello,

is there also a possibility to exchange a display on a Mi9?

Best Regards

Frank

Frank Michel - 返信

Hi Frank,

this AMOLED & Digitizer guide might be the one you’re looking for.

Dominik Schnabelrauch -

コメントを追加

統計データ:

過去 24時間: 2

過去 7 日: 14

過去 30 日: 46

今までの合計 2,859