この翻訳は機械によって生成されたものであり、まだ人間による校正は行われていません。 日本語を話せますか? レビューはこちらから。

Xbox One ワイヤレスコントローラー モデル 1708 ジョイスティックキャップの交換

Dylan Gross とその他 5 人の作成者
最終更新日: 2026年7月29日
閲覧: 7.5万
統計データ:
- 過去24時間:
- 20
- 過去7日:
- 170
- 過去30日:
- 770
- 今までの合計
- 74,630
コメント: 26
手順に関する17件のコメント, 9 guide comments.
修理ガイドのコメントへ完了済み: 154 155
154人のユーザーがこのガイドを「完了」させました。あなたも加わりませんか?
あなたを含む、155人のユーザーがこのガイドを使って修理を「完了」させました。素晴らしいです!
お気に入り: 16 17
16人のユーザーがこのガイドをお気に入りに登録しています。あなたもリストに入れませんか?
あなたを含む、17人のユーザーがこのガイドをお気に入りに登録しています。
おすすめの学生による修理ガイド
このガイドは当社の素晴らしい学生たちによって作成中であり、iFixitスタッフによってとりわけ素晴らしいガイドであると注目されています。
はじめに
手順 1 に進む ↓Xbox コントローラーのジョイスティックキャップは、反応しなくなったり、ベタついたりすることがあります。その場合は、ジョイスティックキャップを取り外して交換または清掃する必要があるかもしれません。この修理ガイドでは、Xbox One ワイヤレスコントローラー モデル 1708 のジョイスティックにアクセスして交換する方法を説明します。
必要な工具と部品
パーツ

ツール


-
-
-
バッテリーカバーをコントローラーの上部へスライドさせて取り外します。
-
バッテリー筐体から、バッテリーまたはバッテリーパックを持ち上げて取り出します。
 FixBotに聞いてみる
-
-
-
コントローラー上部の継ぎ目にオープニングツールを差し込み、底部に向けてゆっくりと動かします。
-
オープニングツールを使って、コントローラーのサイドプレートをゆっくりとこじ開けて外します。
-
もう片方のサイドプレートでも同じ手順を繰り返します。
-
-
-
バッテリーラベルをゆっくり剥がすか、バッテリー筐体内のステッカーの中央に穴を開け、隠れているネジを露出させます。
-
コントローラーの背面から9mmのトルクスセキュリティネジ5本を取り外します。
-
-
-
-


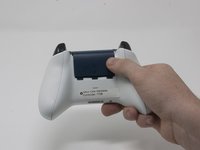


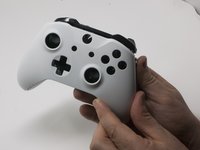
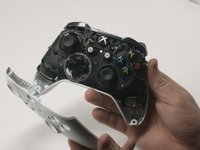


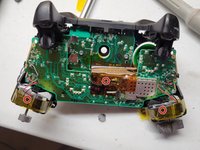
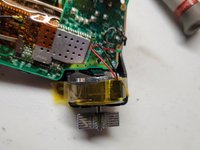
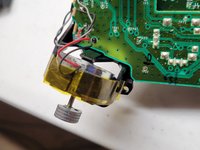

デバイスを再組み立てするには、これらのインストラクションを逆の順番に従って作業を進めてください。
154 の人々がこのガイドを完成させました。

チーム

Cal Poly, Team S18-G3, Forte Fall 2017 Cal Poly, Team S18-G3, Forte Fall 2017人のメンバー
CPSU-FORTE-F17S18G3
4 メンバー
84のガイドは作成済み
9件のガイドコメント
How about the square thing with the stick and hinges that the joystick is attached to? I think it’s called the Module. I have a joystick drift / drifting problem and that may help me out. Thanks.
Agreed. That’s actually the part I need to replace too. The module.
followed this guide to take the controller apart because I had a joystick that was sticking, my solution was to put some 3in1 oil on the module that was sticking and it seems to be working a lot better now.
John Jaggi - 返信 共有
@corytc and @tomchak I did replace the module, in general, you buy (Amazon or eBay) you will receive a module of 6 modules you need a multimeter and test each module interface, measure both resistances and subtract them, the one nearest zero is the module you will use since is the one with least drift from the factory.
Just disassemble it, turn upside down uses a solder remover and unsolder the old one, place the new one solder back, boom you are done.
Like you will need an iron solder with medium and thin tips, I used lead-free solder, so is a patience test, be careful with the wires from the rumbles, try not to unsolder them since is a thin wire and is difficult, like I have big hands so took me a while to solder back.
Just want to say the hardest part is carefully prying off the plastic covers on the handles. It’s also not necessary to remove the back cover for simply replacing the joysticks. Other than that, it’s very easy. I would guess this is rated at moderate difficulty simply due to the plastic covers.
