はじめに
このガイドはボタンの外し方を扱っています。
必要な工具と部品
-
-
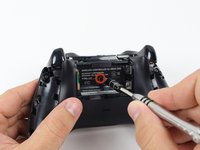
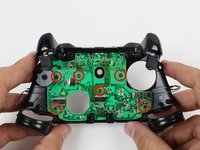
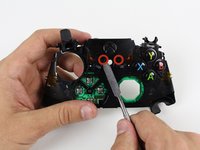
サイドハンドルを外すため、コントローラーをしっかりと握ります。スパッジャーをフロントとハンドルプレートの間にできた隙間に差し込みます。
-
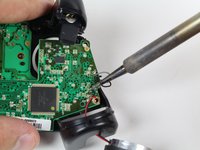
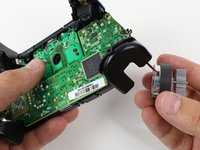
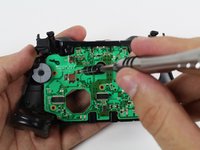
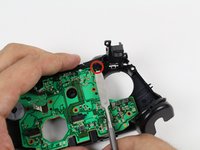
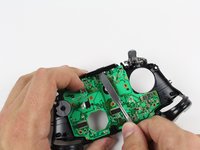
スパッジャーを前後に動かしながら、フロントプレートからサイドプレートを外します。サイドプレートの隙間全体にスパッジャーを動かして作業を進めてください。
-
-


デバイスを再度組み立てるには、次の説明書の逆の順番で組み立ててください。
デバイスを再度組み立てるには、次の説明書の逆の順番で組み立ててください。
106 の人々がこのガイドを完成させました。
以下の翻訳者の皆さんにお礼を申し上げます:
100%

これらの翻訳者の方々は世界を修理する私たちのサポートをしてくれています。 あなたも貢献してみませんか?
翻訳を始める ›
チーム

Cal Poly, Team 20-15, Maness Winter 2015 Cal Poly, Team 20-15, Maness Winter 2015人のメンバー
CPSU-MANESS-W15S20G15
5 メンバー
54のガイドは作成済み
32 件のコメント
do you have a URL for the repair parts (rubber pads) ect. for the wireless controllers
kendixon69 - 返信
For all of my Xbox One controllers, I needed the tamper-resistant Torx bits. They're the ones with the hole in the center, like these: http://www.amazon.com/Pro-Grade-13pc-Tam.... Any tamper-resistant or Torx security bit set should do as long as it has the sizes listed in the Tools section of this FixIt article.
Just an FYI you can use a flat screwdriver against the post and side and it will either work or break the post which is what happened to me and allowed me to use a normal torx screwdriver.
sid f -